Latest Posts

The $20 Dollar Dinner Party: Pork Ragú with Creamy Polenta

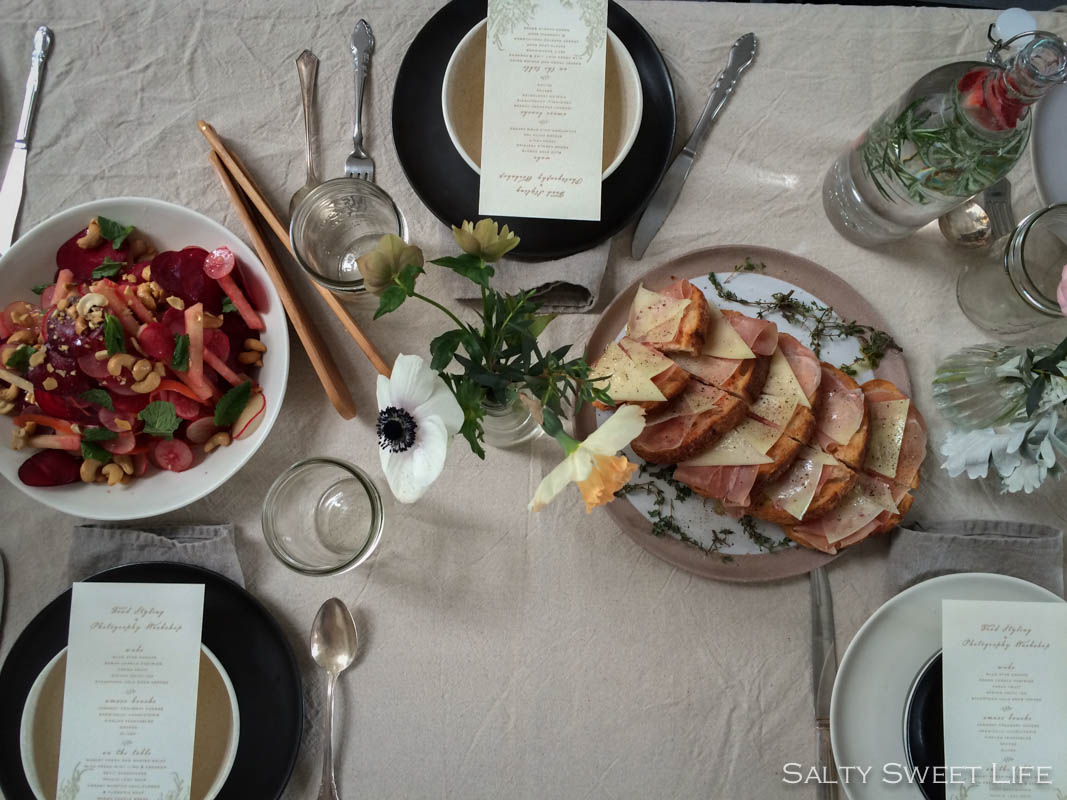
Having friends join us for dinner in our home is one of the most fun and positive things we can do with our weekend. Sure, we could go out to dinner, there are more than enough amazing restaurants in Las Vegas to try, but there’s just something special about sharing a meal at home. Personally, I love having dinner parties. If I could, I would have a dinner party every single weekend!

The $20 Dollar Dinner Party: Pork Ragú with Creamy Polenta - Salty Sweet Life

This particular weekend, I had a dilemma. I had a nearly empty checking account and four people coming over for dinner. The solution to my dilemma was a recipe for Pork Ragú with Polenta from the March issue of Bon Appetít Magazine. When Bon Appetít arrives in my mailbox, I get as excited as a kid with a Christmas catalog–eagerly dashing away with it and dreaming of all the scrumptious recipes I can make. When I saw this recipe, it lived in the back of my mind for several weeks, just waiting for the perfect opportunity to make it.

The $20 Dollar Dinner Party: Pork Ragú with Creamy Polenta - Salty Sweet Life

Living in the West, I learned to cook pork shoulder using Mexican flavors, braising it in orange juice, chili powder, Mexican oregano, tomatillos. Until seeing the Bon Appetít recipe, I had not thought to use it as the base of a tomato sauce, so I was instantly intrigued. What really sealed the deal for me, was that the pork ragú was nestled in a bowl of creamy polenta. I love anything with polenta. Adding fresh herbs, butter and parmesan cheese just makes it utterly cravable.

This recipe was a perfect choice for our little impromptu dinner party for several reasons. Pork shoulder is incredibly economical. Earlier in the week, I had discovered that a pork shoulder blade steak that fed the two of us for two meals could be purchased for $2.50. A six pound pork shoulder roast was around $11.00 and could be portioned to make more than one meal. It’s a large cut of meat and makes plenty of food (which means no one leaves hungry). Polenta is equally inexpensive, around $3.00 for a 24 ounce bag (you can also find it in the bulk section of some supermarkets). Canned whole tomatoes are a pantry staple, but even a splurge for San Marzano tomatoes is less than $4.00. The fresh herbs were free and sourced from my herb garden.

The $20 Dollar Dinner Party: Pork Ragú with Creamy Polenta - Salty Sweet Life

Another reason that it’s a perfect dinner party choice was the cooking method. An inexpensive cut of meat, like the pork shoulder roast is best cooked low and slow in a heavy pot, like a lidded enameled cast iron pot.  Pork shoulder (also called a Boston Butt) is a fattier cut of pork with a lot of connective tissue, so the meat needs an extended amount of time for the fat to render and the connective tissue to gelatinize. A long, slow braise in the oven is the perfect method for making the best, most tender pork shoulder. It isn’t a dish that you can make in a hurry, but once the initial process of chopping vegetables and browning meat is done, there is a large amount of unattended cooking time. This is especially advantageous when cooking for a group, because the day of the dinner is always a busy one with tidying up the house, setting the table, and any other errand that may pop up (and they inevitably do).

porkragu-4The $20 Dollar Dinner Party: Pork Ragú with Creamy Polenta - Salty Sweet Life

I made the recipe as written, but instead of simmering the sauce on the stovetop, I braised it in a 300 degree oven for about 3 1/2 hours. When it emerged from the oven, the meat was tender and falling apart and the sauce was thick and rich.  I tasted the sauce and felt that it needed a little sweetness to balance the acidity of the tomatoes. I tested a few different things, a pinch of sugar, a squeeze of orange juice, until I settled on a drizzle of good balsamic vinegar. It added just the right touch of sweetness and tang that I felt the sauce was lacking.

The $20 Dollar Dinner Party: Pork Ragú with Creamy Polenta - Salty Sweet Life

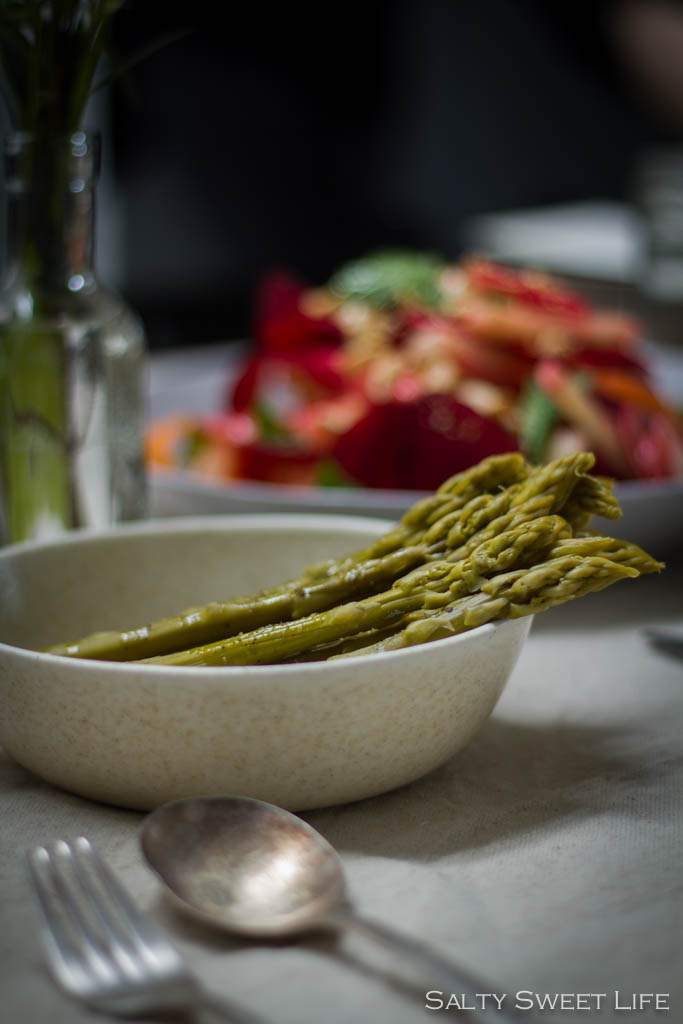
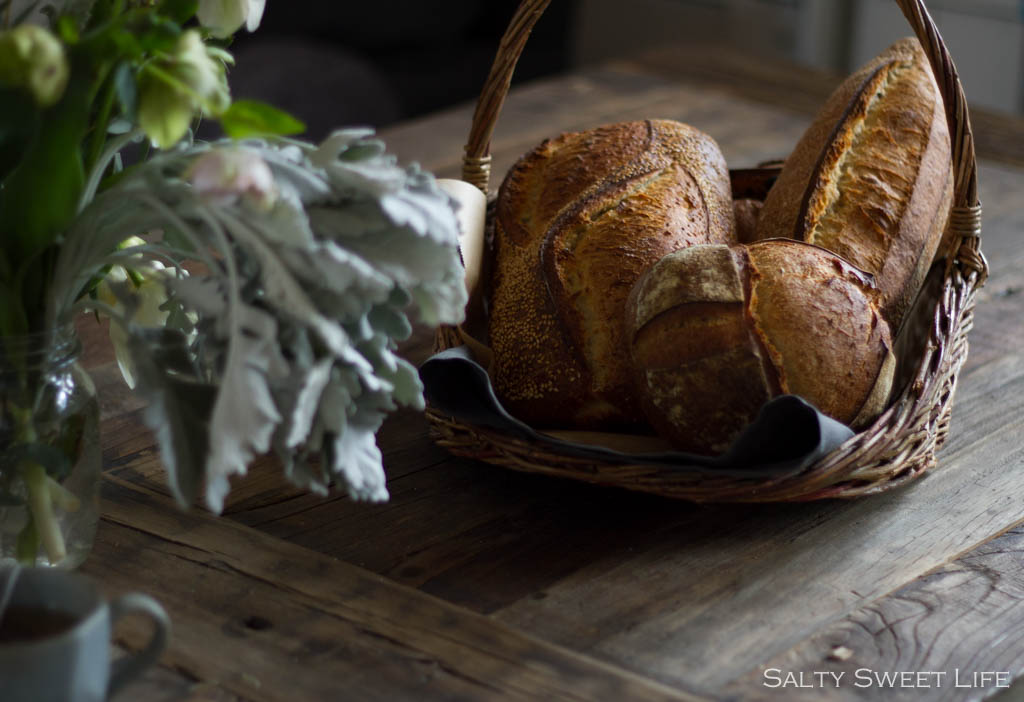
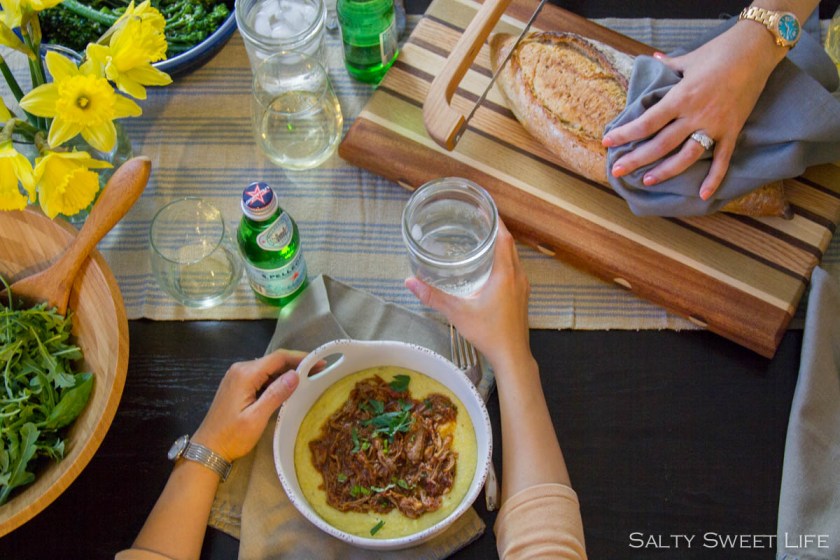
My friends brought a vegetable side dish and a couple of bottles of wine and we were set. With all of the ingredients, plus flowers (daffodils were $3 for two bunches!), and a crusty loaf of bread, I was out of pocket about $20 (taking into consideration that a portion of the meat would be used for another meal. Everyone really loved the meal and there was plenty of leftover ragú which we enjoyed later in the week over pasta and even in an omelette! Most importantly, we spent a great evening with our close friends, drinking wine and unwinding from a long, stressful week.

The $20 Dollar Dinner Party: Pork Ragú with Creamy Polenta - Salty Sweet Life

Amazing, garlicky broccolini was a perfect side dish.

The $20 Dollar Dinner Party: Pork Ragú with Creamy Polenta - Salty Sweet LifeThe $20 Dollar Dinner Party: Pork Ragú with Creamy Polenta - Salty Sweet Life

The $20 Dollar Dinner Party: Pork Ragú with Creamy Polenta - Salty Sweet Life

Pork Shoulder Ragú with Polenta

  • Servings: 6
  • Difficulty: moderately fussy
  • Print

Source: Very lightly adapted from Bon Appetit Magazine

I love making braises. It’s one of my favorite cooking methods and one that I use often. Braised dishes are commonly saved for the winter months, when it’s nice to have the oven on and when your stomach is craving comfort foods, but I think it’s a shame to forego braises just because winter is over. I enjoy these types of comfort food throughout the year, but once it gets really warm, I just switch to braising in an electric slow cooker–no need to have the oven on!

  • 3 pound pork shoulder roast, deboned, skin and excess exterior fat removed
  • Kosher salt and freshly ground black pepper
  • 2 tablespoons vegetable oil
  • 1 large onion, finely chopped
  • 6 cloves garlic, minced
  • 2 tablespoons tomato paste
  • 1/2 cup red wine
  • 1  28 ounce can of peeled tomatoes (I used San Marzano whole peeled tomatoes)
  • 4 sprigs thyme
  • 2 sprigs rosemary
  • 2 bay leaves
  • Balsamic vinegar, to taste

For the Polenta:

  • 1 1/2 cups coarse polenta (not quick-cooking)
  • 6 cups water
  • 2 teaspoons chicken base or bouillon (optional)
  • 1/4 cup unsalted butter
  • 1/2 cup grated parmiggiano reggiano chese
  • Fresh ground black pepper
  • Salt
  • 1 teaspoon chopped fresh thyme
  • Chopped fresh parsley and basil for garnish
  1. Cut the pork into three pieces (remove the bone if using a bone-in roast. Season with salt and pepper and allow the meat to come to room temperature, about 30 minutes.
  2. Heat the 2 tablespoons of oil in a heavy bottomed pot over medium heat. Place the pork in the pan and cook, turning to brown the meat on all sides. When the meat is nice and browned, remove the meat from the pan and place on a platter, pouring off any pan juices that have accumulated.
  3. Wipe out any burned bits from the pan and add the onion and garlic. Cook over medium heat until the onion browns, about 12-15 minutes. Add the tomato paste and cook for another 5 to 8 minutes, until it becomes a deep maroon color.
  4. Add the wine, scraping up any browned bits in the pan and cook until reduced by half, 5 to 8 minutes. Add the tomatoes, crushing them by hand as you add them. Add the herbs (thyme, rosemary, bay leaves) along with two cups of water.
  5. Add the pork back into the pan along with any juices that may have collected on the platter.
  6. Press a piece of parchment paper over the top of pot, then cover the pot with its lid. Place the pot into a 300 degree oven and cook for 3 to 3 1/2 hours, until the meat is tender and falls apart easily with a fork.
  7. Remove the pot from the oven, and shred the pork with two fork, removing any fatty bits. Remove the herb stems and bay leaves from the pot. Season with salt, pepper and a drizzle of balsamic vinegar if desired.

For the polenta:

  1. Bring 6 cups of salted water to a boil. I added two teaspoons of chicken base to add extra flavor but this is completely optional and not in the original recipe.
  2. Slowly whisk in the polenta, continually whisking to prevent lumps. Reduce the heat to medium-low. Add the chopped thyme and cook until the polenta is thick and creamy, about 20-25 minutes.
  3. Add the butter and the cheese and whisk until incorporated. Season with salt and pepper.
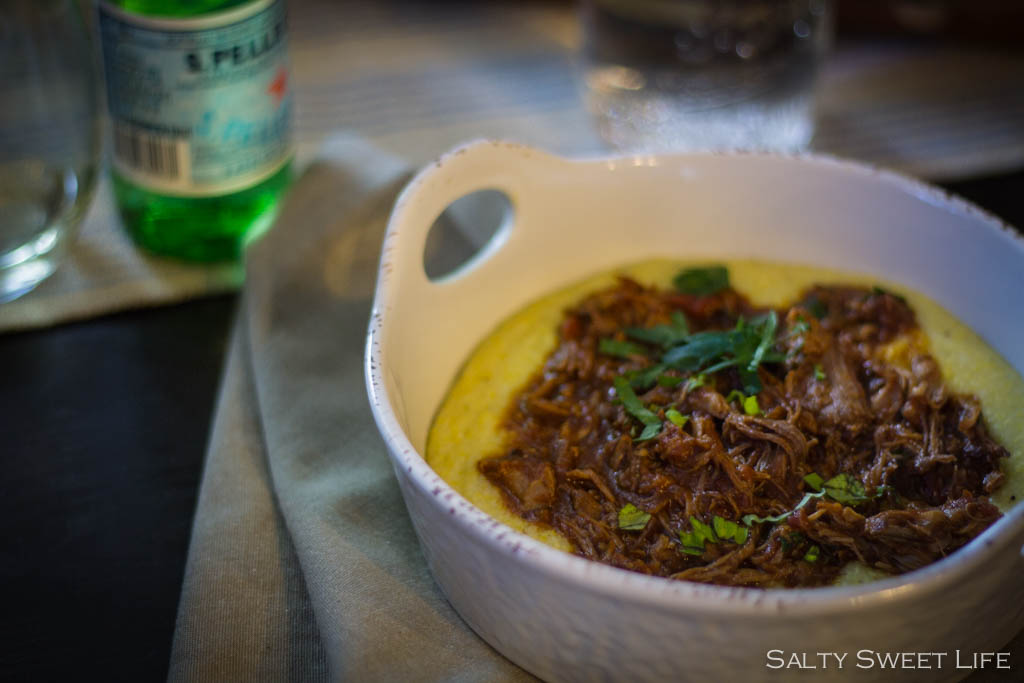
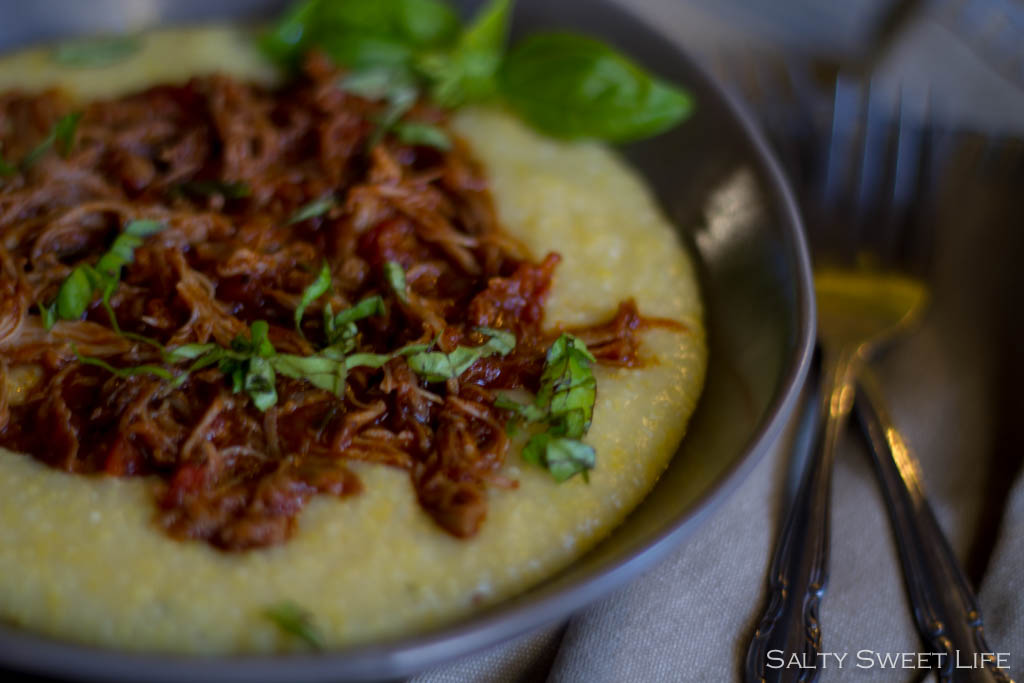
  4. Spoon the polenta into bowls and top with the pork ragú. Garnish with basil and parsley and grated Parmiggiano Reggiano.

porkragu-3

The Apollo Cocktail with St. George Terroir Gin

It’s really, really great when you have thoughtful friends who know you well enough to buy you gifts of gin. Those are the kinds of friends that you hold onto for dear life because a friend who knows your favorite spirit is a special friend, indeed.

The Apollo - A Gin Cocktail made with St. George Terroir Gin - Salty Sweet Life

My dear friend Lori Rice of Fake Food Free is just that kind of thoughtful friend! A few weeks ago, I was surprised and thrilled to receive a package in the mail from her containing an entire set of St. George Spirits Gin as a wedding gift! The set came with their 3 signature gin varieties: Terroir, Botanivore and Dry Rye. St. George Craft Distillers hails from Alameda, California, which just happens to be Lori’s stomping grounds.

The Apollo - A Gin Cocktail made with St. George Terroir Gin - Salty Sweet Life

It’s no secret that Gin is my favorite spirit. I love it because the flavors in gin so easily combine with fresh herbs and I love cocktails that taste like they’re fresh from the garden. Since I was unfamiliar with this particular brand of gin, I was very excited to hold a little tasting for myself in order to get to know these gins in their purest form–just a little sip in a glass, without ice. I found Terroir particularly fascinating, yet somewhat challenging. Terroir is distilled from local botanicals: Douglas Fir, Bay Laurel, sage. This gin was very piney on my tongue and at the onset I wasn’t sure what flavors I wanted to pair with it, so I gravitated toward the Botanivore, which is sweeter and more familiar.

The Apollo - A Gin Cocktail made with St. George Terroir Gin - Salty Sweet Life

It wasn’t until the Husband decided to make the Apollo Cocktail from Mr. Boston Official Cocktail Guide, that I discovered exactly how to showcase the earthy and evergreen notes of the Terroir.

It makes perfect sense that a sage based cocktail would complement and amplify the sage, juniper and fir notes in the Terroir. I was actually quite stunned at how amazing it was and immediately wanted to share it with you!

The Apollo - A Gin Cocktail made with St. George Terroir Gin - Salty Sweet Life

I have made this drink with Hendrick’s Gin, which is sweeter than Terroir and more similar to Botanivore. It is delicious with both varieties, but the earthy complexity of Terroir combined with the flavors of ginger and sage won me over, hands down. I haven’t had a chance to experiment with the Dry Rye yet, so if you have any suggestions for me, please leave them in the comments! I hope you all have a great weekend!

The Apollo

  • Servings: 1
  • Difficulty: easy
  • Print

This cocktail contains raw egg whites, which gives it a creamy, frothy cap, but do not fear–the alcohol and citrus in the cocktail will neutralize the risk of salmonella. A word of warning, though–be sure to use a Boston Shaker for this drink. We made it in a Cobbler style shaker the first time and it exploded all over the kitchen (the foamy egg whites causes pressure to build and the top blew right off). That was 3 ounces of this amazing gin literally down the drain…and on the curtains…and all over the floor. 

Source: Mr. Boston Official Cocktail Guide, cocktail created by Moses Laboy

  • 1″ piece of peeled fresh ginger root, sliced
  • 7 fresh sage leaves
  • 1-1/2 oz St. George Terroir Gin
  • 1 egg white (tip: separate the egg in a small bowl, then pour the egg white into the cocktail shaker)
  • 3/4 oz simple syrup
  • 1/2 oz fresh lemon juice
  • Garnish: 1 dash of angostura bitters (6 drops), fresh sage leaf
  1. In the glass portion of a Boston Shaker, muddle the sage leaves and the ginger root until well pulverized. Add the gin, lemon juice, simple syrup and egg white and add ice to the level above the liquid.
  2. Shake as vigorously as possible for 30 seconds or until the liquid is frothy and foamy.
  3. Immediately strain into a chilled cocktail glass. Add six drops of Angostura bitters in a circular shape in the foamy cap of the cocktail. With a straw, connect the dots, forming a circle. Garnish with a fresh sage leaf.
The Apollo - A Gin Cocktail made with St. George Terroir Gin - Salty Sweet Life

Cheers!

A Food Photography Workshop and Savory Baked Oatmeal w/ Caramelized Onion and Goat Cheese

Two weekends ago, I was once again in my happy place, Portland, Oregon. I found the perfect excuse to go: a food photography and styling workshop taught by two Portland-based blogger/photographers, Eva Kosmas-Flores of Adventures in Cooking and Christiann Koepke of Portland Fresh. I virtually met both of these ladies through their Instagram accounts (@evakosmasflores and @portlandfresh), instantly falling in love with their beautifully moody photographs. So much so, that when they announced the Portland photography workshop in February, I signed up immediately without giving it a second thought.

No joke, this is where I caught the bus. Too gorgeous for words!

No joke, this is where I caught the bus. Too gorgeous for words!

The morning of the workshop I caught the number 17 bus from our Airbnb to Tillamook Station, an event space nestled in a pre-war building in the heart of the Albina Industrial District. I was so nervous that I missed my stop and had to backtrack a couple of blocks. I breathed a sigh of relief as I rounded the corner and saw the bright yellow door of the building and other similarly nervous people laden with camera bags heading in the same direction.

I tried to drink in everything as I stepped through the doors: the high ceilings above white brick walls, the amazingly soft, natural light, the doughnuts and pastries and cold-brew coffee, fresh fruit, tea. Pretty place settings were arranged on a long communal table. They thought of everything. What’s really special, though, was that Eva and Christiann were exactly the way they come across online–welcoming, warm, consummate hostesses, and so generous with their time and knowledge.

A Food Photography Workshop and Savory Baked Oatmeal w/ Caramelized Onion and Goat Cheese

Taken with my iPhone

A Food Photography Workshop and Savory Baked Oatmeal w/ Caramelized Onion and Goat Cheese

Donuts provided by Blue Star Donuts – @bluestardonuts

A Food Photography Workshop and Savory Baked Oatmeal w/ Caramelized Onion and Goat Cheese

After we settled in with our pastries, Eva began the workshop with basic camera lessons. This was especially helpful for me since I have recently begun to shoot on manual mode. I won’t go into all the nitty gritty of photography in this post, but what was most helpful to me was learning how to manually focus my camera. Until the workshop, I used the auto-focus on my camera because I have never trusted my ability to manually focus due to my very poor eyesight. How poor, you might ask? Remember poor Velma on Scooby-Doo? The way she would fumble around like a blind person when she would lose her glasses? That’s me in a nutshell. So, the lesson on how to zoom in on the focus point using the camera’s monitor, then focus, was an eye opener for me. The second biggest lesson I learned was about using a small aperture and low ISO to produce the soft, romantic shots that Eva and Christianne are famous for.

A Food Photography Workshop and Savory Baked Oatmeal w/ Caramelized Onion and Goat CheeseAnother thing I learned was how beautiful it can be to include a human element in food photography.

A Food Photography Workshop and Savory Baked Oatmeal w/ Caramelized Onion and Goat Cheese

Christiann Koepke of Portland Fresh

After the camera lesson, we began shooting the cheese and charcuterie, olives, breads and pastries. We were free to utilize the prop collection: antique teapots, well-worn pots, linens, carved wooden spoons and serving boards. There were so many beautiful items to choose from and wonderful textures to shoot. I really loved the linens which were provided in part by The Modern Proper and from Eva’s personal collection. I think my favorite piece of linen was the tangled piece of burlap that had been washed and (accidentally) dried in the dryer, forming a fluid, free-form swath of fabric that could be placed in the scene for an added layer of texture. I have always had the most difficult time choosing linens for my photos, but having a neutral palette to work with made so much sense to me. I have bought so many props and linens over the years that I haven’t used simply because they are too busy or too bright. Neutral colors allow the food to be the star.

A Food Photography Workshop and Savory Baked Oatmeal w/ Caramelized Onion and Goat CheeseA Food Photography Workshop and Savory Baked Oatmeal w/ Caramelized Onion and Goat CheeseA Food Photography Workshop and Savory Baked Oatmeal w/ Caramelized Onion and Goat Cheese

Our lunch was elegantly styled and we had ample opportunity to shoot photos prior to sitting down to eat.

A Food Photography Workshop and Savory Baked Oatmeal w/ Caramelized Onion and Goat Cheese

A Food Photography Workshop and Savory Baked Oatmeal w/ Caramelized Onion and Goat Cheese

A Food Photography Workshop and Savory Baked Oatmeal w/ Caramelized Onion and Goat Cheese

This Raw Shaved Salad with Mint, Walnut Oil, Lime and Cashews appears on Christianne’s blog and it was a riot of color and texture. Also a lovely touch were the bottles of water filled with a sprig of rosemary and a few sliced strawberries.

A Food Photography Workshop and Savory Baked Oatmeal w/ Caramelized Onion and Goat Cheese

A Food Photography Workshop and Savory Baked Oatmeal w/ Caramelized Onion and Goat Cheese


A Food Photography Workshop and Savory Baked Oatmeal w/ Caramelized Onion and Goat CheeseA Food Photography Workshop and Savory Baked Oatmeal w/ Caramelized Onion and Goat Cheese

Learning to photograph food beautifully is only a small part of attending a workshop. One of the greatest elements about attending food photography workshops is building community with creative people who love and obsess over food. The idea for this recipe came from a conversation over lunch. Eva mentioned a savory oatmeal that she had served at a previous food photography workshop and I was completely taken with the idea and couldn’t wait to get home to begin developing the recipe. Oatmeal? with caramelized onions and goat cheese? Why had I never thought of that before? I absolutely loved this sweet baked oatmeal from Alexandra’s Kitchen, so the concept for baked oatmeal was not a new one; however, the idea that oatmeal could have a savory side was.

Savory Baked Oatmeal with Goat Cheese and Caramelized Onion - Salty Sweet Life

Using the custard base from Alexandra’s recipe as a starting point, I added sweet, caramelized onions, goat cheese, asparagus, crisp beet greens from the garden and cooked italian sausage.

As it baked, it filled the kitchen with the aroma of fresh sage and thyme. When it emerged, bubbling from the oven, it was no beauty queen (baked oatmeals never are) but it had the rugged handsomeness of a meal that was going to be satisfying in a way that a regular bowl of oatmeal could never quite manage. It was love at first sight.

Savory Baked Oatmeal with Goat Cheese and Caramelized Onion - Salty Sweet Life

Savory Baked Oatmeal with Goat Cheese and Caramelized Onion - Salty Sweet Life

Savory Baked Oatmeal with Caramelized Onions and Goat Cheese

  • Servings: 6
  • Difficulty: moderately fussy
  • Print

I loved this baked oatmeal topped with a sunny-side-up egg. Think of it as a breakfast casserole–perfect for a weekend brunch. A little decadent and a little virtuous, too (whole grains)! The oatmeal is wonderful piping hot right out of the oven; however, if you have leftovers, it’s easy to reheat in a microwave oven. Just add a tablespoon of water prior to reheating. 

  • 2 cups whole milk
  • 1 large egg
  • 3/4 cup uncooked steel cut oats (not the quick cooking type)
  • 1 teaspoon baking powder
  • 3/4 teaspoon salt
  • 1/4 teaspoon freshly ground black pepper
  • 1/4 teaspoon garlic powder
  • 2 tablespoons unsalted butter, melted
  • 1 large red onion, thinly sliced
  • 2 sprigs thyme, finely shopped
  • 3 sage leaves, finely chopped
  • 6 stalks of asparagus cut into 1 inch pieces
  • handful of fresh tender greens, such as beet greens or spinach
  • cooked italian sausage, sliced (optional)
  • 1/4 cup crumbled goat cheese
  • olive oil
  1. Heat the oven to 375 degrees. Saute the onion in 1-2 tablespoons of olive oil over medium heat. Cook, stirring occasionally until the onion has caramelized, about 40 minutes. The onion should be dark in color (not burnt) and very sweet. Remove from the heat and allow to cool.
  2. In a medium bowl, whisk together the milk, egg, butter, thyme, sage, salt, pepper and garlic powder. In another bowl, combine the oatmeal with the baking powder.  Pour the wet ingredients over the dry ingredients and stir to combine.
  3. In a 2 to 3 quart baking dish, add the asparagus, the chopped raw greens, half of the caramelized onions and half of the italian sausage (if using). Sprinkle with half of the goat cheese. Pour the oatmeal mixture into the baking dish. Gently press the mixture with the back of a wooden spoon to submerge the ingredients in the liquid. Top with the remainder of the onions, goat cheese and sausage. Cover and bake for 50-55 minutes.

 Savory Baked Oatmeal with Goat Cheese and Caramelized Onion - Salty Sweet LifeSavory Baked Oatmeal with Goat Cheese and Caramelized Onion - Salty Sweet Life


Savory Baked Oatmeal with Goat Cheese and Caramelized Onion - Salty Sweet Life Savory Baked Oatmeal with Goat Cheese and Caramelized Onion - Salty Sweet Life


Savory Baked Oatmeal

“W & P” Mint Julep from “Shake”

It’s been a really long time since I shared a cocktail recipe with you and it seems like Tax Day is a good time to have a nice libation to either celebrate your refund or soothe your nerves if you had to pay!

W & P Mint Julep from

This Mint Julep is another favorite from the book “Shake: A New Perspective on Cocktails” by Eric Prumm and Josh Williams and they call it the W&P Mint Julep. It took me a few minutes to figure out that W and P were the author’s initials…I’m a little slow. It’s a simple, straight-forward mint julep–nothing fancy, just good Bourbon, fresh mint, a bit of lemon juice and sugar cubes for sweetness and lots and lots of crushed ice. Absolutely refreshing.

WP_Products_Shake_1_1024x1024

W & P Mint Julep from

The inspiration for this cocktail came from the abundance of mint and lemon balm we have growing in our garden. It was so healthy and gorgeous and every time I passed by it I thought “I need to make something with this mint as soon as possible”. Well, I’m glad I did because last night we had another one of our Las Vegas windstorms and our beautiful mint is now chapped and windburned. I’m heartbroken. Hopefully it will recover in time for more spring cocktails.

I hope you made it through Tax Day unscathed–cheers!

W&P Mint Julep from Shake

  • Servings: 2
  • Difficulty: easy
  • Print

Adapted slightly from “Shake” by Eric Prumm and Josh Williams

  • 6 ounces of your favorite Bourbon
  • 3/4 ounce freshly squeezed lemon juice
  • few handfuls of fresh mint, plus additional for garnish (I added some fresh lemon balm as well, because I love the lemony flavor)
  • 4 sugar cubes
  • Lot of crushed ice
  1. In a cocktail shaker, muddle the mint, sugar cubes and lemon juice until the mint is well-pulverized and the sugar is dissolved.
  2. Add the bourbon and enough crushed ice to cover the liquid in the shaker.
  3. Shake vigorously, then strain into mint julep tumblers filled with crushed ice. Clap a sprig of fresh mint in your hand in order to release the fragrant oils and use as a garnish.

W & P Mint Julep from
mintjulep-3

Tagliatelle with Caramelized Orange and Almonds, plus Seared Duck Breast

I’m beginning to think that there’s some literal truth to this March Madness thing. After a month of family bulls%&t, food failures, photography failures and fights with The Husband I’m really ready to throw in the towel on the month of March. And to think, the month started with so much promise!

The weather has been perfect. Absolutely beautiful. It hasn’t even been windy, which is really weird. For once, I had written out a calendar of ideas and recipes to post. And then, as if on cue by a Soothsayer, the Ides of March brought with it a firestorm of crazy. I’ve had quite enough, thank you. Last year in March it was the same thing.  Are any of you having a rough month as well or is it just me?

This recipe is probably the one good thing that came out of this lousy month.

Tagliatelle with Caramelized Orange and Almonds, plus Seared Duck Breast - Salty Sweet Life

I was driving to work one day, listening to The Splendid Table podcast, completely engrossed by Lynn Rosetto Kasper’s soothing voice as she coached violinist Joshua Bell through this recipe for Tagliatelle with Caramelized Orange and Almonds. By the way, if you are prone to March Madness, you should give The Splendid Table a listen–audial Prozac, that.

Tagliatelle with Caramelized Orange and Almonds, plus Seared Duck Breast - Salty Sweet Life

I was struck by the complete strangeness of the recipe–an Italian pasta dish that didn’t contain a single tomato and featured one odd central ingredient: sugar. She began by melting a stick of butter in a saucepan, then added sugar(!) and orange juice, reducing it until it became am amber syrup, then tossed this “sauce” with an egg pasta, blanched almonds, cinnamon, more sugar and orange zest.  I couldn’t believe that this combination of ingredients could ever taste right, but the thought of the dish kept nagging at me until I finally decided to give it a try.

The history of the dish is as fascinating as the recipe itself. As Lynn Rosetto Kasper explained, the dish hails from 17th century Italy, before the tomato was even introduced to the country from the New World. The wealthy would have used sugar, a very expensive commodity at the time, as well as butter, which signified wealth as the person who had butter would have had enough land to raise cows. Fortunately, sugar and butter and oranges are relatively inexpensive these days, and I had just enough money in my bank account to eat like a rich, Italian land-owner (update: not anymore. My car key broke and the replacement cost $268. Thank you, March).

Tagliatelle with Caramelized Orange and Almonds, plus Seared Duck Breast - Salty Sweet Life

Lynn Rosetto Kasper’s recipe simply calls for dried tagliatelle pasta, but, this particular day I was in need of some stress-relieving food therapy and I thought pasta-making would be just what the doctor ordered.

Tagliatelle with Caramelized Orange and Almonds, plus Seared Duck Breast - Salty Sweet Life

Tagliatelle is an egg pasta and I used Mario Battali’s recipe that required five whole eggs and three and a half cups of flour. I substituted 1/2 cup of Tipo 00 flour in an attempt for a more tender pasta; however, because it is March, even the pasta would not behave. Once I started to incorporate the eggs into the flour, the dough became so tough that I could barely knead it! It’s not often that I feel that I lack the necessary upper body strength to make dinner. Note to self: must get back to the gym.

Pasta is supposed to be easy. For crying out loud, it’s just flour and water, or flour and eggs or a combination of those three things.  What began as a stress-relieving exercise became a recipe for frustration as I tried and tried to get the dough to come together.  Finally, I gave up and put the dough, the extra flour and an additional egg into the Kitchenaid mixer and let it knead for a few minutes. Then I wrapped the ball of dough in plastic wrap and let it rest for about 30 minutes.

Tagliatelle with Caramelized Orange and Almonds, plus Seared Duck Breast - Salty Sweet Life

See that little breach in my well of flour at the top right? A sure sign of future difficulty.

That little rest period did help the dough to hydrate and soften and I was able to knead it and roll it out without breaking too much of a sweat (or having a melt-down).

Tagliatelle with Caramelized Orange and Almonds, plus Seared Duck Breast - Salty Sweet Life

The Husband is the designated pasta maker in the household, for no other reason than he is part Italian and it just seemed like he was a natural for the task. I usually just watch and offer general assistance and moral support. It took a few failed attempts to roll the pasta out into the nice sheet you see above, but I thought I did pretty well for my first time! I’m obviously no expert on homemade pasta, but this video is a good resource if you want to try it yourself. It sure makes that pasta attachment for the Kitchenaid look like a very good investment!

Tagliatelle with Caramelized Orange and Almonds, plus Seared Duck Breast - Salty Sweet LifeThankfully, the sauce was relatively easy and didn’t require much upper body strength, unless you count zesting and squeezing three large navel oranges. The duck breast was also a first for me. I’ve always been a little afraid to make it at home because it’s a bit of a splurge–$12 for two duck breasts.  The duck breast ended up being the easiest component of the dish. Salt, pepper and a frying pan was all it took to end up with salty, crispy skin and a juicy meaty interior. Cook it just as you would a steak, which is what I did–medium-rare.

I hope you all have a wonderful week and a great Easter holiday! I’m happy to bid adieu to March. April, I greet you with open arms.

Tagliatelle with Caramelized Orange and Almonds, plus Seared Duck Breast - Salty Sweet Life

Tagliatelle with Caramelized Orange and Almonds

  • Servings: 4
  • Difficulty: fussy
  • Print

Adapted from: The Splendid Table: Recipes from Emiglia Romagna, The Heartland of Northern Italian Food

The sauce is gorgeously silky and sinfully rich and when tossed with the tender egg pasta and garnished with orange zest, almonds, parmiggiano-reggiano and more sugar, it is definitely a show-stopping dish that should be served for a party…in April. This might even be a good choice as an Easter side dish!

  • Shredded zest from 3 large oranges
  • 1 stick of butter
  • 2/3 cup sugar, plus additional sugar to garnish
  • 1 1/2 cups freshly squeezed orange juice
  • 1/2 to 1 teaspoon ground cinnamon
  • 2/3 cup grated Parmiggiano-Reggiano
  • Freshly ground black pepper
  • 1 cup blanched almonds, toasted and roughly chopped
  • 1/2 pound tagliatelle pasta (dried or fresh)
  • 4 duck breasts
  1. For the sauce: Melt the butter in a large skillet over medium heat. Add the sugar and 1/4 cup of the orange juice and stir until the sugar dissolves. Continue to add the orange juice one tablespoon at a time, stirring frequently to keep the sugar from crystallizing. Reserve 1/3 cup of the orange juice to finish the sauce.
  2. When the sugar is completely dissolved, increase the head to medium-high and cook until the sauce is a deep amber color. Stir in the pepper and 2/3 of the orange zest and cook for just a few seconds, then add the remaining orange juice. The sauce will bubble up and the consistency will thin. Remove from the heat.
  3. Generously salt a large pot of water and heat to boiling. Add the pasta and cook until al dente. Meanwhile, heat the sauce until bubbly. Strain the pasta in a colander and add to the skillet with the sauce. Toss to coat with the sauce.
  4. For the duck breasts: Salt and pepper the duck breasts and allow them to sit at room temperature for at least 30 minutes. Score the fat in a criss-cross pattern being careful not to cut all the way down to the meat. This will help the fat to render. Place the duck breasts skin side down in a cold stainless steel or cast iron frying pan and cook on medium-high heat until the fat renders and the skin is crispy, about 6 minutes. Flip the ducks breasts over and cook on the skinless side for a few minutes more until well-browned on all sides. Remove from the pan and place on a plate to rest, covered for 5 minutes. Cut into 1/2 inch slices. By the way, save that fat and use it for roasting potatoes–divine!
  5. Pour the pasta onto a serving dish. Sprinkle with the remaining orange zest, the cheese, cinnamon and almonds and sugar. Serve with the sliced duck breast.

Tagliatelle with Caramelized Orange and Almonds, plus Seared Duck Breast - Salty Sweet Life


Tagliatelle with Caramelized Orange and Almonds, plus Seared Duck Breast - Salty Sweet Life

This post is part of the monthly blog event, Our Growing Edge. This event aims to connect food bloggers and inspire us to try new things. This month is hosted by Cynthia from Eat Munch Love.


unnamed

Easy Avgolemono Soup: Greek Chicken Soup with Lemon and Egg

I live in the desert, where we get less than 4 inches of rain per year, so anytime it rains it feels like an event. When the forecast calls for rain, I immediately go through the five stages of a desert dweller:

First, there’s Doubt. I simply cannot believe that it’s going to rain any time soon because the sky is blue right over my house and it is sunny.

Hope. A raindrop falls. Then two, then three. Sometimes the rain evaporates before it hits the ground. Yes, this is actually a thing and it has a name: virga. I cloak myself in cautious optimism in hopes that this little bit of moisture will coalesce and become precipitation. When the rain actually starts to hit the ground and the drops come in fast succession I feel myself getting a little excited, which leads to…

IMG_1037

My neighborhood, the morning after a rainstorm.


Collaboration. This is usually characterized by rapid fire text messages to family and friends: “Is it raining at your house?” “No?” Words of encouragement are sent in reply: “I think the clouds are moving your way!” I check Facebook and see about 20 status updates from friends reporting that it’s raining in their little corner of the valley. If it’s a work day, everyone gathers at the nearest window to marvel at the rain. We take photos to post to Instagram and we don’t even need a filter because it’s just. so. pretty! Very little work gets done.

IMG_4954

IMG_1036

Stratosphere tower, Las Vegas, NV


Jubilation. At this point, the cells in my body are positively thrumming with excitement that actual rain is falling from the sky. We get out the rain buckets to catch the run-off (we will use this to water the garden throughout the week). There is more staring out of windows. A hush descends over the house and I start to gather carrots, celery, onion and thyme to make soup.

Easy Avgolemono Soup: Greek Chicken and Rice soup with lemon and egg - Salty Sweet Life

Hot soup and rainy days go together like whiskers on kittens. I simply cannot allow a rainy day to pass without making a pot of soup! This soup is a particularly good one that was inspired by the Avgolemono soup served at a Greek restaurant in our neighborhood. Full of juicy pieces of chicken and creamy arborio rice, it is filling without being heavy. It lends it’s creaminess in part to the arborio rice, a starchy short-grained rice that is most commonly used for risotto, but also to the addition of a mixture of egg and lemon juice. The result is a creamy soup that is unexpectedly bright and tart.  Because it never rains for too long here, the making of soup has to be somewhat quick. I adapted this recipe from Chef Cat Cora and reduced the cooking time in half by using ready-made stock. Use homemade stock if you have some on hand, but if you don’t store-bought stock is just fine.

Easy Avgolemono Soup: Greek Chicken and Rice soup with lemon and egg - Salty Sweet Life

I almost forgot. There’s a fifth stage for the desert dweller on a rainy day:  Gratitude. This might be particular to me, but I never feel like it rains long enough. I suppose if it did, it wouldn’t be called the desert! I’m always sad to see the rain surrender to the sun that so eagerly peeks through the clouds, but I’m grateful for what we get. The garden is quenched, the dust is washed away for a time and I’ll have this steaming and sunny bowl of soup.

Avgolemono Soup

  • Servings: 6
  • Difficulty: moderately fussy
  • Print

My time-saving version of this soup is a bit more rustic than Cat Cora’s but can be made on a weekday when you might not have three or more hours to devote to making dinner. The secret is to cook the chicken pieces in ready-made chicken stock and lots of fresh herbs. Be sure to use bone-in, skin-on chicken pieces as they are so much more flavorful. It is very important to temper the egg and lemon mixture before adding to the pot. You don’t want to have scrambled eggs!

  • 1-2 bone-in, skin-on chicken breasts (or whatever pieces you have on-hand)
  • 8 cups chicken stock or broth
  • 1 leek cleaned and sliced
  • 1 carrot chopped into small pieces
  • 1 stalk celery, cut into large chunks
  • 2 bay leaves
  • 2 tablespoons extra virgin olive oil
  • 1 medium onion, finely diced and reserved
  • 2/3 cup arborio rice
  • 1/2 cup fresh squeezed lemon juice (about 2 large lemons)
  • 2 eggs
  • 1 1/2 teaspoons salt
  • 1 teaspoon fresh ground black pepper
  • bouquet garni:  2 sprigs thyme, 2 sprigs oregano, 2 sprigs parsley, 2 sprigs dill, tied together with twine
  1. Place the chicken pieces, sliced leeks, carrot, bay leaves, celery and the bouquet garni in a soup pot.  Add the chicken stock and 1 teaspoon of salt and pepper and bring to a boil, then lower the temperature to to a low simmer.  Skim off any foam that comes to the surface and discard.   Simmer for approximately 45 minutes or until the chicken is completely cooked.
  2. While the soup is simmering, sauté the chopped onion in the olive oil on medium heat for about 5 minutes until it softens.  Remove from the heat and set aside.
  3. When the chicken is done, remove from the pot and allow it to cool.  Remove the bouquet garni, the celery stalk and the bay leaves from the pot and discard.  Remove the meat from the bones and chop or tear into pieces and set aside.
  4. Raise the temperature to high and add the rice and the sautéed onion to the soup.  Bring the soup to a boil, then lower the temperature to low.  Add the chicken meat back to the pot and simmer for approximately 20-25 minutes, or until the rice has cooked through.
  5. In a medium sized bowl, whisk together the eggs and the lemon juice.  Temper the egg mixture before adding it to the pot of soup by slowly adding two ladlefuls of the hot broth to the egg mixture while continuing to stir.  After the egg mixture has combined with the hot broth, add the egg mixture to the pot of soup and stir until well-blended.  Add the remaining 1/2 teaspoon of salt if needed.  Simmer for about 5 minutes more and garnish with chopped parsley and some additional chopped dill if desired.

Easy Avgolemono Soup: Greek Chicken and Rice soup with lemon and egg - Salty Sweet Life

The Best Vanilla Tapioca Pudding

The Best Vanilla Tapioca Pudding - Salty Sweet Life

This was supposed to be a recipe for scones. I had all of the right ingredients: the good organic milk, the heavy cream, fresh blueberries, buttermilk and sweet cream butter. In case you’re curious, I had planned to make either this beauty from Tartine or this one from Sally’s Baking Addiction.  I couldn’t go wrong with either one. Bright and early Saturday morning, I stood in front of the refrigerator and the urge to bake just left me. We both had a laundry list of chores for the day–I was still on my wild decluttering tear (still am!) and The Husband had his own list of honey-do’s to accomplish. Hauling out flour and grating butter was a little more than I could fathom so I declared scones a Sunday project because time was ticking and there is no shorter day of the week than Saturday…Sunday being a very close second.

The Best Vanilla Tapioca Pudding - Salty Sweet Life

Sunday morning came and went and I still hadn’t made the scones. To me, Sunday breakfast requires bacon and eggs, toast and orange juice (I’ve never been able to get on board with sweets on an empty stomach). A scone added to that is just too much food. A single scone is not enough. Two scones is crazy-talk.  The Husband would worry about blowing his diet and attribute any deviation on the scale to those scones and I would never hear the end of it! After two full mornings passed without a single scone in the oven, I came to the conclusion that there was just no room in our lives for scones–at least not that weekend. And then, like a ray of sunshine poking through the clouds I saw this recipe for tapioca pudding in the pages of Bon Appétit magazine. I knew right then I had to make room in my life for this pudding.

The Best Vanilla Tapioca Pudding - Salty Sweet Life

This pudding. I don’t know if I can adequately describe how it makes me feel, but when I saw the photo of it in the magazine, my heart skipped a beat! Those little translucent pearls–the creamy custard. The little kid in me could just see my mom standing at the stove with the little red box of “Royal” instant tapioca pudding, carefully stirring it into the pot of hot milk, being so careful so it wouldn’t scald; pouring the thick, lumpy custard into little dessert cups. Then the interminably long time it took to set. I’d swear Christmas came around faster than that pudding! Oh, the anticipation! When it was done, though, it was my very own special treat–the perk of being the only one in the family who is not lactose intolerant. I would sneak spoonfuls when no one was looking. I ate it for second breakfast, then I’d have a little more for elevensies; another bite at luncheon, perhaps a few bites more at supper, because pudding, you see, has no mealtime boundaries. I would whittle it away until all the bowls were scraped clean. It was my absolute favorite dessert.

For reasons unknown to me, I never once thought to make tapioca pudding from scratch until last weekend.

The Best Vanilla Tapioca Pudding - Salty Sweet Life

Lately I have been enjoying a steamy love affair with simple, foolproof desserts and it turns out that tapioca pudding fits perfectly within that realm. I know what you’re thinking–the word “tapioca” probably conjures up visions of grannies and knitting needles, not “steamy love affair” but I consider myself a connoisseur of puddings and custards–I should write a book: Fifty Shades of Cream!

As far as technique goes, if you can stir a pot, then you can make this pudding. All it takes is a little patience, first in the beginning to allow the tapioca to bloom, then at the end when the little cups of warm pudding taunt you from the refrigerator shelf. Careful and frequent stirring is a must, because nothing ruins pudding more than scorched milk, but that is as complicated as this recipe gets.

The Best Vanilla Tapioca Pudding - Salty Sweet Life

As I always say, the simplest recipes require the best ingredients. I’ve been buying Strauss Family Creamery organic milk from Whole Foods and I just love it. The milk comes in glass bottles and it is so thick and creamy that the cream forms a plug at the neck of the bottle. The Husband asked me once why I spend the extra money on this milk and the real, raw truth of it is that it comes in glass bottles and it’s organic and smells like grass and feeds into my fantasy of being a farmer. Oh, and it tastes really good! Seeing those little globules of fat melting in the pot as I stirred made me feel like a farmwoman…only without the farm and the cows.

I suppose I’ve grown a bit of patience at my age because it didn’t seem to take as long as Christmas. I did have a hard time not eating it before it set–I kept stealing tastes of it as it cooled on the stove. Once set, it was incredibly, intensely creamy; pleasurably sweet, but not cloyingly so. The tapioca, tender and bouncy on my tongue. It was every bit as delicious and satisfying as I remembered, but with a little more refinement. The recipe I found called for the addition of milk powder, which I did not use because I didn’t want yet another odd ingredient to languish in the pantry for a year. The recipe did not call for vanilla, but I added it because I look for any excuse to use my Madagascar Bourbon vanilla bean paste–yet another thing I tend to sneak by the spoonful.

The Best Vanilla Tapioca Pudding - Salty Sweet Life

Tapioca pudding is still my very own special treat–The Husband said he would like it more without the tapioca (what?!). I actually don’t have a problem with that because it leaves more for me. I may eventually make those scones, but for right now, pudding makes my heart grow just a little more fonder. I hope you love it as much as I do. Now if you’ll excuse me, I have some pudding to sneak!

tapioca-9The Best Vanilla Tapioca Pudding - Salty Sweet Life 

Vanilla Tapioca Pudding

  • Servings: 4
  • Difficulty: easy
  • Print

The original recipe says that it makes 6 servings but those must have been tiny cups! I was able to make 4 perfect sized portions.  Have I waxed poetic about whole nutmeg before? If you have never used whole nutmeg you are in for a treat–it is so much more fragrant and flavorful when freshly grated. Grate some over the top of this pudding and your tastebuds (and your nose) will be happy indeed.

Recipe lightly adapted from Bon Appétit Magazine

  • 2 cups whole milk
  • 1 cup heavy cream
  • 1/3 cup small tapioca pearls – I used tapioca from Bob’s Red Mill
  • 1/8 teaspoon salt
  • 1 egg yolk, beaten
  • 1/3 cup granulated sugar
  • 1/2 teaspoon vanilla bean paste or vanilla extract
  • 1 tablespoon nonfat dry milk powder  – I did not use this ingredient and the pudding was still very rich and creamy
  1. In a saucepan, combine the milk, cream, salt and tapioca pearls and allow it to sit for thirty minutes to allow the pearls to hydrate.
  2. After 30 minutes add the sugar and the vanilla, then bring to a simmer over medium heat. Lower the heat to medium low, stirring often to prevent the milk from scorching. Cook for 10 to 12 minutes, or until the mixture becomes thick and coats the back of a spoon and the tapioca is no longer hard.
  3. Beat the egg yolk and whisk it into the pot. Cook for an additional two minutes. Remove from heat and allow it to cool on the stovetop for about 10 minutes.
  4. Spoon into small dessert cups and chill in the refrigerator for two hours until set, which is the most difficult part of this recipe!
  5. Serve with grating of nutmeg.

The Best Vanilla Tapioca Pudding - Salty Sweet Life