I’m not normally a person who obsesses over things. But when I received a copy of the February issue of Bon Appetit in the mail, I couldn’t stop obsessing over the cover photo. In the photo was the darkest, crustiest loaf of homemade bread, nestled in the cast iron pot it was baked in and the article inside promised a homemade bread that would rival those found in professional bakeries. The recipe was daunting. In fact, it was a recipe that would fill a weekend. I’m more of a mix-up-a-batch-of no-knead bread kind of woman, not a woman who spends an entire weekend kneading dough. But as the months went on, I couldn’t quit this bread. The magazine kept appearing on my desk, its cover photo beckoning to me. Once it landed on my kitchen counter, I knew there was no point in resisting anymore. So, finally, a couple of weekends ago, I tried it. The bread was high maintenance–just as I knew it would be. It stretched the boundaries of what I thought bread dough should look like, feel like and smell like. I even managed to Snapchat the process. This bread recipe was powerful. Powerful enough to get me to spend a whole weekend on it, and powerful enough to bring me back from a nearly one-year blogging hiatus (sorry guys!).
I have a lot of magazines lying around. Every month, there’s a new recipe I want to try, but with so many, I tend to get “analysis paralysis”. Then I started thinking about the sheer number of magazine recipes and wondering how many actually get attempted by the readers? And I thought maybe I’ll try some of these big weekend project recipes and tell you if it’s worth it to spend a weekend in the kitchen. As I worked my way through this bread recipe, I started noticing that there were little things that I would have benefitted from knowing in advance. I made a few little tweaks to the written recipe as I went along in order to get the results I wanted and knew to expect.

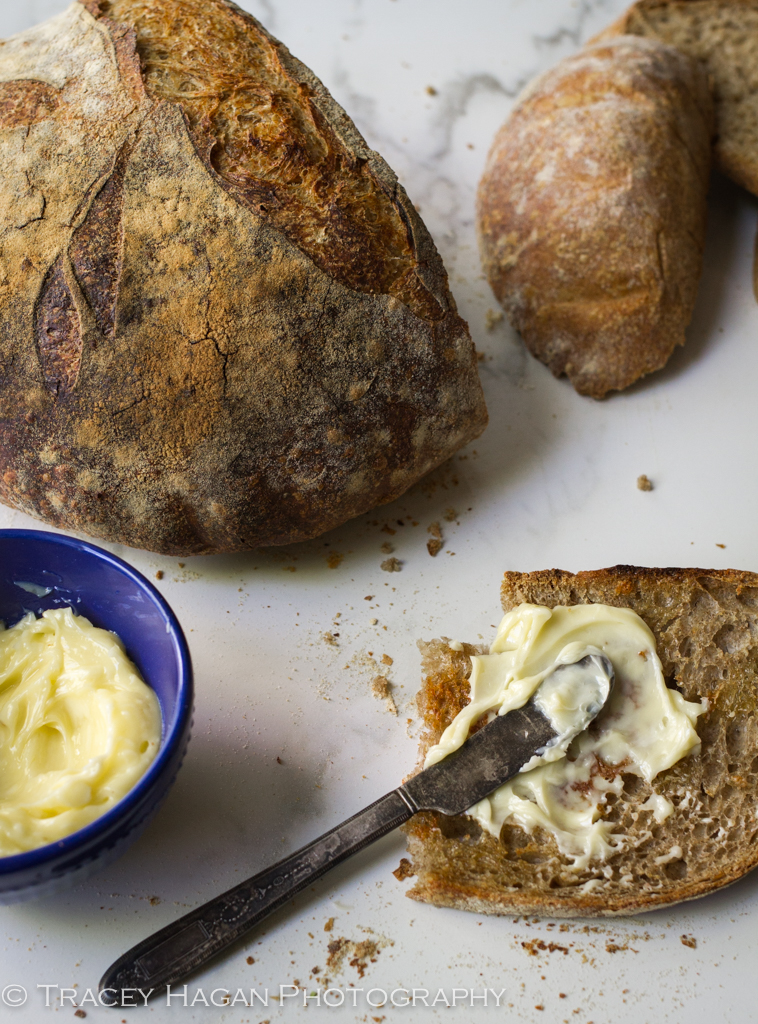
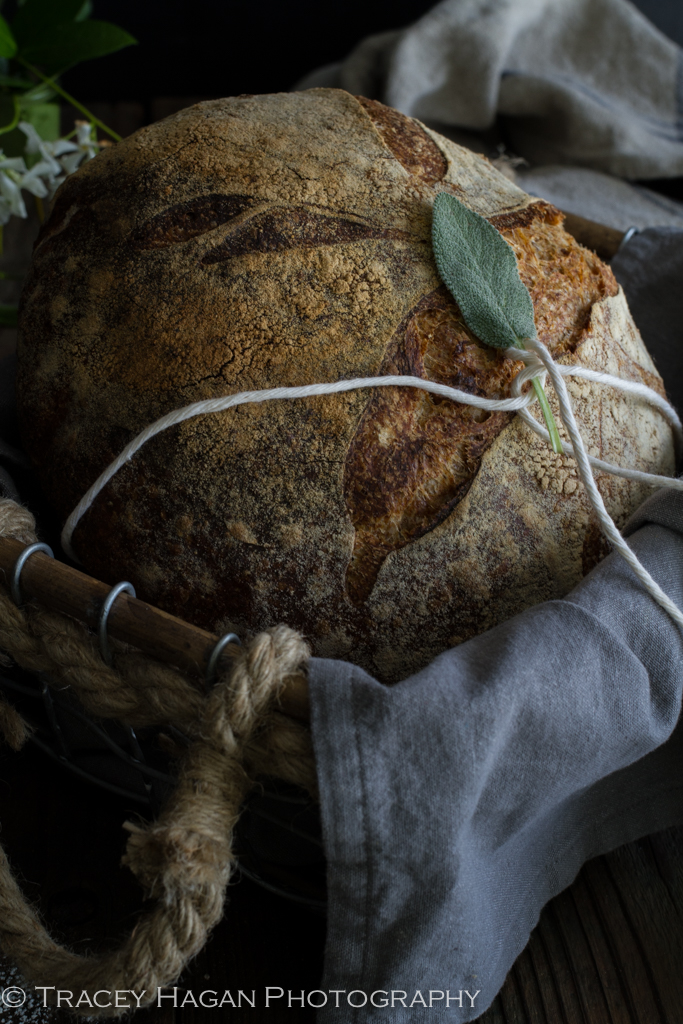
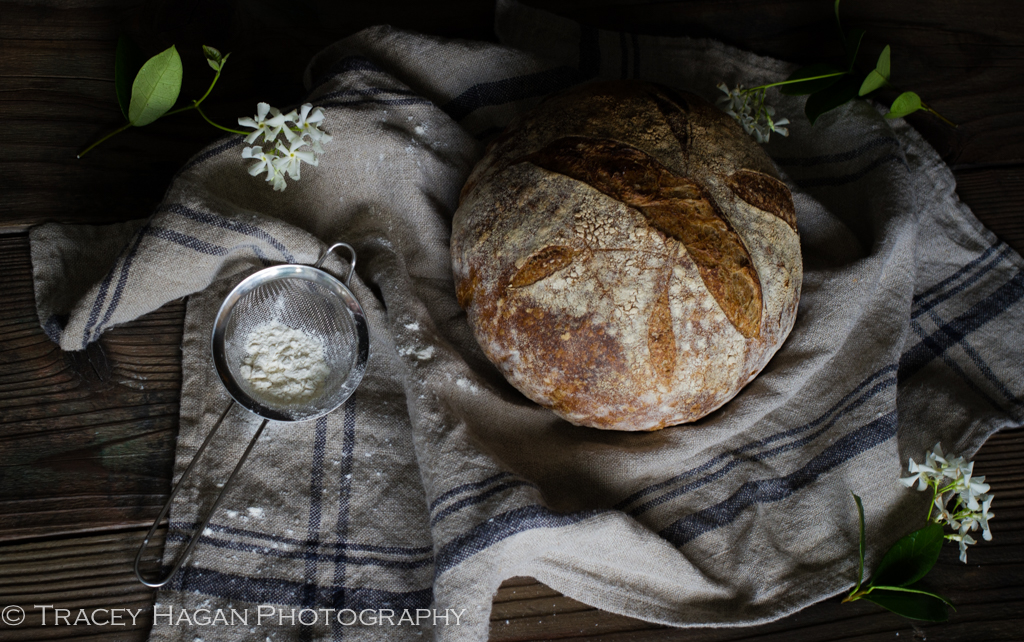
My homage to the Bon Appetit cover photo
The recipe can be found here:
http://www.bonappetit.com/test-kitchen/primers/article/how-to-make-bakery-bread
Day 1.
The recipe requires you to make a poolish, which is a mixture of water, yeast and flour that serves as the starter. I started my poolish on Friday night around 10:30 p.m. The recipe indicated that the poolish needed 14-18 hours to reach maturity. I started checking the poolish at the 14 hour mark and performed the “float test”. The pinch of dough quickly sank to the bottom of the bowl, so as the recipe stated, I waited another 30 minutes to check again. At the 18 hour mark, the poolish still wasn’t mature, and I reasoned that it never would be. The original recipe calls for 1/8 teaspoon of yeast. Instead of chucking the entire batch of poolish and starting over, I stirred in an additional 1/8 teaspoon of yeast, 2 tablespoons of water and a tablespoon of all purpose flour. Early the following day, the poolish was bubbly, and I performed the float test–Eureka! it floated, and I was able to proceed with the Day 2 activities.

Day 2 (actual day 3 for me due to the poolish snafu):
Autolyse: this is the point where the dough gets its initial mix. This was easy and uneventful. You’re just mixing some additional water with the flours (whole wheat and all-purpose). I should tell you that I substituted about a 1/2 cup of bread flour to the mix since the recipe called for a higher protein flour, such as King Arthur Flour. I was pretty sure that the AP flour in my pantry was from Whole Foods, so I substituted about 1/2 bread flour just to boost the protein a bit. The dough rose perfectly well at room temperature for about 2 hours.
Mixing and Kneading. For this part, salt is sprinkled over the dough and an additional 65g of water is added to the dough. Oh, before I forget, DO use a kitchen scale for this recipe. Be aware that there is a typo in the original recipe where it calls for 17 g of salt or 2 tablespoons. 2 tablespoons is incorrect. 17 g is more like 1 tablespoon. A glitch like this could have produced a really salty loaf. Into the mixer it went, and the directions say to mix until the dough “clears the sides of the bowl” and clings to the dough hook. Well…this didn’t exactly happen like this. The dough was the consistency of a thick pudding, but it was not “developing a shape”, nor was it clearing the sides of the bowl or clinging to the dough hook. I added additional all-purpose flour, one tablespoon at a time until it started to take shape. It never did cling to the dough hook, however, and I tapped out at about 3 additional tablespoons of flour.
It got weird. The kneading process was the strangest experience I’ve ever had kneading dough. I felt like I was kneading soup, it was so wet! The way to knead bread like this is through a process of man-handling. You scoop up the dough, then you slap it on the counter. Over and over again. The recipe says to do this for 10-12 minutes. And, you know what I’m going to say, right? It totally took longer than that! I slapped and folded for 26 minutes–as my fitbit can attest! Yep–I got credit for 26 active minutes (high fives! happy dance!). Finally, the dough firmed up passed the window-pane test–the hallmark of well-developed gluten. I was ready for the first part of bulk fermentation.
Bulk Fermentation. During bulk fermentation, you reach into the bowl, grab the edge of the dough, pulling it upwards and the giving it a little shake and folding it over itself. You give the bowl a quarter turn, and repeat the process until you’ve done all four corners. This process is repeated every half hour for three “turns”. After the final turn, the dough rests for 20 to 50 minutes. After my final turn, I was tired of being stuck in the house and wanted to go to brunch, because there is no Sunday without brunch in my opinion. I put the dough in the refrigerator to slow down the process. We were gone for about 2 hours, so after that, I set it outside (it was a warm day) and let it rest until it was puffed and ready for shaping.
Shaping. Because I’ve baked several loaves of bread before, the shaping portion was not too difficult for me. You just have to get used to the motion of tucking your hands behind the dough and pulling it towards you to create surface tension on the “boule” (ball of dough). At this point, the dough feels like a nice, taut…booty. Supple, yet firm (note to self: must get to the gym). After shaping, I popped the dough into a lined colander and into the refrigerator overnight. Whew!
That was a long day of bread-handling, but it actually wasn’t too bad. It was mostly a matter of timing and being somewhat tied to the house for most of the day. Just know that if you need to come to a stopping place, like I did, just put the whole thing in the refrigerator for a bit. When you take it out, give it some time to come to room temperature before starting again.

Day 3/4: Baking Day
The next day, I was excited to bake this bread that I’d been obsessing over. I noted that the directions didn’t mention anything about removing the dough from the refrigerator to come to room temperature, so I started to have questions. Fortunately, I watched the video of this bread being made on youtube and it answered that important question. The dough is baked cold. Because it was a warm day and I don’t like heating up the entire house with the oven on, I decided to bake the bread outside on the grill.
The score: this shouldn’t have been difficult, but it was because of my own lack of hand-eye coordination and my stubborn adherence to the recipe. I don’t own a “lame” which is tool used to slash the dough before baking. So, I took the suggestion in the article to make one out of a razor blade and a popsicle stick. Because I wanted to do one better, I used a wooden knife and tried to fashion it like a real lame. Do not do this. Just use a really sharp knife to make the slashes, but if you must make a lame from a popsicle stick and a razor blade, just tape it parallel against the stick and BE CAREFUL. Don’t lose any fingertips. Seriously, double-edged razor blades are hella scary (and sharp!).
Because my colander was kind of big, my dough ball was big and spread out. I was pretty certain when I took the dough out of the colander and set it on the plate that it would be larger than my pot. Not good. So, I attempted to rein it in a bit, using the same techniques used during the initial shaping. That seemed to do the trick…but then…
When I scored it, the dough gave an audible sigh and collapsed. It spread back out just the way it was before I attempted to reshape it. I freaked out and all my plans for the pretty scoring patterns in my head just flew out the window. In my now, shaking hands, my makeshift lame and I made a few weirdly placed score marks and I called it a day.
I mentioned that I baked it outside on my grill. I have a large gas grill with 5 burners and when I bake out there, I set the burners to heat the food indirectly. I place a thick baking stone on one side of the grill and one burner underneath the stone is placed on the lowest setting (you don’t want too much heat directly under the baking stone, trust me on this–I’ve burned bread this way). The three burners on the opposite side of the grill are set to the highest setting and one burner closest to the baking stone was completely off. This way the temperature reaches exactly 500 degrees and stays there. If you want to experiment with baking on the grill, know that your grill will likely be different, so play with it and learn how to work those burners!
Thankfully, the dough was exactly the size of the pot (whew!) and not a millimeter too large. I plopped the dough into the preheated pot and cooked it with the lid on for 15 minutes, just as the instructions indicated. Then I removed the lid and baked it for 40 minutes more.
The resulting loaf was a thing of beauty. It was a deep brown color, exquisitely hard on the outside and custardy on the inside. It was chewy and hearty, due to the rye and wheat flour and had the slightest tang of fermentation. I can say quite honestly that it was the best loaf I’d ever made.

The Verdict:
Even though it was one of the most high maintenance doughs I had ever worked with, I would absolutely do it again. Yes, I could make a no-knead loaf that would be a whole lot easier, but I kind of liked the thrill of a day of playing in dough. Plus, it was challenging, and sometimes I just enjoy being challenged and pushed by a recipe. It was fun getting elbows deep in the kneading process and honestly it was freeing to manhandle that dough without fear that I was going to over-knead it. This recipe is a keeper in my book. If you decide to make it, I’d love to hear your thoughts and if you take a photo of it on social media–tag me (@saltysweetlife on Instagram and @saltsweetlife on Twitter) because I want to see!