Latest Posts

James Beard Foundation Taste America and Greek Food Festival

This last weekend, we found ourselves with almost too many things to see and do in town!  The stars aligned and Las Vegas was host to three major food events–Bite of Las Vegas, James Beard Foundation’s Taste America, and the 41st Annual Greek Food Festival!  We didn’t make it to Bite of Las Vegas this time, but we did get to experience some amazing dishes at Taste America and the Greek Festival.  So much fun!

The James Beard Foundation’s Taste America took place at the Mirage Hotel and Casino Pool and featured tastings from nine world class restaurants and James Beard Award winners.  It was a gorgeous night!  The highlight of my evening was meeting Iron Chef Masaharu Morimoto!  Chef Morimoto offered a dish of Big Eye Tuna loin and Japanese Wagyu beef.  It was a perfect bite!

I’d have to say that my favorite tasting dish came from local James Beard Award Winner Saipin Chutima of Lotus of Siam Thai restaurant.  She featured two Northern Thai dishes: Khao Soi Beef, beef stewed in a curry sauce and served over egg noodles; and Sai Oua, a house-made spicy pork sausage.  That sausage was flavored with lemongrass and it was super spicy!  I was really grateful for the cool, sweet coconut dessert that was served alongside it because my mouth was on fire!  I really wish that I’d gotten more photos of this event, but I was having a hard enough time wrestling the plates of food and wine glasses!  I finally decided to just focus on enjoying what I was eating and hope that you’ll forgive me for the lack of photo documentation!

Macarons by James Beard Award Winner Chef Francois Payard
Chef Francois Payard of Payard, Las Vegas

The next day we headed to the Greek Food Festival.  This year was the 41st year that the Festival has taken place and I’ve lived here for 25 of those years and had never been to it!  Shame on me!  The event took place on the grounds of St. John the Baptist Greek Orthodox Church and there was live music, carnival rides, and lots and lots of delicious food!

Look at this huge plate of food!  Chicken, dolmathes (stuffed grape leaves), pastitsio , lemony rice and Greek salad!   I was so full!

This was Eric’s dish–he had the sliced lamb!


View of St. John the Baptist Church


We bought two incredible balsamic vinegars from this vendor.  The balsamic vinegar was aged 18 years and it is so thick that it’s almost the consistency of a reduction.  It’s amazing and I can’t wait to use it in some recipes!

We have received and given tins of Christmas cookies made by the Ladies Philoptochos society from St. John the Baptist Church and they are incredible! I  tried to bribe this lovely lady into giving me the recipe for my favorite treat: kourambiedes.  She wasn’t budging, though.  I guess I’ll have to learn to make these myself because they aren’t going to last much longer at the rate I’m eating them!


So that was our foodie weekend!  Can’t wait until the next time!

Fagioli, Cipolle e Tonno — Grilled Tuna and White Bean Salad

I first had this very simple tuna and white bean salad at Chef Carla Pellegrino’s Neapolitan restaurant, Bratalian.   It was so delicious that I had to ask the manager what was in it.  I was shocked to learn that the simplest ingredients: lemon, olive oil, salt and pepper, were what made it so good!  After having it at the restaurant, I set out to recreate the dish and now it’s a weekday staple dinner for us.  The base of the salad is peppery arugula dressed with a drizzle of olive oil, fresh lemon juice, salt and freshly ground black pepper.  The main part of the salad is juicy grilled tuna paired with creamy cannellini beans, crisp red onion and celery.

This salad is crazy-good and amazingly simple to make.  I usually use canned whole white albacore tuna for this dish, but today I used fresh tuna, because I had a thought that it would be even more amazing–and it did not disappoint.  I think from now on I will use fresh tuna whenever possible.
It is not necessary to use expensive sushi-grade tuna for this dish because the tuna is thoroughly grilled.  I found this tuna for a reasonable price at Trader Joe’s.    
For the salad you will need:
8 ounce tuna steak, cut in half cross-wise (or one can of whole white albacore tuna, drained)
1 can of cannellini beans, drained and rinsed
1 stalk celery, finely chopped
1/2 small red onion, finely sliced
1 tablespoon chopped fresh parsley 
For the dressing:
1/4 cup fresh lemon juice (about 2 lemons, squeezed)
1/4 cup extra virgin olive oil
1 jarred anchovy filet, finely minced (optional, but oh, so good)
1 small clove garlic, minced
Pinch of salt
freshly ground black pepper
Makes 4 servings

1.  Season both sides of the tuna with salt, pepper and a pinch (about 1/4 teaspoon) of ground fennel.  I had whole fennel, so I ground it with a mortar and pestle–alternatively, you could use a spice grinder.  Coat the tuna steaks with canola oil.  I used an oil from Costco called Mediterranean Blend that is a combination of canola oil, olive oil and grapeseed oil.  It is great for frying and grilling.  Preheat the grill or grill pan to high.

2.  In a medium bowl, combine the beans, celery, onion and parsley.

3.  In a small bowl, whisk together the lemon juice, olive oil, salt, pepper, anchovy and garlic and set aside to allow the flavors to mingle for 5 minutes.  You could omit the anchovy if you prefer but the anchovy adds a wonderful depth to the dressing.  Don’t worry, it won’t taste fishy!

4.  Place the tuna steaks on the hot grill or grill pan and cook for approximately 3 minutes on each side or until the tuna is cooked through but still juicy.  Remove the steaks from the grill and allow the tuna to rest for about 2 minutes.  After it has rested, flake the tuna with a fork and add to the bowl with the beans.  Pour the dressing over this mixture and stir gently to combine.  Taste and add additional lemon juice or salt and pepper as needed.

5.  Toss arugula with a drizzle of olive oil first, then the juice from 1/2 of a lemon.  Sprinkle with a finishing salt, like Maldon Sea Salt and freshly ground black pepper.  Mix gently with your hands.  Top each serving of arugula with a mound of the tuna and white bean mixture.

Coq Au Vin

The first time I ever had Coq au Vin was during the summer semester before my senior year in college.  One of my favorite professors, who was also a gourmet cook, made this dish and shared it with me and forever changed the way I thought about food.  I remember biting into a beautifully browned mushroom bursting with red wine and feeling that I was eating my first adult meal.  I also remember wondering if it was ok for me to eat it since I wasn’t yet 21 (I was both very sheltered and very, very square in college)!  I remember how special I felt after that first bite–that my professor had thought to share such a lovingly prepared, and to my inexperienced palate, decadent, dish with me! Now I realize that the dish itself is not so much decadent, as it is classic French, rustic, country food, but was every bit lovingly made and incredibly delicious.
To this day, this is how I love to cook and why I celebrate the Autumn season with rustic, homey, braised dishes. For me, cooking this way shows love.  Every component gets special treatment as it goes into the pan and the result is a rich mélange of juicy chicken, robust wine and tender vegetables. It’s a perfect dish to make when you want to show someone that you really care!
This recipe was adapted from one of my new favorite cookbooks:  All About Braising, by Molly Stevens.  This is one of the longer recipes that I’ve posted and it may seem like a lot of different steps, but don’t be daunted.  None of these ingredients are exotic or expensive and once you have everything chopped and in place, it goes rather quickly.  The mushroom and onion garnish can be made while the chicken is braising.
The best cooking vessel to use for this dish is a large, heavy bottomed Dutch oven or braiser with a well-fitting lid that can be transferred from the stovetop to the oven.  I used a 5 quart braising pan.

Ingredients:

4-5 ounces diced pancetta or slab bacon cut into small dice
1 4-5 pound chicken cut into parts (or you can use a mixture of your favorite bone-in chicken pieces)
1 large carrot, sliced
1 large onion, diced
2 cloves garlic, minced
1 bay leaf
2 sprigs thyme, leaves removed and chopped roughly
1 cup chicken stock
1 750 ml bottle of red table wine
2 tablespoons Cognac or brandy
1 tablespoon tomato paste
3 tablespoons unsalted butter
flour for dredging the chicken
salt
pepper
chopped Italian parsley

For the garnish:

3/4 pound crimini mushrooms
2 tablespoons unsalted butter
1 1/2 cups of frozen pearl onions
chopped Italian parsley
salt
freshly ground black pepper

Preheat the oven to 325 degrees.

1.  Cook the diced pancetta or bacon until the fat renders and the meat is crisp on the outside but still tender on the inside.  Transfer the bacon to a plate lined with a paper towel and set aside.  Remove the pan with the drippings from the heat.

2.  Season the chicken pieces generously with salt and pepper.  Dredge the chicken in the flour and shake off the excess.  Add a tablespoon of butter to the pan with the drippings and place over medium-high heat.  Add half of the chicken to the pan and brown, being careful not to crowd the pan.  As each piece browns, set aside on a plate.  Add additional butter to the pan and finish browning the remainder of the chicken pieces.  You may need to turn down the heat at this point so that the second batch of chicken does not burn.

3.  After all of the chicken has browned, pour off the excess fat in the pan, but do not discard the browned bits of chicken (this is called “fond”). Add another tablespoon of butter and after the butter melts, add the onion and carrot and sauté until the onion softens (about 5 minutes).   Add the tomato paste and stir to completely coat the vegetables.  Add the 2 tablespoons of Cognac and increase the heat to deglaze the pan, which means that the liquid will now loosen all those roasted bits from the bottom of the pan.  Ok, full disclosure:  I used about 4 tablespoons of Cognac, just because it’s delicious and 2 tablespoons just didn’t seem to do it justice!

4.  Raise the temperature to high and add the entire bottle of wine, the garlic, thyme, bay leaf, parsley.  Bring this mixture to a boil and reduce the liquid by about half.  Stir in the reserved pancetta and 1 cup of chicken stock and bring to a boil.  Remove and reserve 1/2 cup of this mixture for the garnish which will be made later.

The chicken is added to the braising liquid. Place the chicken breasts on top of the other pieces to cook more slowly.
5.  Add the chicken back to the pan and tuck into the braising liquid.  If you have used breast meat, place the breast meat skin side down on top of the other chicken pieces.  This will allow the breast meat to cook more slowly and keep it from drying out.  Cover the pan with the lid and place into the 325 degree oven.  After about 15 minutes, turn the breast pieces over (skin side up) but keep it on top of the other chicken pieces.  Continue braising for 30 to 45 minutes more, or until the chicken is tender and pulling away from the bone.
To make the garnish:
6.  Clean and dry the mushrooms and cut into quarters.  In a frying pan (I used a non-stick pan for this part) melt 1 tablespoon of butter and add the frozen pearl onions.  Toss the onions in the butter and stir or toss until they begin to brown.  Add the reserved 1/2 cup of braising liquid and season with a pinch of salt and pepper.  Place a lid over the onions and cook for about 4 minutes.  Remove the onions from the pan and set aside in a small bowl.  Add one more tablespoon of butter to the pan and sear the mushrooms until they are a nice, golden brown color.  Add the onions back to the pan and set aside.
Mushroom and onion garnish
7.  After the chicken is done braising, remove the chicken pieces from the pan and set aside.  Skim as some of the fat from the surface of the braising liquid.  Place the pan on the stove over high heat and reduce the braising liquid until it reduces just a bit–maybe by a quarter.  Add the mushroom and onion mixture to the braising liquid and heat through.
8.  Pour the mushroom and onions and sauce over the chicken pieces, sprinkle with the chopped parsley and serve.  I served this on top of roasted fingerling potatoes, but mashed potatoes or noodles would also be great!
Bon Appétit!

Say Hello to My Little Friend//This Means War!

Hello.  My name is Tracey and I’m the worst gardener ever.  Welcome to my support group.  I didn’t set out to be the world’s worst gardener; it was not because I didn’t have good intentions or a pure heart or unwillingness to give it “the old college try”.  It’s not that I forgot to water or fertilize or get rid of caterpillars.  I think it’s just good ole’ Murphy’s Law and really bad luck.

So, I told you last week about the rats that invaded the garden less than 12 hours after I planted the fall/winter vegetables.  We set traps, and for the first couple of days, they seemed to work.  We caught three big, ugly rats and thought that our problem might be coming to an end.  But, the rats kept coming and you know what? They are getting smarter!  They are actively avoiding the traps.  They don’t take the peanut butter that we set out as bait.  They went after the most vulnerable plants in the garden and They Ate Everything.  Remember all those seeds I planted ten days ago?  Gone.  All of the tender leaves stripped bare.  To add insult to injury they even went so far as to dig the seeds out of the ground and they ate those, too.  The tiny arugula?  razed.  Baby lettuces? disappeared like a phantasm.  They stole the last few eggplants that were growing and ate those, too. There was almost nothing left except for the thyme and the basil, which they don’t seem to like.

I consulted the internet and saw on a message board that rats can’t stand the smell of catnip.  Apparently, a chemical in catnip, called trans-nepetalactone, smells a lot like female cat urine.  So, off I went to the nursery and picked up ten catnip plants and a big plastic owl.  I planted the catnip in the holes of the cinderblocks.  I had also gotten a tip from a new friend, Marilyn of Cowboy Trail Farm, who suggested cayenne pepper.  I sprinkled that all around the edges of the garden bed.  I felt like I was warding off demons or something (I suppose I am in a way)!

So, I started over.  I replanted all of the seeds.  I bought a few more seedlings because now I’m ten days behind schedule for planting.  And now we wait and see if any of this works.  I’ll keep you posted!  If any of you have any suggestions on how to deal with this problem, I’d sure appreciate it!  

P.S.  I just thought of something: maybe the catnip will attract an army of alley-cats to my yard….  Problem solved!

Chipotle Black Bean Soup

Sometimes there’s just nothing better than a piping-hot bowl of soup.  I think I have a little alarm bell in my stomach that starts ringing for soup any time the weather dips below 85 degrees or there are clouds in the sky–and if it rains, forget it! You can be sure I’ll be having soup for dinner.  That being said, I made soup last night when it was well above 85 degrees and sunny, but it so happened that I had an exciting event to attend yesterday evening and I needed to make a really quick dinner before heading out.  This chipotle black bean soup comes together very quickly, thanks to the use of a few convenience foods, such as canned black beans and tomatoes.  If you have a food processor, then you can really save some time chopping the onions, garlic and chipotle peppers.  Like any soup, the flavor is even better the following day, so if you have the time to make it ahead, definitely do so.

The inspiration for this soup came from this Dave Lieberman recipe.  I’ve been making this soup for a few years and I’ve made a few alterations to make it a little spicier and a little smokier.  During the holidays, I make it with leftover Christmas ham and it is amazing!  The original recipe calls for lots and lots of bacon, and while I love bacon, I like to use diced pancetta because it’s convenient and a little less fat than ten slices of bacon!

The soup has a spicy, smoky chipotle flavor due to the addition of canned chipotle peppers in adobo sauce.  This can be found in the grocery store in the ethnic or Mexican food aisle.  Chipotle peppers are smoked jalapeño peppers.  They have heat, but in my opinion, they are not so fiery hot so that you need a glass of milk to go with your bowl of soup.  They have a smoky, earthiness that really pairs well with black beans.

1 large onion, chopped finely
6 garlic cloves, minced
3-4 chipotle peppers, pureed in a blender or food processor
5 ounces diced pancetta
4 cans black beans, drained but not rinsed
2 cups chicken stock
1 tablespoon Worcestershire sauce
1 can diced tomatoes or Ro-Tel (spiced tomatoes with green chiles)
1 tablespoon ancho chili powder
1/2 teaspoon salt (or more to taste)
1/2 teaspoon sugar
1/2 teaspoon black pepper
1 bunch of cilantro, leaves removed and chopped
for garnish:  cheese, cilantro, avocado, sliced green onion

Cook the pancetta in a heavy bottomed pot on medium heat until the fat renders and the pancetta is crisp.  Add the onions and garlic and sauté until softened.  Add the ancho chili powder to the onions and garlic and cook for about 2 minutes.  I think this is an important step because it allows the spices to distribute evenly in the soup, plus when you cook or toast spices, it deepens the flavor.  Add the rest of the ingredients and bring to a boil.  Reduce the heat to low, cover and simmer for an hour.  You could cook it for a shorter amount of time, but a longer, slow simmer allows the soup to develop more flavor.  If you would like to use a slow cooker, you could make the recipe through the addition of the chili powder and put the mixture into the slow cooker, then add the rest of the ingredients and cook for 4 hours on low heat.

To make the soup creamier, during the last ten minutes of cooking, remove two cups of the soup and puree in a blender or food processor, or use an immersion blender to puree it in the pot.  After you’ve blended to your preferred consistency, add the cilantro (about 1/2 cup) and stir.  Cook for ten more minutes and serve topped with cheese, cilantro, avocado and more cilantro leaves.

Oh, I almost forgot to tell you about the event!  I had the opportunity to emcee a cooking competition at the Le Cordon Bleu College of Culinary Arts last night!  It was so exciting to watch the culinary students compete and experience the frenzy of a restaurant kitchen firsthand!  As soon as the photos are available, I’ll be sure to link them so you can see!

Soup! It’s what’s for dinner!

Starting Fresh in the Garden and PESTS!

Lemon Thyme

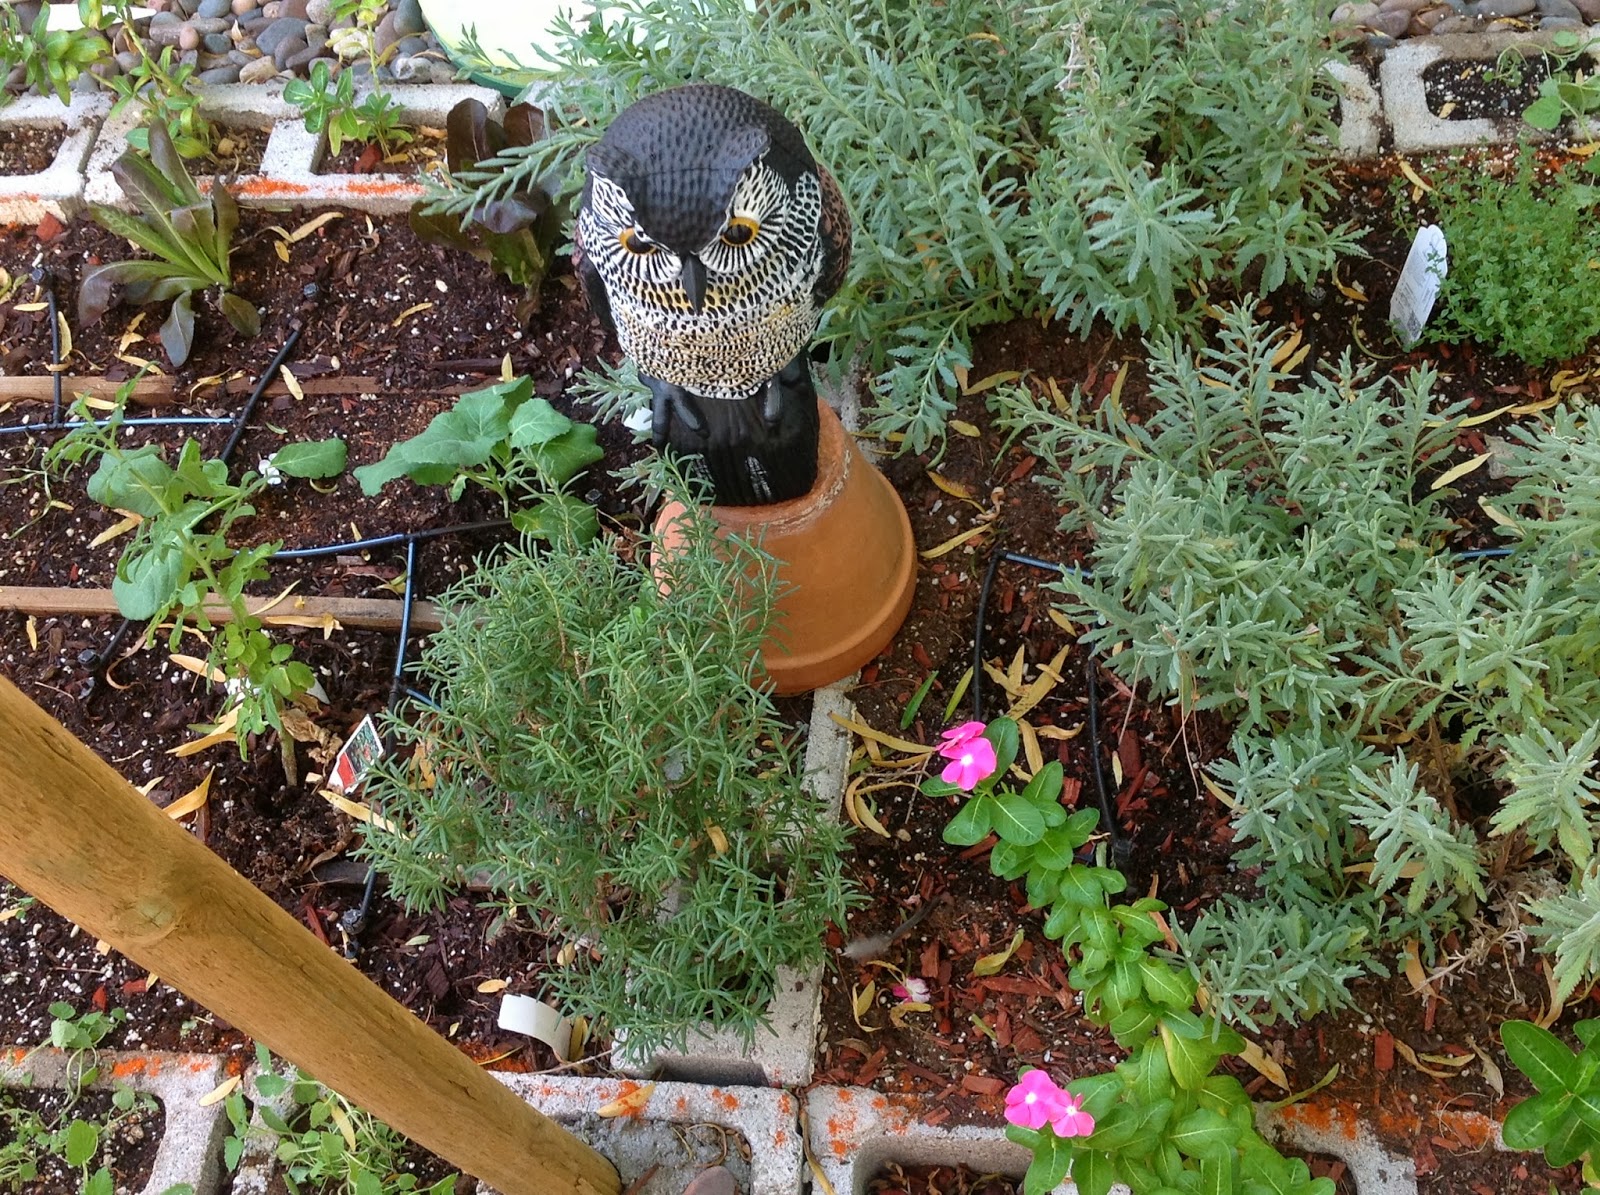
My little cinderblock garden has pretty much been dormant for the last two months, but this week, with the brunt of the summer heat behind us, it was finally time to clear out the old and bring in the new!  So, starting last Monday, I began pulling out all of the dead and dying summer zucchini, cucumber and tomato plants in order to get ready for our fall and winter plantings.  This sounds like a pretty simple plan, right? Well, because it’s me and nothing ever comes easy, let me assure you it wasn’t simple!

First off, the zucchini plant.  As I approached the plant, I couldn’t help but notice that the topmost leaves had turned completely black!  I thought, “wow, these are in worse shape than I thought” but continued toward it to put it out of its misery.  As I grew closer and reached my hand towards the stem, I saw that what I thought were withered, black leaves were actually covered with a swarm of horrifying beetles! I, of course, screamed and ran into the house beckoning to the Man of the House to “come quick and see something horrible!”  Incidentally, this is probably not the best phrase to use when you need someone to follow you somewhere.  So, outside we went and The Man saw the Something Horrible.  First, I got scolded for not keeping an eye on my garden.  “But that’s not true, I really have been!”, I exclaimed.  Dear Readers, let me take you back to a few weeks ago.  One day, I approached this same zucchini plant, seeing that there was a small zucchini on it that I wanted to pick.  As I reached for the zucchini, I saw that there were two beetles mating right on top of it.  Thinking that these were assassin beetles, and therefore helpful, predatory bugs, I actually said out loud to them “I’m going to let you two finish your business and I’ll come back later”.  Yes, I talk to bugs and animals…that’s not weird, right?  So, I left them to it.

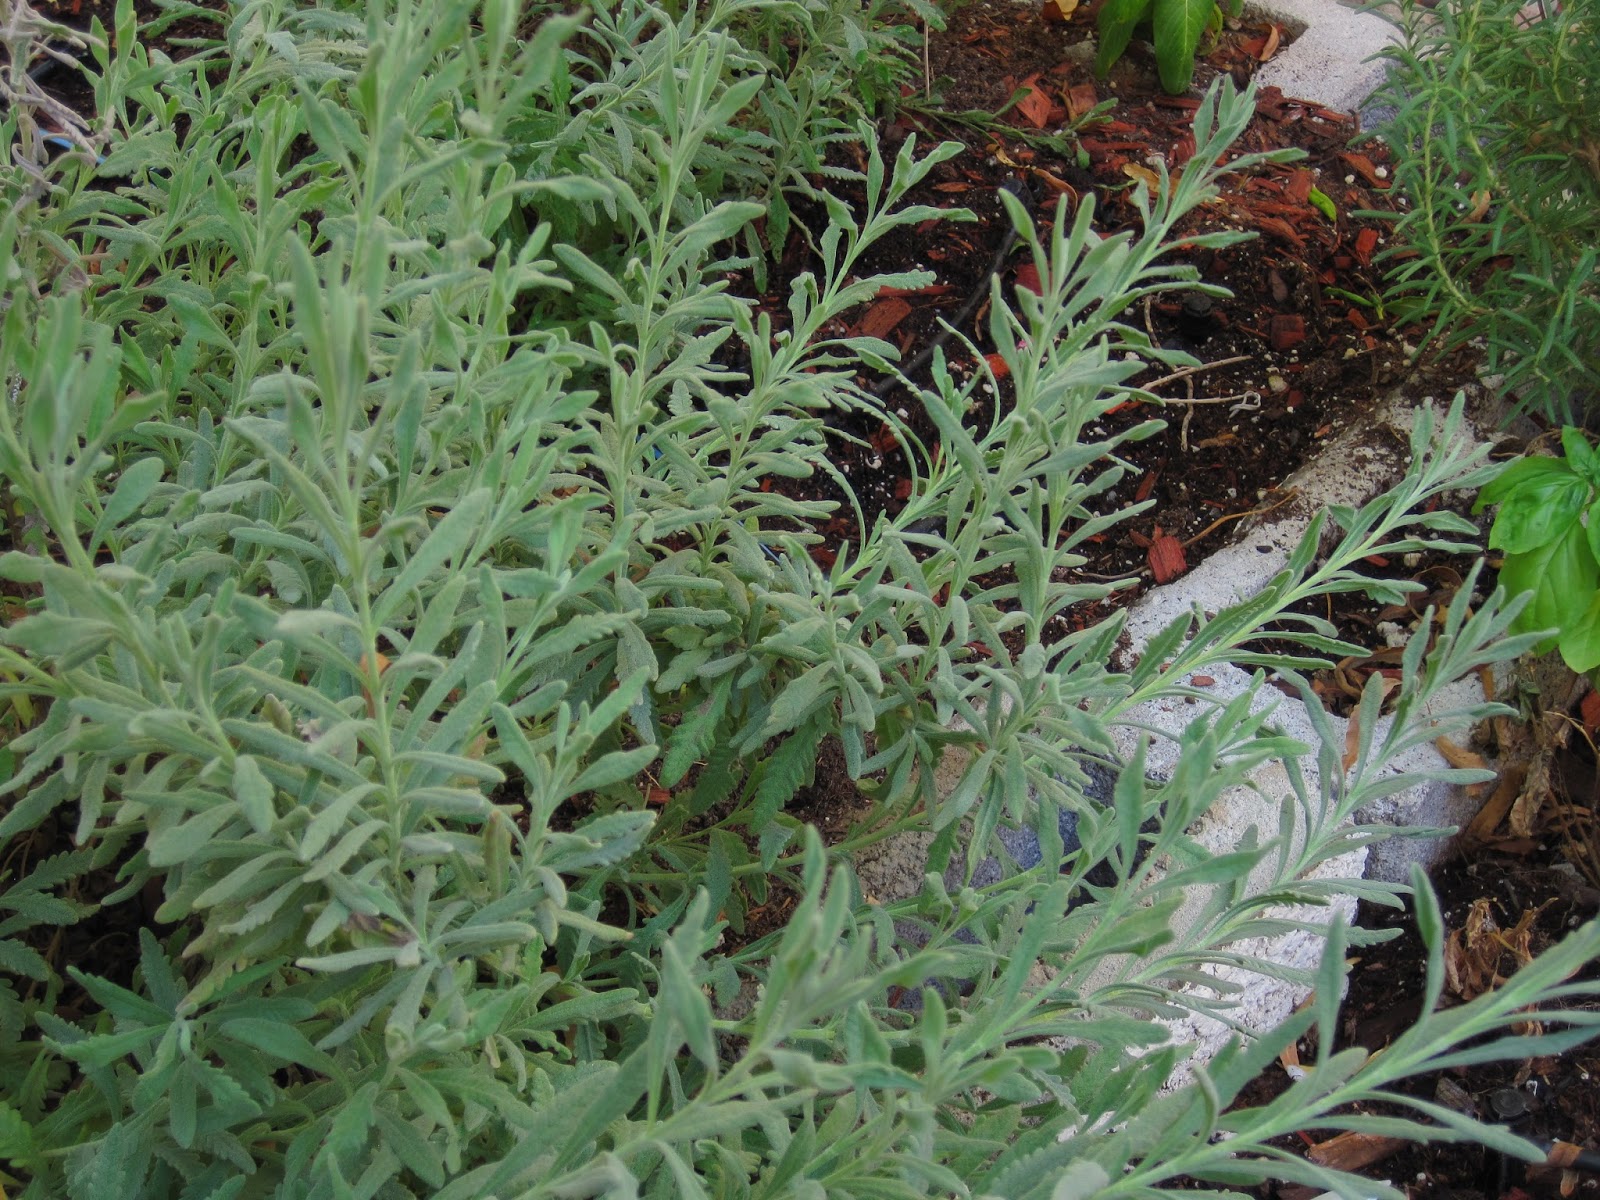
The Lavender That Ate Manhattan.  If anyone knows any uses for the leaves, let me know!

So, flash forward to last Monday and now there was a swarm large enough to carry me away!  Turns out they weren’t assassin beetles at all, but were squash beetles, which are terrible pests in the worst possible sense!  Now, I’m going to give you this link, so you can see what I am talking about, but if you are anything like me, I must warn you, I cannot be held responsible for any nightmares or bouts of itching!  Only the stout of heart and constitution should gaze upon it!

So, I ran inside to retrieve some bug spray from the garage.  The Man completely doused the leaves with the poison and the bugs just walked through it like it was nothing–like we had just given them a lovely summer cocktail!  By this time, I was itching uncontrollably and was ready to get the blow torch to set the whole thing on fire.  Luckily, The Man was in a much better frame of mind, and after donning his shining armor (work gloves and a firm resolve) he just pulled the whole thing out and threw it in the trash can! My hero! We read after the fact that these beetles are very difficult to control, that they don’t respond to poison and they live solely on squash plants.  The only way to mitigate them is to literally squash them! So, basically, I could have prevented this whole problem by squashing the first two that I saw!

After that, it was pretty much easy.  I tilled the soil, added some new soil and fertilized it with epson salts and vegetable fertilizer.  On Thursday, I ventured to the garden center and brought home a few seedlings: kale, cilantro, thyme and mint.  Then I laid out rows of greens and planted Swiss Chard, collard greens, spinach and lettuce.  I was feeling pretty excited and proud of myself until the next morning, when I came out and saw that my brand new, tender kale was just a bunch of naked stems!!  RODENTS!  Now I am fit to be tied.  We set traps, and this morning, there was a rat in the trap!  At least, I think it was a rat.  It was either a small rat or a large mouse, and since it wasn’t even remotely adorable, I’m going to assume it was a rat.  Of course, it was still able to make a meal out of the cilantro and the mint before it met its demise.

See that sad little stick plant on the right? That was kale after the rat ate it.

Cilantro after being devoured by a rat!

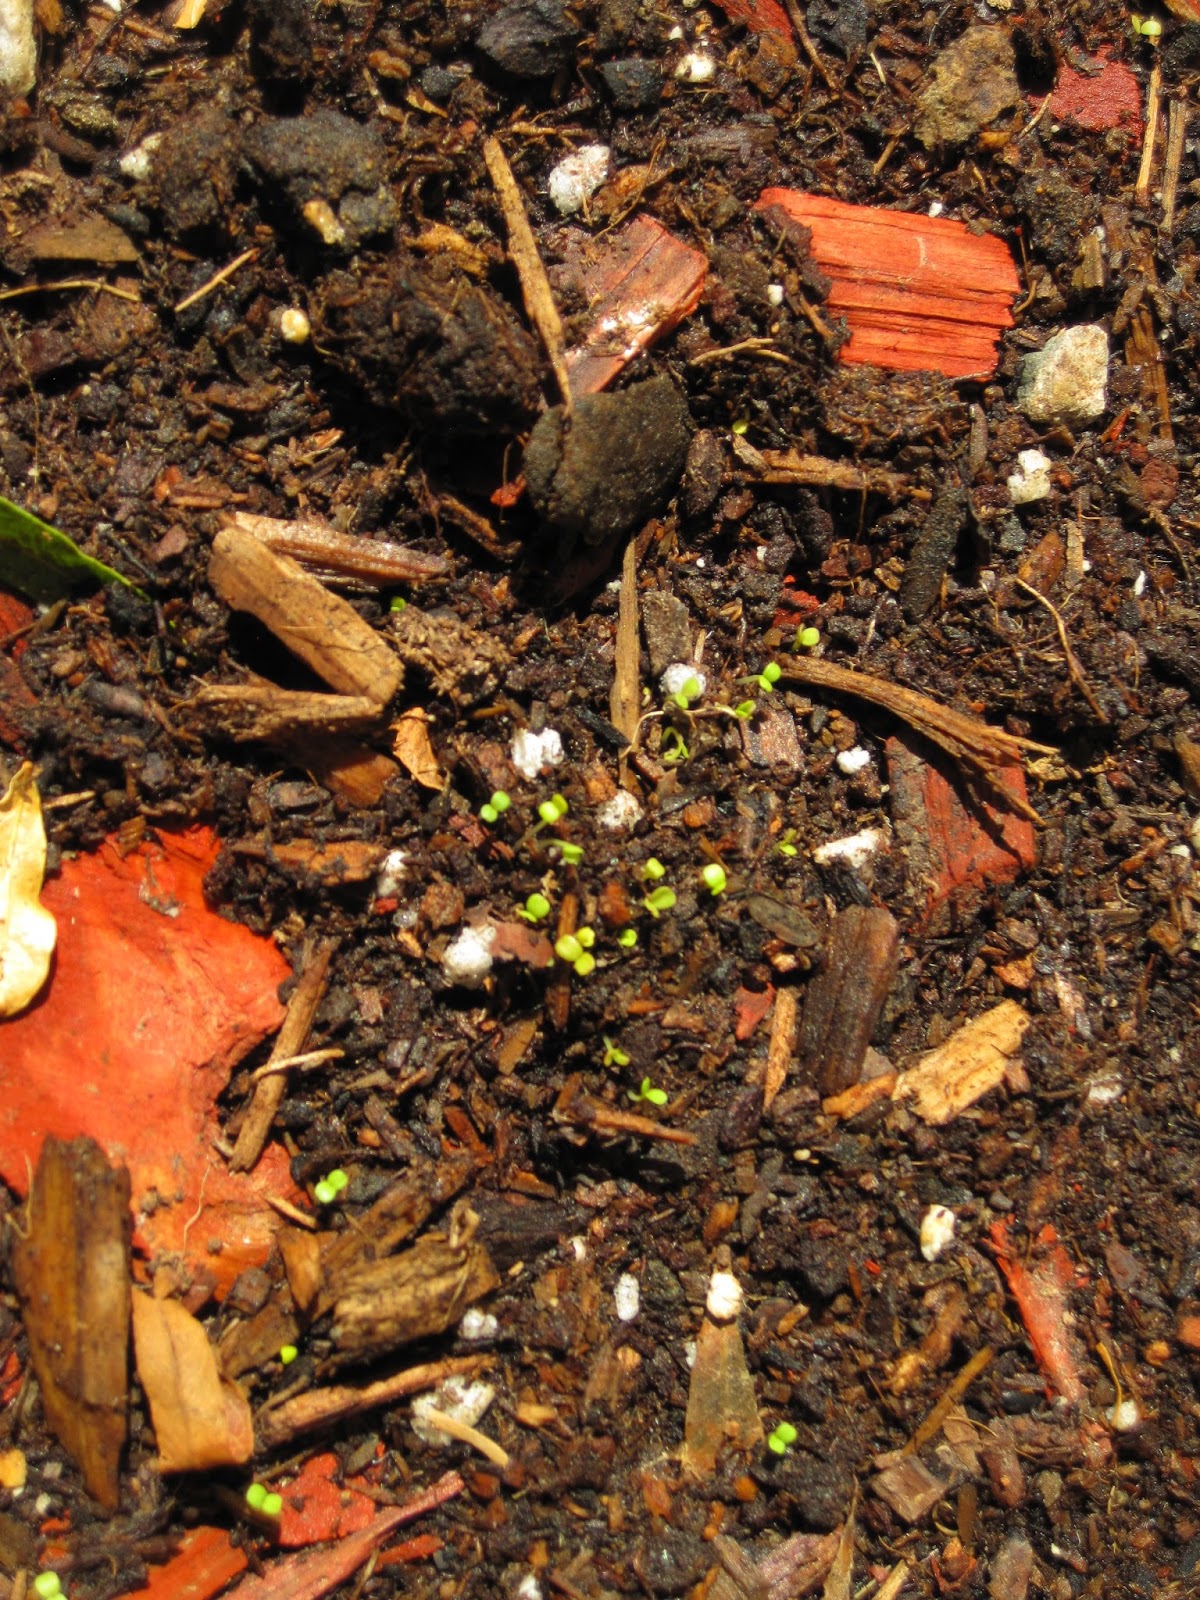
I also planted some arugula in a pot right outside of the kitchen window.  It’s a good, sunny, spot, so I think it will do well.  It’s only been 3 days, and tiny little sprouts are appearing!

Teensy little arugula seedlings

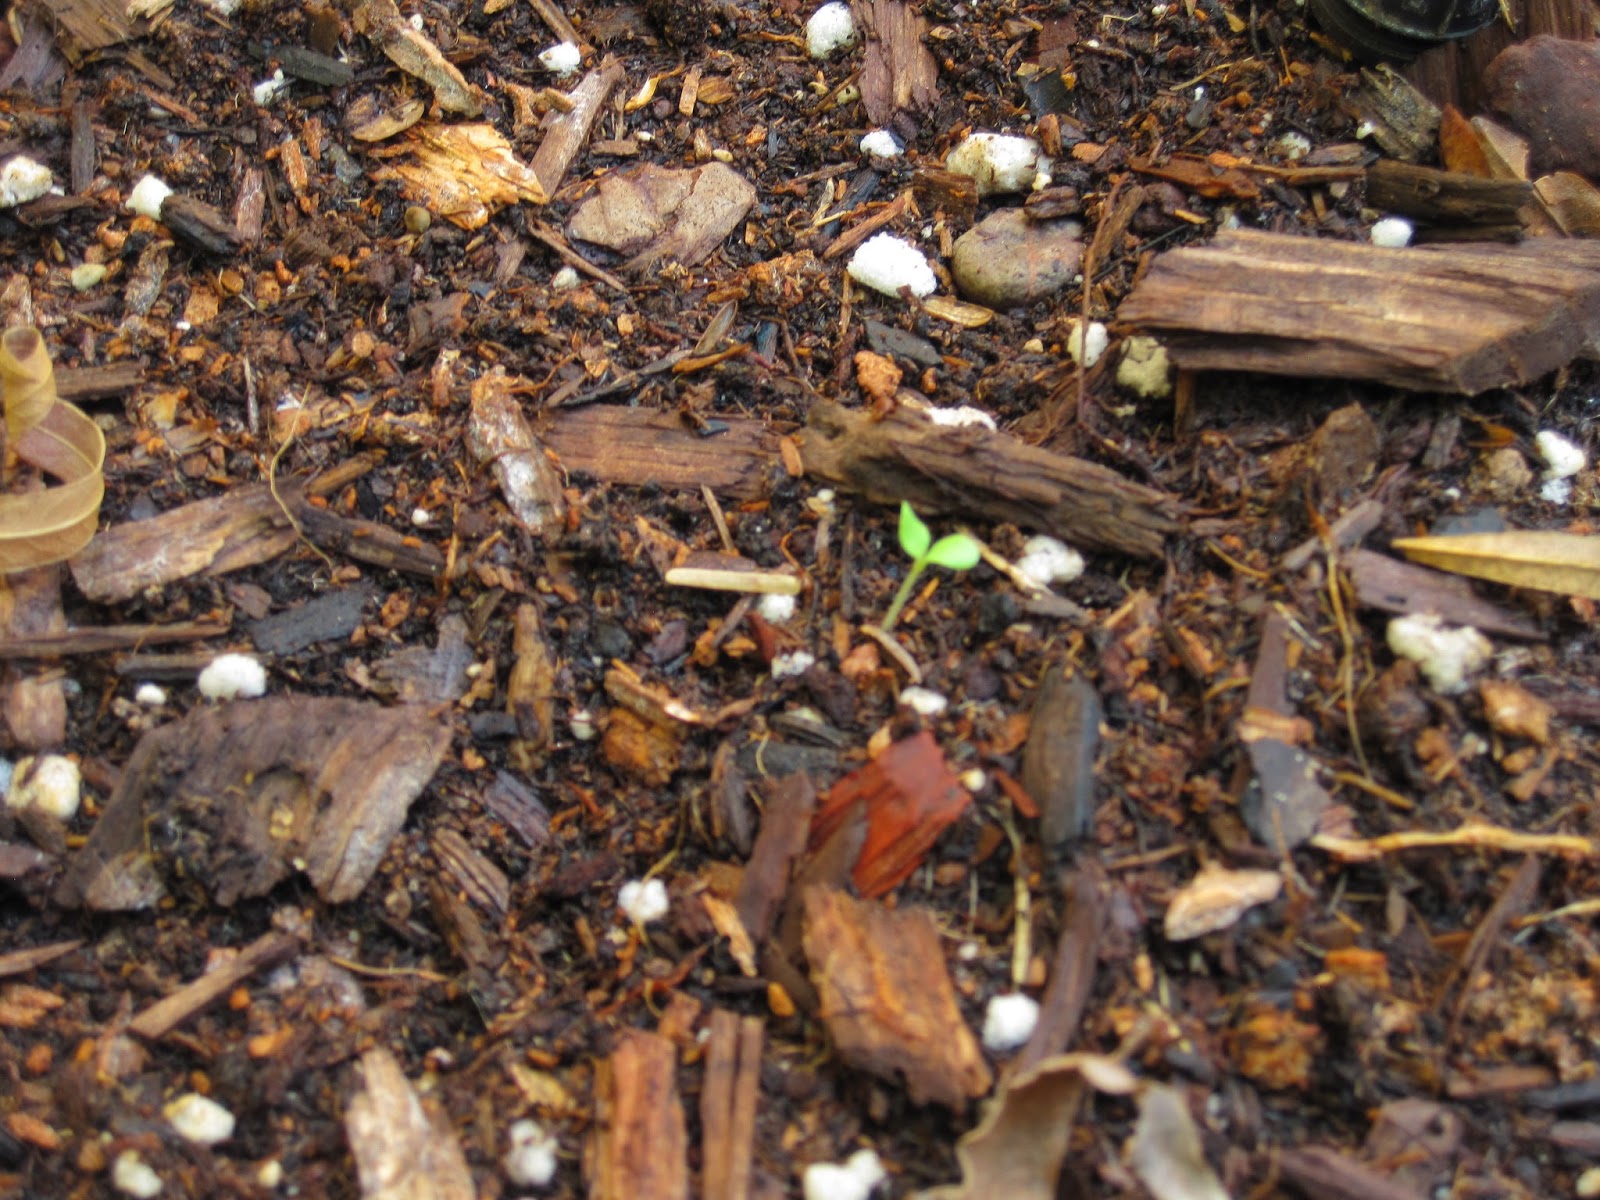
I had to look really hard to see them, but some lettuces are poking their heads through as well!

Tiny lettuce!
The future site of leafy greens!

In other parts of the yard–we finally have citrus!  Earlier in the summer we planted a Meyer Lemon tree  and I am so excited that the lemons are growing and most importantly, are staying on the tree!  I have visions of lemon curd dancing in my head!  Since it’s a baby tree (as are all of our citrus trees) I am keeping my expectations low, but there are at least 12 lemons on it!

Meyer Lemon

Also, this year is the first year that our two year old Mexican Lime tree has borne fruit!  There are quite a few on this tree as well, and I expect they will be ripening very soon. I just picked one the other day out of sheer excitement!

Mexican Lime (a.k.a. key limes)

So, it begins again with the garden, and I’ll be updating you on the trials and tribulations in the weeks to come!

Spicy Asian Chicken Wings

There are times when I look for any old excuse to make chicken wings:  Game night?  Monday Night Football?  A weekday ending in the letter “y”?  I never know when the craving for chicken wings is going to strike, but when it does, you can be sure that it will be for these sticky, spicy-sweet, Asian-style wings.  Today just happened to be a weeknight ending in the letter “y” and so it was the perfect excuse to whip up a batch!

Unlike chicken wings from a restaurant, these wings are baked in the oven and then coated with a thick, smoky sauce that’s just spicy enough to make things exciting!  They couldn’t be easier to put together on a weeknight.

I brined these wings for about an hour in a very simple brine of water, salt, lemon and garlic.  It’s not necessary to do this step, but it does add a base layer of seasoning to the chicken.  If you don’t have time to brine your chicken, you can simply season it well with salt, pepper and garlic powder if you prefer.

To make the brine, combine one cup of water with 3 tablespoons of kosher salt in a medium saucepan.  Bring the water to a boil and stir to dissolve the salt.  Add 3 cloves of smashed garlic and one lemon cut into eighths.  Add one cup of cool water and one cup of ice to the mixture.  Stir to combine.  Place chicken wings in a one gallon zipper bag and pour the cooled brine with the chopped lemons and garlic over the chicken.  Seal the bag and place inside of a bowl.  Place in the refridgerator for at least one hour.   When you are ready to cook the chicken, drain the brine and rinse the chicken.  Pat the chicken dry with paper towels and season with ground black pepper and garlic salt and a drizzle of canola oil.

For the sauce:

2 tablespoons Soy Sauce
2 tablespoons hoisin sauce
2 tablespoons rice vinegar
1 teaspoon sesame oil
1 tablespoon sambal oelek (chili sauce)
1/2 teaspoon fish sauce (optional)
1 inch piece of fresh ginger, grated (approximately 1 teaspoon)
3 garlic cloves, minced
1 hot chili pepper, such as a serrano chili or jalapeño, minced
2 1/2 tablespoons brown sugar
1 teaspoon smoked paprika
juice of 1/2 lime
1/4 cup water

Combine all of these ingredients in a small saucepan and bring to a boil.  Reduce heat and simmer until the mixture thickens, then remove from heat.  If you like your wings really spicy, you can also add  a half teaspoon of cayenne pepper or red chili flake to the sauce!

Preheat the oven to 425 degrees.

Place about 2 tablespoons of corn starch in a plastic bag.  Place a few wings in the bag at a time and shake to lightly coat with the corn starch.  Place on an oiled roasting grate and bake for 40 minutes until golden brown and cooked through.

Pour the sauce in a large mixing bowl.  Place the cooked chicken wings in the bowl and toss to coat with the sauce.  Place the chicken back into the oven and cook for an additional 5-7 minutes to glaze the wings.

Serve with fresh cilantro, lime wedges and chopped scallions and then gloat in the knowledge that you just made wings better than any takeout wing restaurant!