Latest Posts

Prawns and Pancetta Salad with Creamy Cilantro-Lime Dressing

Many years ago when The Man and I first started dating, we bought a funny little cookbook called “Will Cook For Sex: A Guy’s Guide to Cooking” by Rocky Fino.  It was an impulse buy. The author just happened to be doing a book signing at the time and we liked his spiel.  The recipes are very simple and straight-forward–and as the title suggests, written for a guy who wants to…impress the ladies, if you know what I mean!   Now that I think about it, it was the first cookbook purchase of our relationship! We don’t use this cookbook much anymore, mostly because our cooking skills have advanced and we have collected so many other cookbooks throughout the years; but this adapted recipe made its way into our regular rotation and we make it fairly often.  
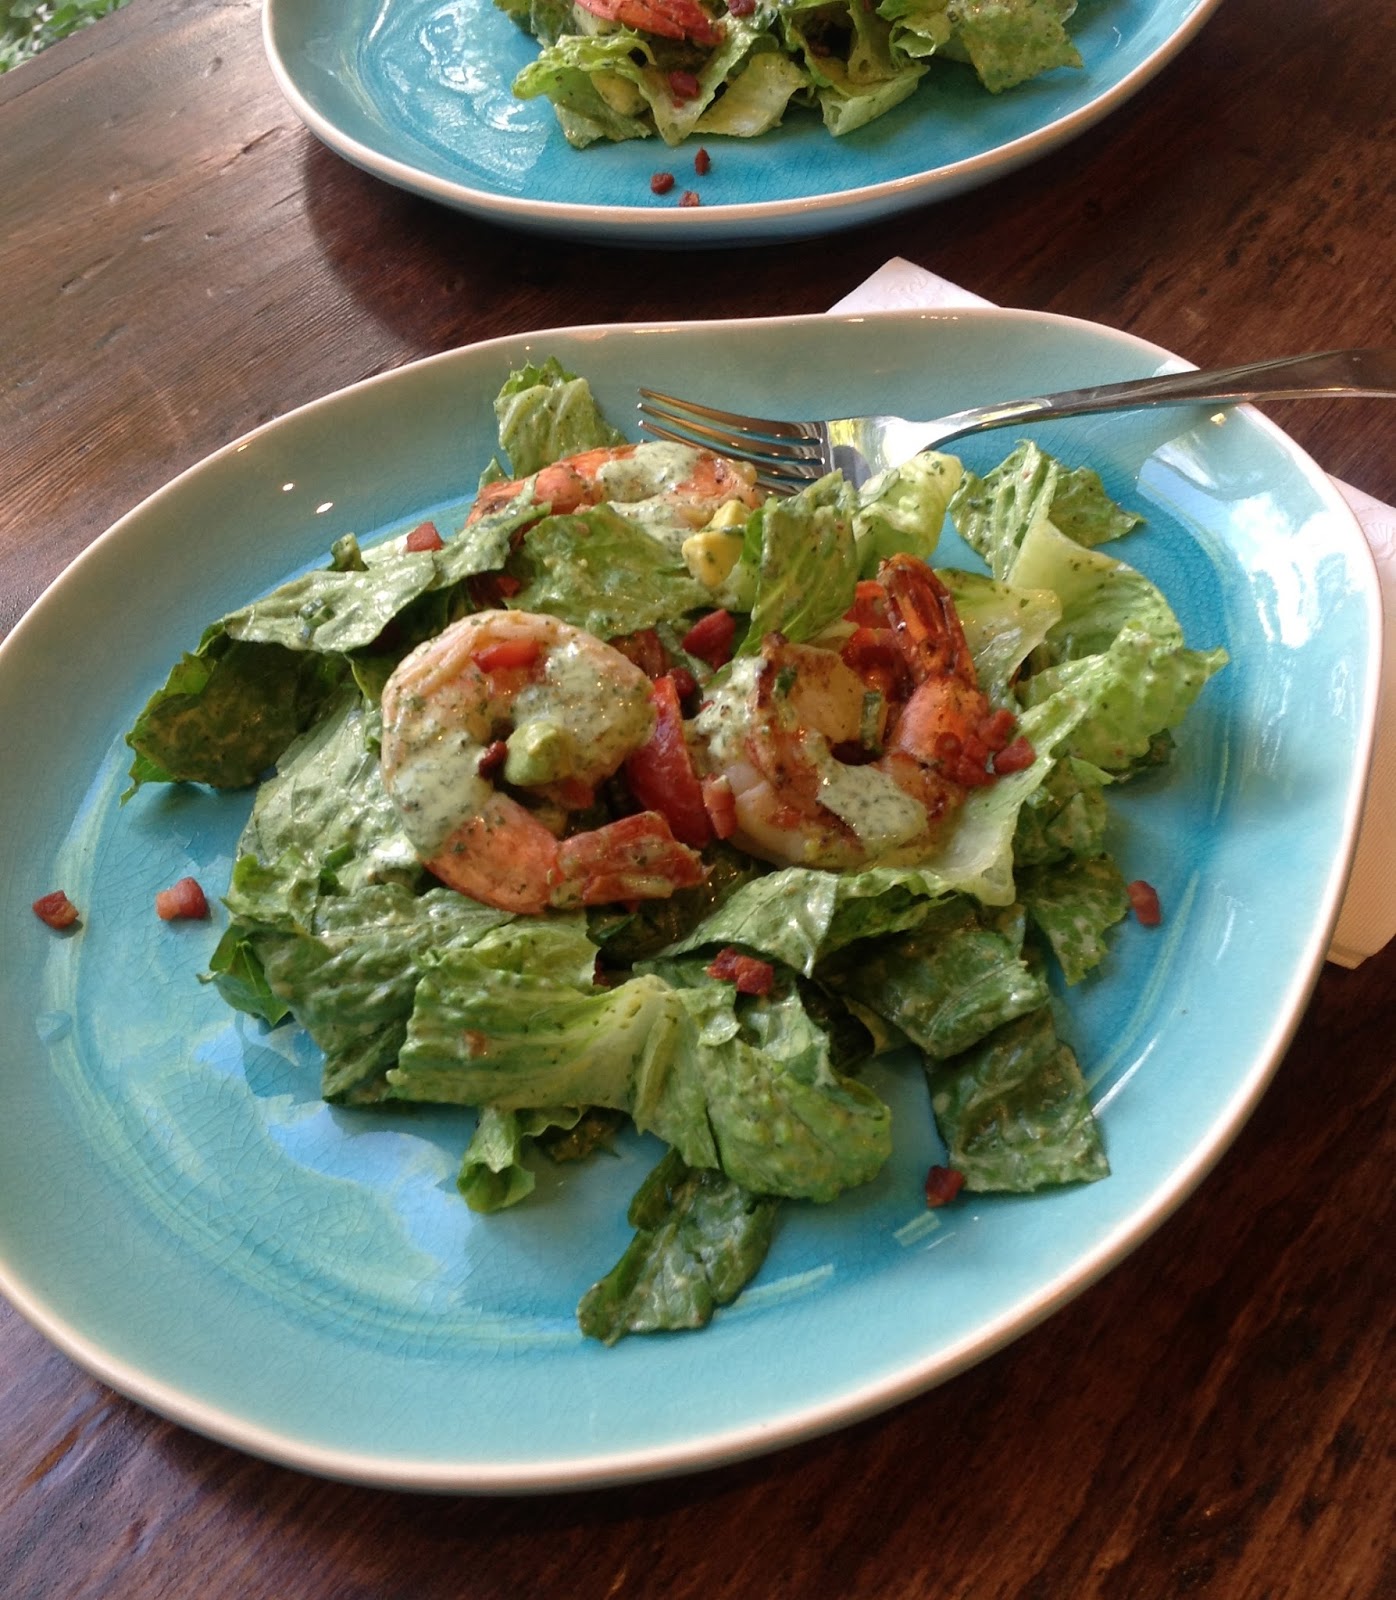
I used pancetta in this salad, because of course, pancetta makes everything taste betta! I know, completely corny, but pancetta just adds so much flavor!  Now, if you’re concerned about the added fat and calories, allow me to point out that the dressing is completely fat free!  See how that works? I also found some really nice tiger prawns from Costco that were very large, fresh and reasonably priced.  They were in the shells, but were already deveined, which made the preparation easy. The original recipe suggested boiling the shrimp, but I find that they are much more flavorful when grilled.
This recipe makes a large dinner salad for two people or an appetizer for four.  You’ll need:
1 head romaine lettuce, chopped
2.5 to 3 ounces diced pancetta (or two slices of bacon, if you prefer)
1 pound prawns
1 cup small tomatoes, like grape or cherry tomatoes, sliced in half
1 whole avocado, diced
1 scallion, green tops sliced thin
cilantro leaves for garnish
canola oil
salt
pepper
For the dressing:
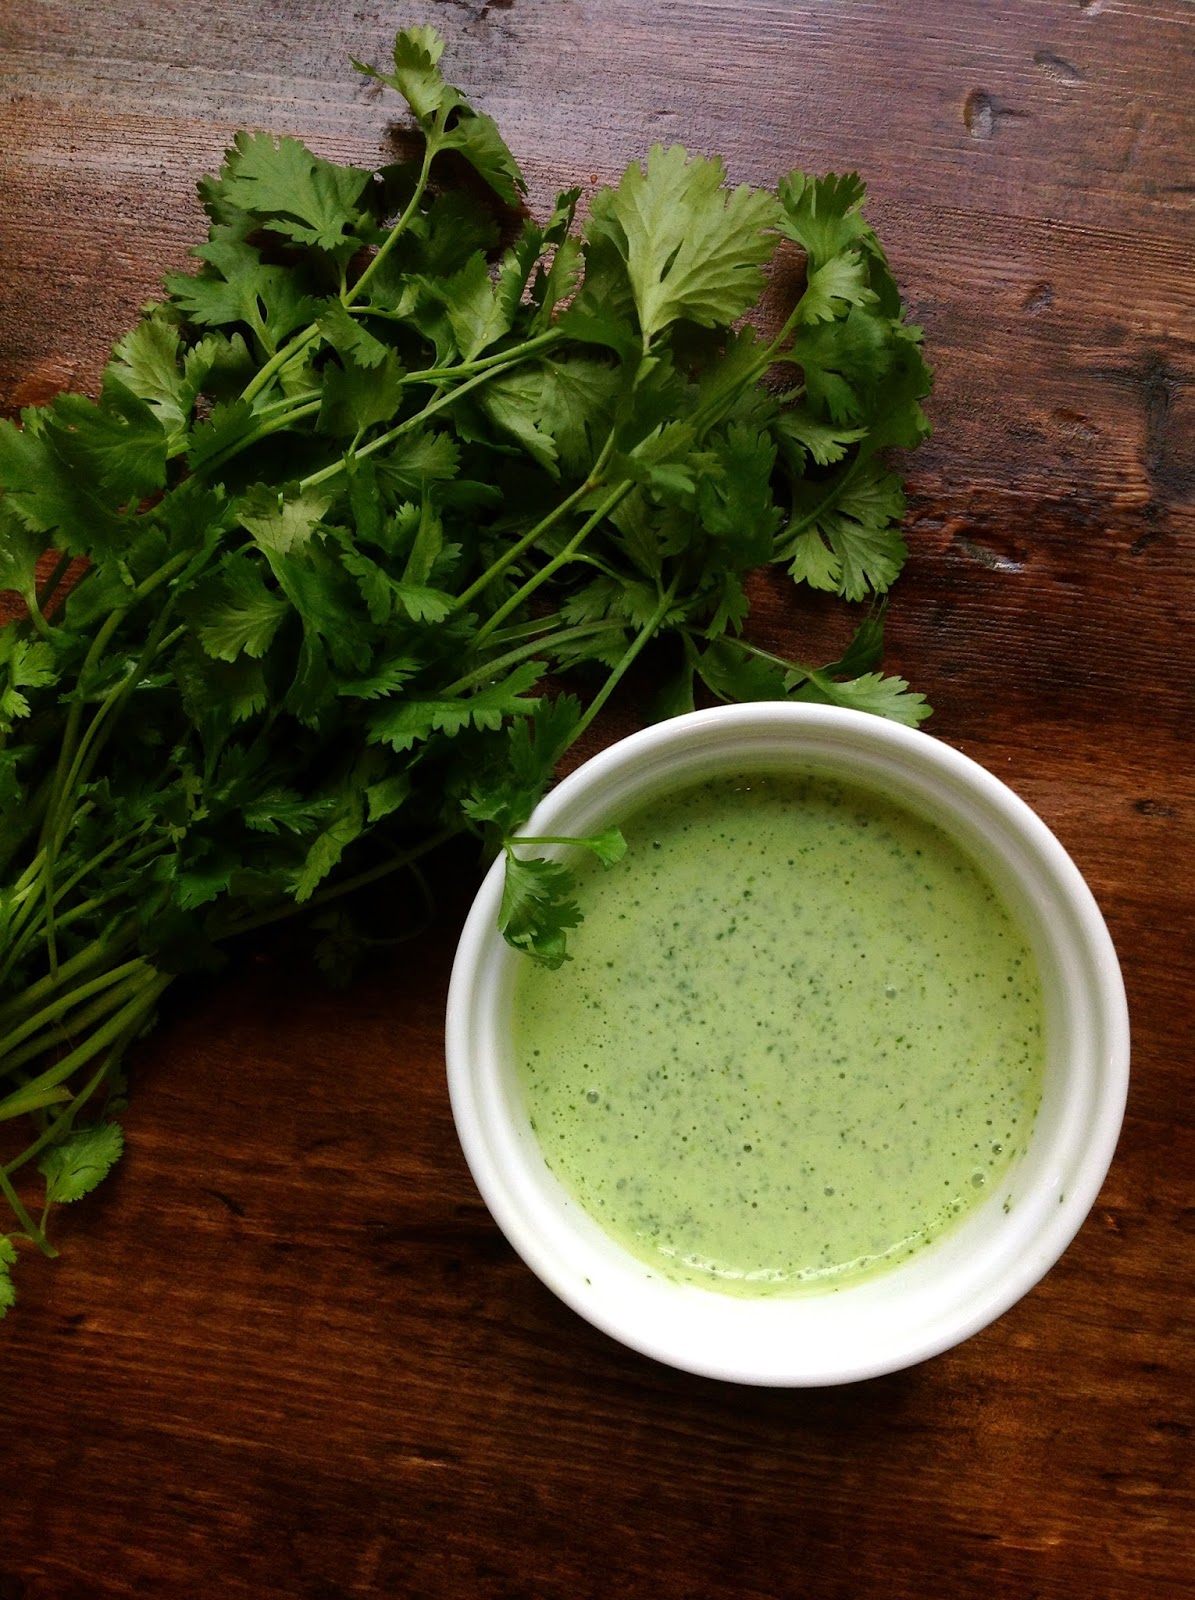
1 cup cilantro leaves (about a half bunch), stems removed
1/4 cup plus 2 tablespoons nonfat Greek yogurt
juice of one lime (or more to taste)
salt
pepper
honey or agave syrup (optional)
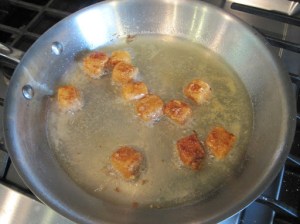
Cook the pancetta on medium high heat in a skillet until the fat has rendered and the pancetta is crispy.  I initially used 2.5 ounces of diced pancetta, but had to increase the amount because I kept sampling it to make sure it was edible!  It’s a tough job, but I wanted to make sure it wasn’t poisonous or anything.  Drain the cooked pancetta on a folded paper towel and set aside.

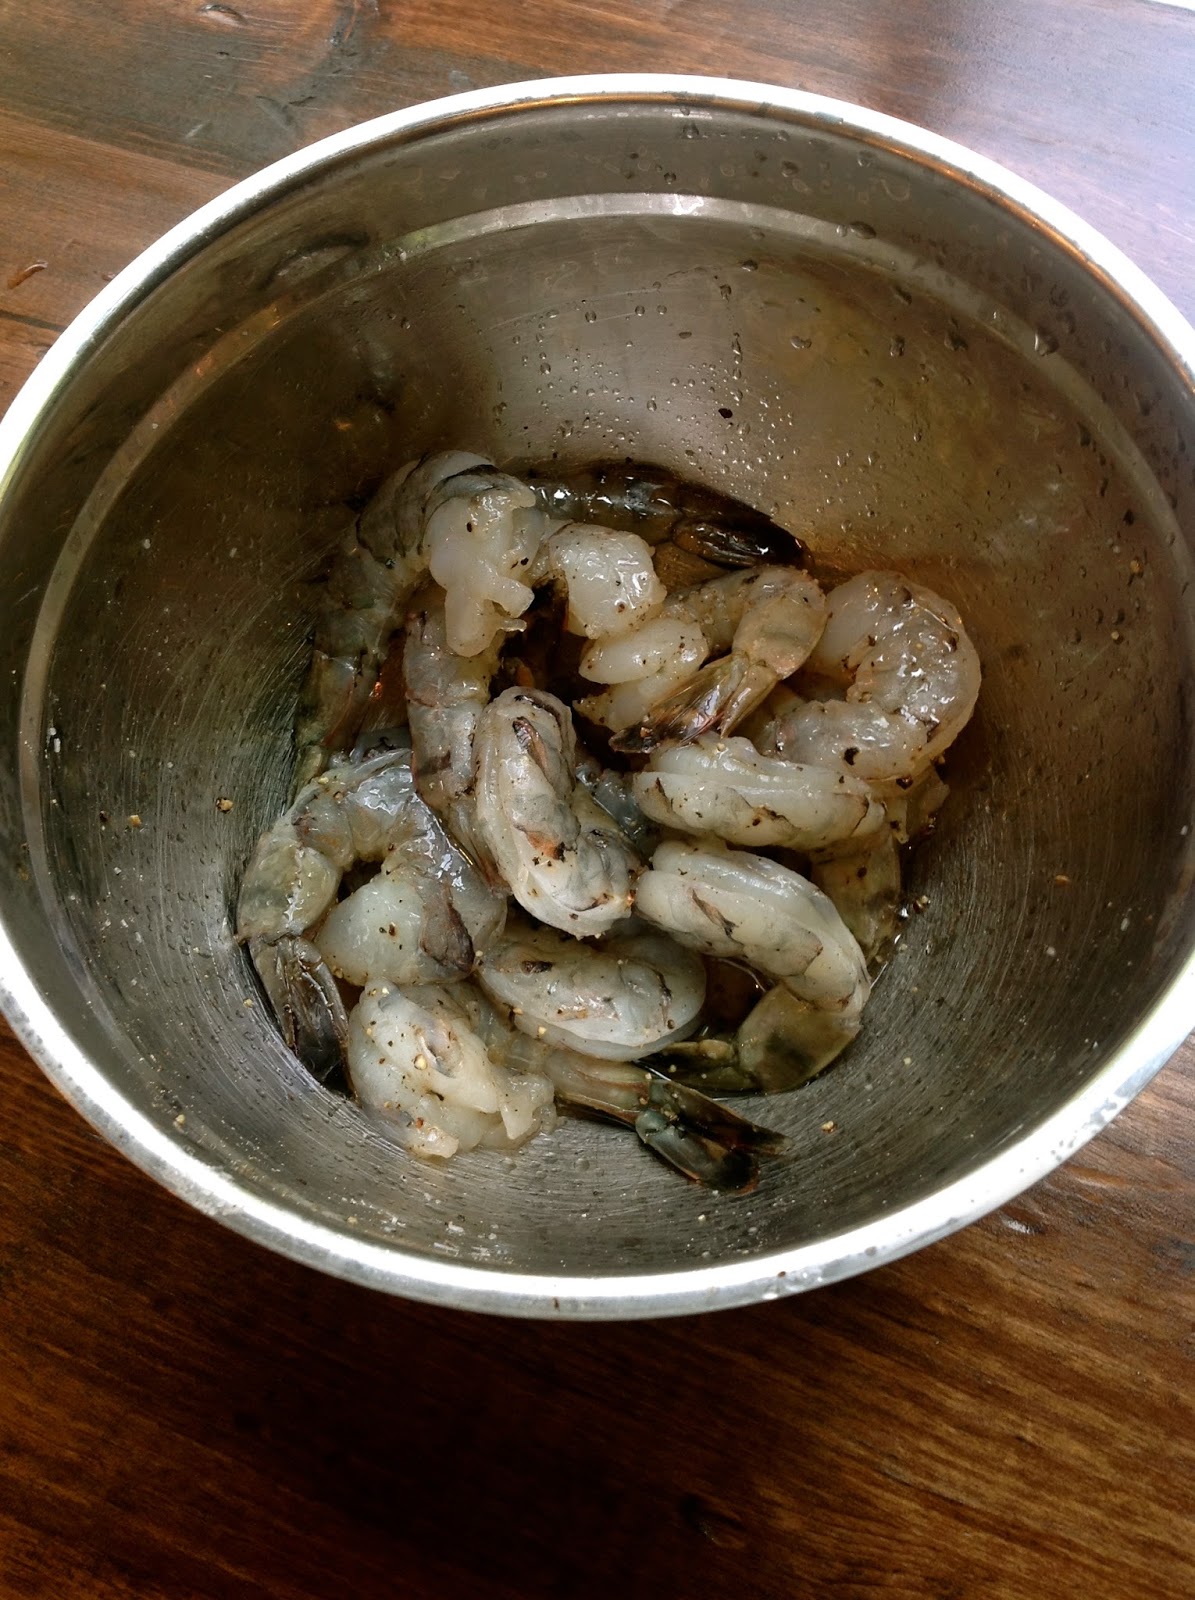
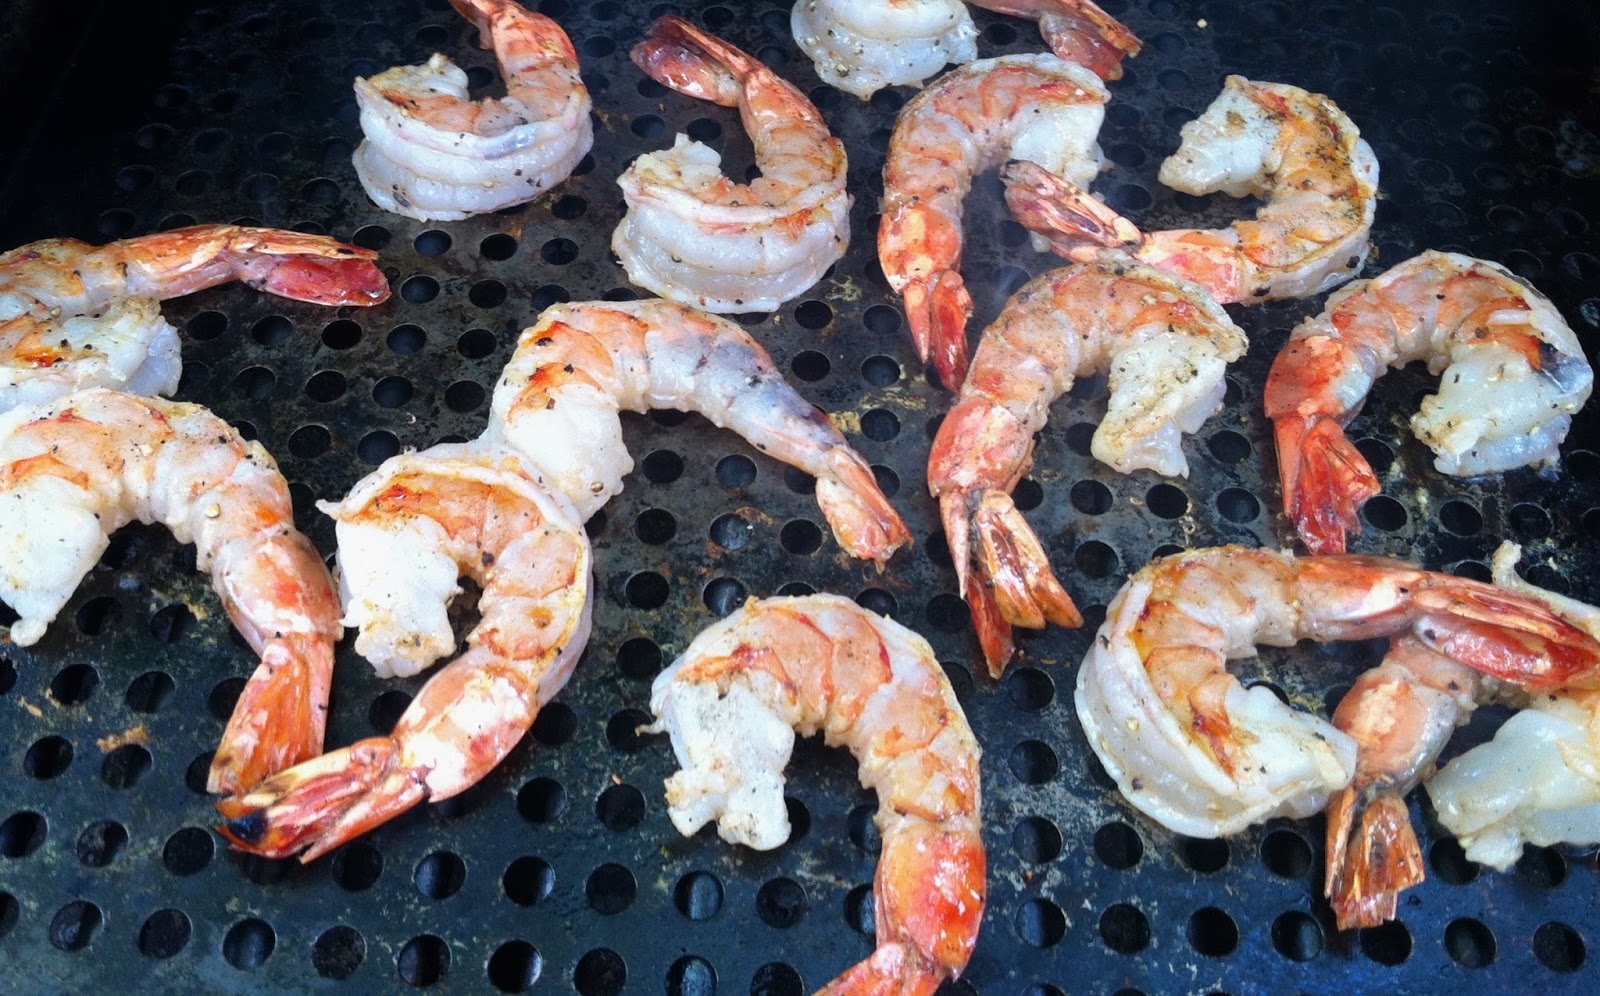
Shell and devein the shrimp (if they aren’t already deveined) and season with salt and pepper and toss with a generous drizzle of canola oil.  This will allow the shrimp to cook on the grill without sticking.

Preheat the grill and place a grill pan or a grill topper on the grates.  The grill topper is excellent for grilling smaller items that will slip through the grill grates.  There is no need to oil the pan since we oiled the shrimp.  When the grill pan/topper is very hot, pour the seasoned shrimp on it.  Cook for about 2 minutes or until the shrimp are pink and opaque.  They cook very quickly so be careful not to overcook them. Remove the shrimp from the grill and set aside.  Squeezing a little lime juice over the cooked shrimp gives them a very nice flavor. 
For the dressing, combine the cilantro leaves, yogurt, lime juice, salt and pepper in a blender or food processor and blend until smooth.  I like to add a small amount of sweetness to the salad dressing just to balance the acidity of the lime juice and yogurt, so I’ll usually add about 1/4 to 1/2 teaspoon of agave syrup to the to mixture. Adjust the seasoning as needed and place in the refrigerator.

I use romaine lettuce for salads with a creamy dressing because the leaves are firm and hold up well.  Chop the lettuce, avocado, scallion, tomatoes and cilantro and mix in a large salad bowl.

Add the dressing, shrimp and reserved pancetta to the salad and mix gently using your hands.

Home Sweet Home – How I Spent My Summer Vacation

I’m finally home from my summer vacation and as awesome as it was, I am always reminded that there is no place like home.  I saw some amazing things; consumed a great many calories; tasted lots of beer and wine; walked everywhere! Uphill–both ways!  It was incredible and now that I’m home, I feel refreshed, excited about life and re-energized.  Although I run the risk of sounding like a beginning-of-the-school-year essay, here is a taste of what happened over the past 10 days:

I started my vacation in Santa Barbara, California.  The weather topped out at a cool 70 degrees and the sun didn’t come out until the afternoon.  I had a chance to walk along the ocean and feel the salt air on my face.

We headed up to wine country and tasted so much wine that my head spun!


I didn’t drink all of these, I promise!

Then we flew to Portland, Oregon where the bulk of the vacation was spent.  I started almost every morning with a latte, and every single one had a pretty pattern on top!

I ventured to Portland’s Japanese Gardens and saw landscapes so magical they seemed to come straight from a fairy tale.

Portland Japanese Gardens
I also learned that I could make a bona-fide hobby out of staring at fish.  If there was a koi pond (and I stumbled across many on this trip) then you could find me sitting and staring at the fish for a while.  It is addicting and so peaceful that I’ve already requested a koi pond from the Man of the House!  
  

Koi pond at the Japanese Gardens
Koi pond in the middle of town!
I hiked with friends to Silver Falls and was stunned at the amount of natural beauty that surrounded me.

And lest you think that I had forgotten about eating amazing food, rest assured that there wasn’t a calorie left uneaten (or un-drank for that matter).  I dipped a toe into Portland’s microbrew culture and learned that while I haven’t quite developed a palate for the hoppy IPAs (India Pale Ale), I really loved the sour beers that we sampled at Cascade Brewing.  They had a tart, vinegary, fruity flavor, not unlike wine.  
Sour Beers!
Tasting Room at Commons Brewery
Then, there was the fresh, local produce!  The Portland Farmer’s Market is my wonderland.  Held every  Saturday from March through December, it is by far, the best Farmer’s Market I’ve ever been to.  Everywhere I looked there were fresh vegetables, meats, dairy, farm fresh eggs, mushrooms, artisan cheese and bread!  As a matter of fact, the header photo for this blog was taken at the Farmer’s Market last year.  I really wished I could have brought these tomatoes home with me!
Look at these gorgeous heirloom tomatoes!

I never knew bell peppers came in PURPLE!
So many mushrooms!

 And then there were the food stalls!  It’s almost too much to absorb in just one day!

As much fun as I had, I didn’t realize how much I missed home until I walked in the door.  Our cats were happy to see us–really they were! The flowers out back were in bloom again, which was an unexpected thrill and it even looks like we might get some late-arriving cucumbers in the garden!  My retinas will have to get re-accustomed to the bright, bright desert sun after having been in filtered sunlight all week, but it’s all good!  Can’t wait to get back in the kitchen!

Day 1, Happy Wandering in Bridgetown

At long last, vacation time has come and I’m back in one of my favorite cities–Portland, Oregon: land of microbrews, sustainable agriculture and generally fabulous quirkiness.  The header photo on this blog was actually taken last year at the Portland Farmer’s Market and I cannot wait to go there this Saturday!  We have traveled to Portland three summers in a row to visit friends and love to discover new places as well as revisit places from our prior trips.  I spent the majority of today wandering the streets and drinking in the local flavor.  We started out with a really great breakfast at a favorite spot in the Pearl District called Isabel.  What we like about it is that they have a lot of healthier options that will keep you filled up and energized for an entire day of walking around town.  I had the “avocado scramble”–eggs, avocados, black beans, rosemary potatoes and salsa.  Even though it’s filling, it’s pretty healthy and therefore, almost guilt-free!

The only problem with having such a good breakfast is that it took a while to burn it off before I was ready to find some more fun food to munch on.  So, I walked all over the place!

One of the most interesting things in Downtown Portland are the food carts.  There are small clusters of them all over the place and they have absolutely amazing fare.

Quintessential Portland:  Food Carts and a guy playing a saw!

Food Carts on 10th Avenue, Downtown Portland

Once I walked enough to get hungry again, I had the most amazing bulgogi taco from a cart called “Korean Twist” on SW 5th Avenue.  The beef was tender and well seasoned and topped with fresh slaw, cilantro and their house special sauce!  Best $2 spent all day!

Bulgogi Taco from “Korean Twist”

While searching for an entirely different restaurant, I was drawn in by the sight of a baking tray of macarons in the window and discovered this lovely French restaurant called Little Bird Bistro.  We came back later for dinner and enjoyed an assortment of amazing appetizers. We started with a dozen of the freshest oysters I’ve ever had! One half dozen were called Shigoku, from Washington and the other half, the ones with the fluted shells, were called Netarts, from Oregon.  They were sweet, tender and had the subtlest flavor of the ocean. 

Next we ordered the goat cheese gnocchi with lamb necks, peppers and mint.  The flavor was incredibly complex: the peppers added a bit of heat, balanced by the creaminess of the goat cheese gnocchi.  I could have eaten another plate of this!

Goat Cheese Gnocchi, roasted lamb neck, peppers, mint

Another incredible dish was the smoked trout with creamed leeks, buttermilk blini and trout roe.  If it weren’t poor form, I would have licked the plate!

We ended our evening at Little Bird with a dish of fig and butter pecan ice cream followed by those tiny little macarons that caught my eye earlier!  What a great day! I can’t wait to see what I find tomorrow!
Blackberry Macarons

Pizza Margherita and Homemade Pizza Dough

Sometimes it’s the simplest things that taste the best! This weekend I set out to make the simplest of pizzas using fresh ingredients and made almost completely from scratch.  I say “almost” because I didn’t make the mozzarella…this time. I started by making the pizza sauce from fresh tomatoes, garlic and onions, slowly roasted on the grill and then made into a sauce that was reduced on the stove top until it was thick and rich.  Then I made the dough by hand, with soft, fluffy “00” pizza flour–you can find this at your local Italian import store or online.  We order our 00 flour from Giusto’s Vita-Grain, but all-purpose flour will also work. To top it off, a simple combination of fresh sliced tomatoes, fresh mozzarella cheese, grated parmesan and fresh basil.  Delicious and oh, so simple!
I’ll start first with the dough.  Pizza dough from scratch tastes better and is easier to work with than any store-bought pizza dough!   This recipe is adapted from the recipe right on the back of the Giusto’s bag.
Pizza Dough:
4 cups “00” pizza flour or all purpose flour
1 teaspoon salt
1 bottle of room temperature beer
1/4 cup warm water
2 1/4 teaspoons yeast
2 tablespoons olive oil
Mix the yeast into the warm water in a small mixing bowl.  Combine the flour, salt and olive oil in a mixing bowl and slowly incorporate the liquid, using additional flour if needed.  Knead the dough for 7 to 8 minutes.  I used my Cuisinart food processor to do this and it takes considerably less time.  I placed the flour, salt and olive oil in the bowl of the food processor outfitted with the dough blade.  Turn on the dough setting and pulse until the dry ingredients are mixed.  Turn the machine on the dough setting and slowly pour the beer and the yeast and warm water mixture into the feed tube.  When the dough cleans the sides of the bowl,  continue to knead for 30 additional seconds.   Remove the dough from the food processor (or stand mixer if you have it) and quickly roll into a ball.
Pour a little olive oil in the bottom of a mixing bowl and place the dough ball inside.  Coat with a little more olive oil.  Cover the bowl with plastic wrap or a damp kitchen towel and put in a warm spot.   A perfect warm spot is in an oven that has been preheated for one minute at 350 degrees.  Turn off the oven after one minute and place the bowl inside.  Allow the dough to rise for 45 minutes.  It should double in size.

Risen pizza dough

I’m going to give the credit for this sauce recipe to the Man of the House–being half Italian, it’s in his blood to make great sauce!  To make the pizza sauce, place several tomatoes, four cloves of garlic, one whole onion, roughly chopped on a sheet pan and drizzle with olive oil and sprinkle with salt and pepper. Place either in a 350 degree or on a grill heated between 300-350 degrees.  Roast the vegetables for at least an hour or until the skins burst and become wrinkly.  Roasting the tomatoes brings out the sweetness of the tomatoes and is a great way to get that summer sweet tomato flavor in the winter time when tomatoes are out of season and generally not very tasty.

After the tomatoes have finished roasting, pour the entire contents of the pan into the food processor and puree.  Then put the puree, along with a tablespoon of freshly chopped oregano, about 1/2 teaspoon of red pepper flake, salt and pepper into a sauce pan over medium high heat.  Reduce the sauce until it is thick enough to run a spoon through it and hold its shape.

Now the rest is the easy part! Preheat your oven or grill to 500 degrees.  After the dough has risen, punch it down and divide it in portions (depending on the size you want for your pizza). This dough yields four personal sized pizzas or two large pizzas.  Place the dough ball on a floured surface and knead for a few minutes to incorporate the extra flour–you don’t want the dough to be too sticky.  Roll the dough out with a rolling pin and stretch it over a pizza stone or pizza pan.  We like to brush the dough with olive oil before baking.  To keep the dough from sticking, either oil the stone or pizza pan with olive oil and sprinkle corn flour or corn meal over it, or, do what I did for this pizza and roll it out on top of parchment paper on a pizza peel, then slide it onto the hot baking stone. 
We like to add some chopped rosemary to the pizza dough for extra flavor.

Three simple, fresh ingredients! Basil, tomatoes, fresh mozzarella.

Bake for approximately 8 to 10 minutes, being careful not to burn it.  Blistering is good, burning is not!

Lemon-Herb Shortbread Tea Cookies

Monsoon season is upon us and I can’t think of a better way to enjoy it but to sit and watch the rain over a nice cup of hot tea and a plate of cookies.  Some of you are probably thinking that it’s too hot for tea, but I drink green tea each and every day, throughout all four seasons.  I decided to make these cookies after listening to The Splendid Table this weekend.  This week’s episode featured chef and author Sally Schneider who demonstrated making herb salt, which I definitely plan to make soon.  But what really caught my attention was when she started talking about adding the herb salt to chocolate cake and butter cookies!  I rarely make cookies, but one of my favorite cookies is shortbread.  I love that it’s not too sweet and has a texture that stands up to a cup of coffee or tea.  I adapted Ina Garten’s basic shortbread cookie recipe and added lemon zest and Herbes de Provence to the dough.  It resulted in a cookie that was subtly sweet with floral and herb notes that was crisp enough to dunk in your coffee–almost like a biscotti!

It is easiest to make this dough in a stand mixer.  I have to give special thanks to my friend and neighbor, Kim, who allowed me to borrow her KitchenAid Mixer for this project!   I really need to get one of these! 
3 sticks butter, softened (I used 2 sticks of salted butter and 1 stick of unsalted butter)
1 cup sugar
3 1/2 cups all purpose flour
1 teaspoon vanilla extract or vanilla bean paste
zest of one lemon
1 1/2 teaspoon dried Herbes de Provence*
1/4 teaspoon salt
*Be careful to read the label on the herbs and make sure that it doesn’t contain garlic, as some Herbes de Provence mixtures do.  That would make for a very weird tasting cookie!
Preheat the oven to 350 degrees.  Place all of the ingredients in the mixing bowl and mix on low speed until the dough begins to come together. If the dough is too dry (as mine was) add water a little at a time until the dough comes together.

Turn the dough onto a floured surface and shape it into a log.  You can also shape it into a disk if you plan to roll it out and use a cookie cutter.

Place the dough in the refridgerator for at least thirty minutes. Then slice the dough into rounds and place onto a parchment paper lined baking sheet.

I sprinkled the tops of my cookies with a mixture of turbinado sugar and finely chopped fresh rosemary, but this is completely optional.

Bake for 18 to 22 minutes, or until the edges of the cookies just begin to turn golden brown.  Remove from the oven and place on a cooling rack.

Grilled Corn and Black Bean Salad with Lime-Cilantro Vinaigrette

We are now halfway through the summer and the bulk of our summer vegetables have completed their season.  As much as I hated to admit it, the time had come to put part of the garden out of its misery.  We cut down almost all of the tomato plants, leaving only the green zebra and the yellow pear to finish out their yield.  Recently I learned on our local NPR program, Desert Bloom that by cutting the tomatoes almost all the way down and mulching them,  we may get a second round of tomatoes in September.  So, that’s what we did this morning and boy, was I sentimental about it!  I’m going to pause  now for a moment of reflection on our first real summer crop and a remembrance of the herbs that perished during the heatwave:  Purple Sage, English Thyme, French Thyme, Biergarten Sage, Greek Oregano. They served us well and died spectacularly–seriously, they turned white and disintegrated!  115 degrees will do that to tender herbs!
Reminiscing on how pretty everything was just 6 weeks ago!
I’m so glad I was able to get some good photos of the garden when it was doing its best in early June.  If there is a lesson to be learned from the garden this year, it is that we should plant even earlier–maybe between February 1 and February 15, so that the tomatoes will be at their peak in May, when the heat isn’t so extreme.  And even though we didn’t get bushel baskets full of vegetables this year, it was a “goodly sum” compared to previous years, and I’m excited to start over again. It’s probably about time to start thinking about planting seedlings for the fall–indoors first, of course!
This salad is one of my summertime favorites that I have adapted from the Culinary Institute of America  cookbook: Gourmet Meals in Minutes.  I’ve made it so many times that I don’t need the recipe anymore and during the summer I love making the salad with grilled fresh corn.  
Grilling corn is quite easy.  Simply peel back the husks (leave them intact)  and remove the cornsilk.  Soak the corn in water that has been salted with 2 tablespoons of kosher salt for about 10 minutes.  Place on the grill over direct medium-high heat and grill for 20 minutes or until the kernels are cooked and are beginning to char.  Allow the corn to cool and then slice the kernels off with a sharp knife.

 For the salad:

4 ears of fresh corn
3 cans of black beans, drained and rinsed
2 bell peppers, whatever color you prefer, chopped
1 red onion, chopped
2-3 cloves of garlic, minced
1 jalapeño pepper, chopped finely*
1 tablespoon chopped cilantro

Combine all of the above ingredients in a large salad bowl and combine with the cilantro-lime vinaigrette.

For the Cilantro-lime vinaigrette:

1/4 cup freshly squeezed lime juice (about 2 large limes)
1 teaspoon honey or agave syrup
1/4 cup chopped cilantro
1/2 to 1 teaspoon salt (or to taste)
1/4 to 1 teaspoon fresh ground black pepper (or to taste)
1/3 cup peanut or walnut oil
1/3 cup neutral flavored oil

Whisk together all of the ingredients except for the oils.  Allow the mixture to sit for approximately 10-15 minutes to allow the flavors to marry.  Then whisk in the oils.  If you have a nut allergy, olive oil will work just fine.  The nut oil just adds an extra dimension of flavor to the vinaigrette.  Pour the vinaigrette over the salad and mix thoroughly.  All the finished salad to sit for 5 minutes before serving.

*A note about jalapeños:   I really like this salad to have a little kick of heat.  I always buy jalapeño peppers in twos because there will invariably be one mild one and one that is nuclear!  If you happen to get the nuclear one, don’t worry–the sweetness from the honey combined with the acid of the lime will really neutralize the heat of the pepper and the salad will be lovely and well-balanced.  If the mild one happens to get chopped first, then I will add at least half of the nuclear one to the salad for good measure!

Quinoa "Fried Rice", Tempeh Lettuce Cups and Inspiration from Poppy Den

Lately, I’ve been having a little trouble finding inspiration in the kitchen.  The garden isn’t helping–the only growth this time of year being the eggplants and a few scraggly tomatoes that are trying hard to ripen in the heat.  On top of that, the Man of the House made a special request for two weeks of vegetarian dishes!  So, what’s a girl to do? My answer is to go out and find some excitement in someone else’s kitchen! So, on Friday night, the Man of the House and I joined some friends at a fairly new Asian Gastro-pub called Poppy Den.  Led by Chef/Owner Angelo Sosa and located in Tivoli Village in Las Vegas, the restaurant features Asian fusion small plates and entrees along with inventive cocktails.  We were familiar with Chef Sosa when he was a “chef-testant” on the television show, Top Chef (Season 7), so we were more than excited to see what he was cooking up.  We were not disappointed!  The service was impeccable, the food was delicious, and Chef Sosa himself visited our table and was so warm and welcoming and very involved in the service.  Not only did I leave dinner with a belly full of wonderful food, I also came home with a pocketful of ideas for dinner!

Me, a little star-struck with Chef Angelo Sosa

Here are some photos from our dinner that evening:

Beef Lettuce Cups with Fresh Herbs topped with Kimchee Pickles

Quinoa “fried rice”

Chocolate and Vanilla Tiramisu

Homemade Fortune Cookie filled with whipped cream- So Amazing

One of my favorite dishes of the evening was the Beef Lettuce Cups with Fresh Herbs, which I immediately wanted to make at home.  The dish featured marinated steak topped with fresh cilantro, toasted coconut and house-made “kimchee pickles”.  Because we’re temporarily vegetarian, I decided to use tempeh and portobello mushrooms in place of the meat.  The tempeh and mushrooms are first marinated in a mixture of soy sauce, chili sauce, rice vinegar and agave syrup and then grilled on the stove on a grill pan.  Tempeh is a vegan product that is made from fermented soy beans.  It has a nutty and chewy texture and I like to use it as a meat replacement in chili and heartier dishes.  It’s relatively inexpensive, around $2.00 per package and can be found near the soy products and meat substitutes in the grocery store.

The Asian Marinade is actually the same sauce that I also used in the quinoa fried rice.  It’s incredibly versatile and I use it as a dipping sauce for dumplings, marinade for meat, as well as a stir fry sauce.

Asian Marinade/dipping sauce:

1/4 cup soy sauce
2 tablespoons rice vinegar
1 teaspoon sesame oil
1 teaspoon red chili flakes
1-2 teaspoons chili sauce (sambal oelek or chili garlic sauce–I use these interchangeably)
1-2 cloves garlic, minced
knob of ginger, grated or minced finely
2 teaspoons honey or agave syrup
2 tablespoons water

Sambal Oelek and Chili Garlic Sauce

Mix all of these ingredients together and pour over sliced portobello mushrooms (gills removed) and sliced tempeh.  Marinate for 30 minutes.

Heat a grill pan on the stove and oil the grates with canola oil.  Place the tempeh and the mushrooms on the grill and cook for approximately 5 minutes on one side, then flip them over and grill for at least 5 more minutes, or until they are cooked through.

Serve in butter lettuce cups with shredded carrots, sliced green onion, and sprigs of cilantro.  I topped mine with shredded carrot and my take on Chef Sosa’s kimchee pickles.  I did not have Korean chili powder, which is traditionally used to make kimchee, but instead used red chili flakes and chili sauce.  These pickles are very easy to make and they are so addicting that I can probably eat the whole jar at once!  I love sweet/hot pickles!

To make the sweet and spicy pickles:

Slice four to six Persian Cucumbers, place them in a colander and set the colander inside of a larger bowl.  Sprinkle the cucumbers with approximately one tablespoon of kosher salt and allow them to sit in the colander for about 30 minutes.  The salt will draw out the excess water from the cucumbers, which will drain into the bowl.

In a small saucepan, combine 1/2 cup rice vinegar, 1/2 cup sugar, 1 teaspoon red chili flakes, 1 teaspoon chili sauce (sambal oelek) and 1 teaspoon salt. I also added 1 teaspoon of fish sauce to mine, because I like the “umami” that it adds, but it is completely optional.  Heat on medium heat until the sugar is completely dissolved.  
Rinse the cucumbers with water and put them in a glass canning jar if you have one.  Pour the vinegar mixture over the cucumbers.  Allow the cucumbers to cool completely before eating them.  They can be eaten the first day, but the flavor fully develops overnight.
Another dish we had the pleasure of trying was the Quinoa “Fried Rice” with crispy tofu and dried pineapple.  The dried pineapple was an unexpected twist, but it added a nice sweetness to the dish.  I used one slice of the pineapple, chopped and reconstituted in warm water.  Before adding the pineapple to the pan, I drained and squeezed the excess water.
1 cup quinoa
2 cups chicken broth or water
pinch of salt
olive oil
1/2 onion sliced
2 cloves garlic
small knob of ginger, grated or finely minced
1/2 cup frozen shelled edamame
1 dried pineapple ring
1/2 block extra firm tofu
1 egg, scrambled
Asian Marinade (recipe above)
First, make the quinoa.  I usually make it in a rice cooker using one cup of quinoa to two cups of water or chicken broth. A pinch of salt and a drizzle of olive oil. The quinoa usually cooks in about 20 minutes.  
The secret to getting nice, crispy tofu, is to drain it as much as possible.  Place the block of extra firm tofu inside of a colander set on a plate or inside of another bowl.  Set a plate on top of the tofu and weigh it down with a canned good.  Allow the tofu to drain for an hour, if possible.  After the tofu has drained, cut the tofu into thick slices and then into cubes.  Pour about half of the Asian Marinade over the cubed tofu and allow it to marinate for 30 minutes. 

Heat canola oil in a frying pan on medium heat, being careful not to let the oil get so hot that it scorches (trust me on that one–that’s a big mess to clean).  Put about 2 tablespoons of corn starch in a paper bag and drop a few cubes of the tofu into the bag and shake to coat.  Add the cubes to the hot oil and fry until crisp on all sides (one to two minutes) being careful not to crowd the pan.  Set aside on a paper towel to drain.

In a frying pan, stir fry the onion, garlic and ginger for one to two minutes.  Add the edamame and cook until they are heated through.  Add the drained pineapple and stir fry for another minute.

Add the quinoa and the scrambled egg to the pan and mix thoroughly.  Once it has heated through and completely mixed add the remainder of the marinade to the pan and cook for another two minutes.  Add the tofu cubes right at the end so that they remain crisp.