Latest Posts

Kale and Mint Salad with Spicy Peanut Dressing and Spatchcocked Chicken

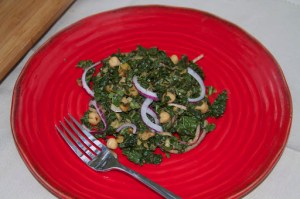
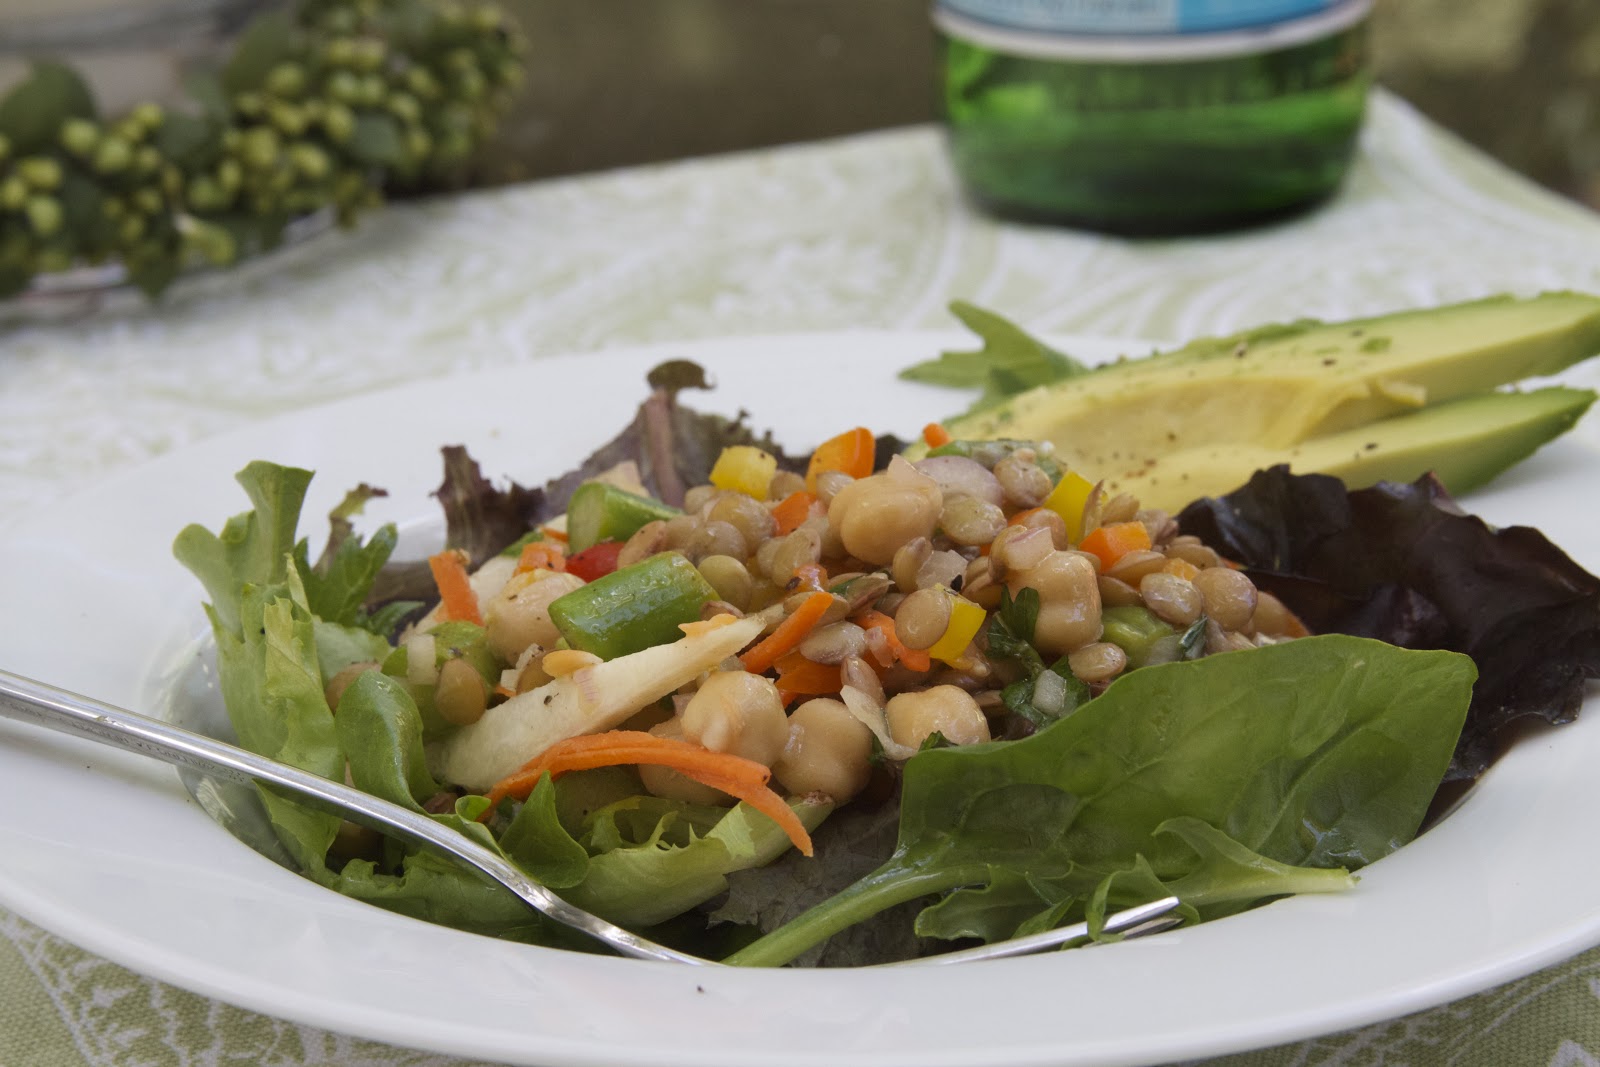
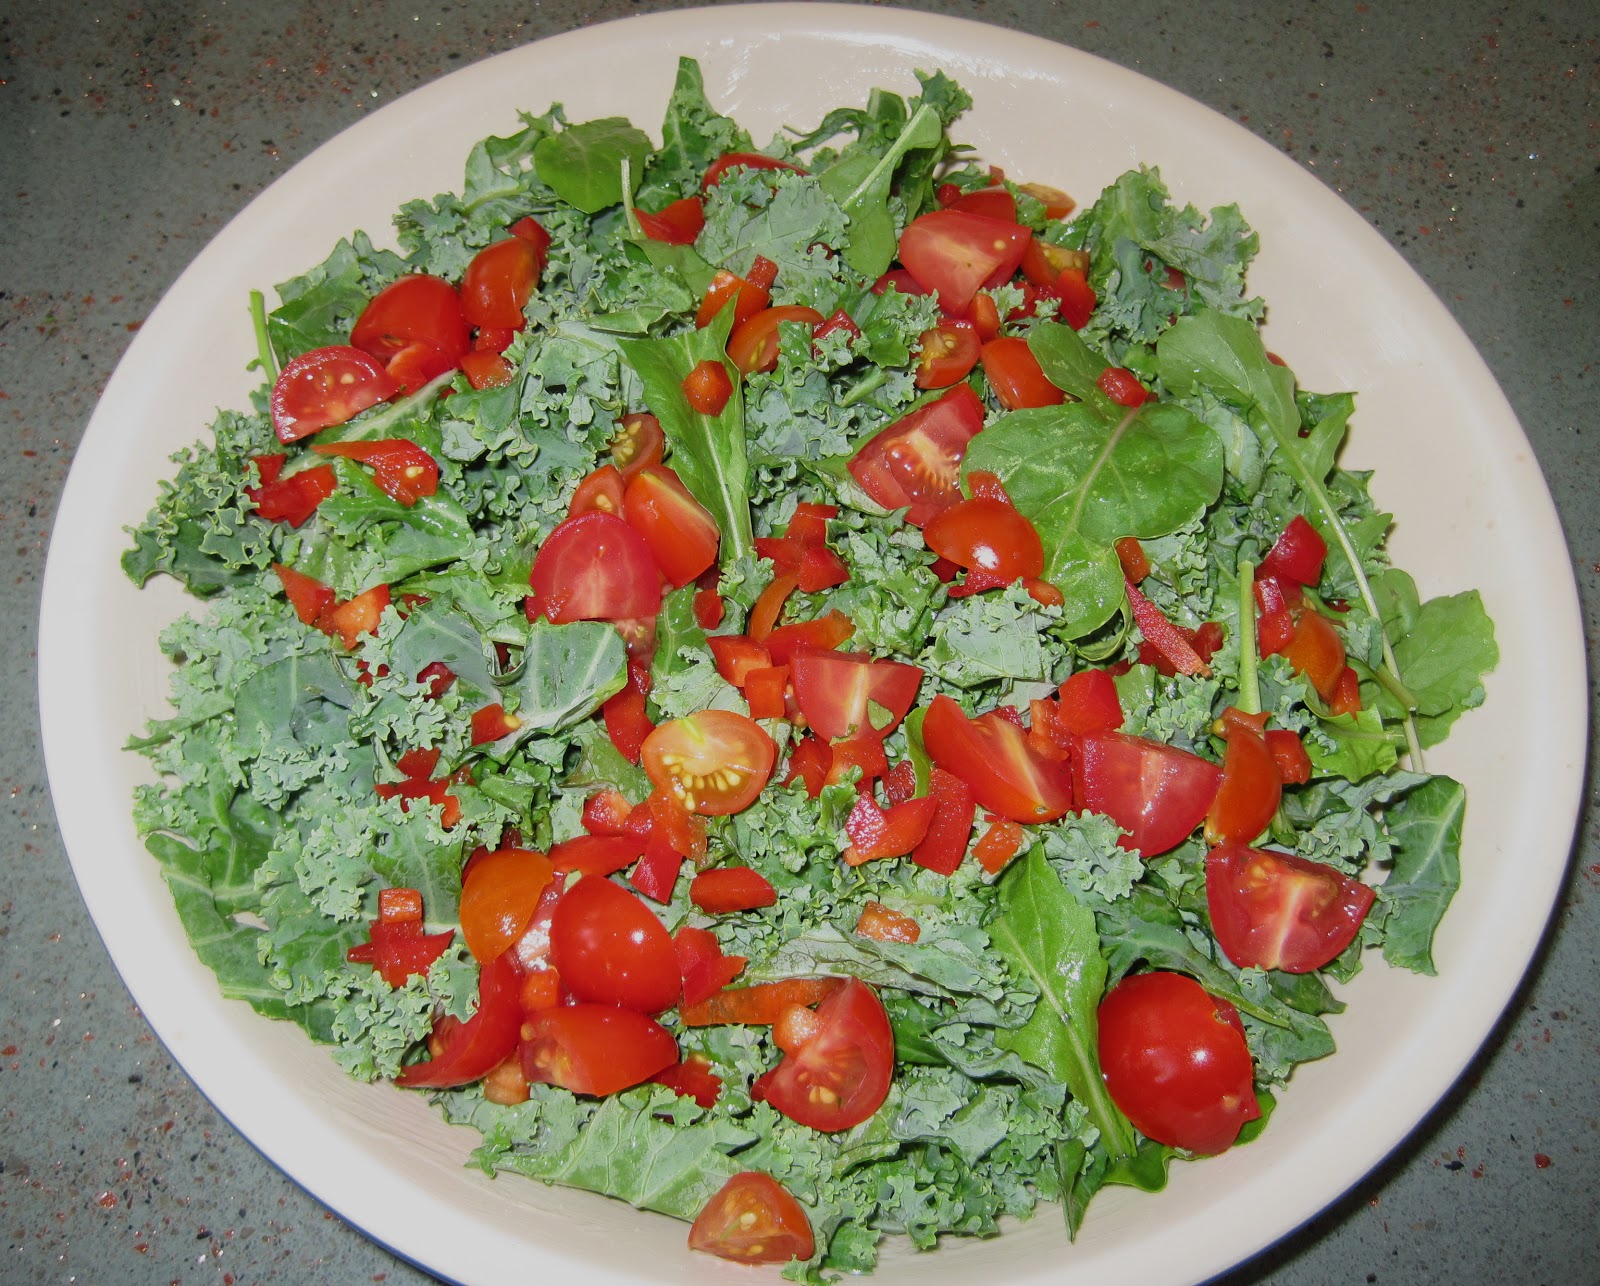
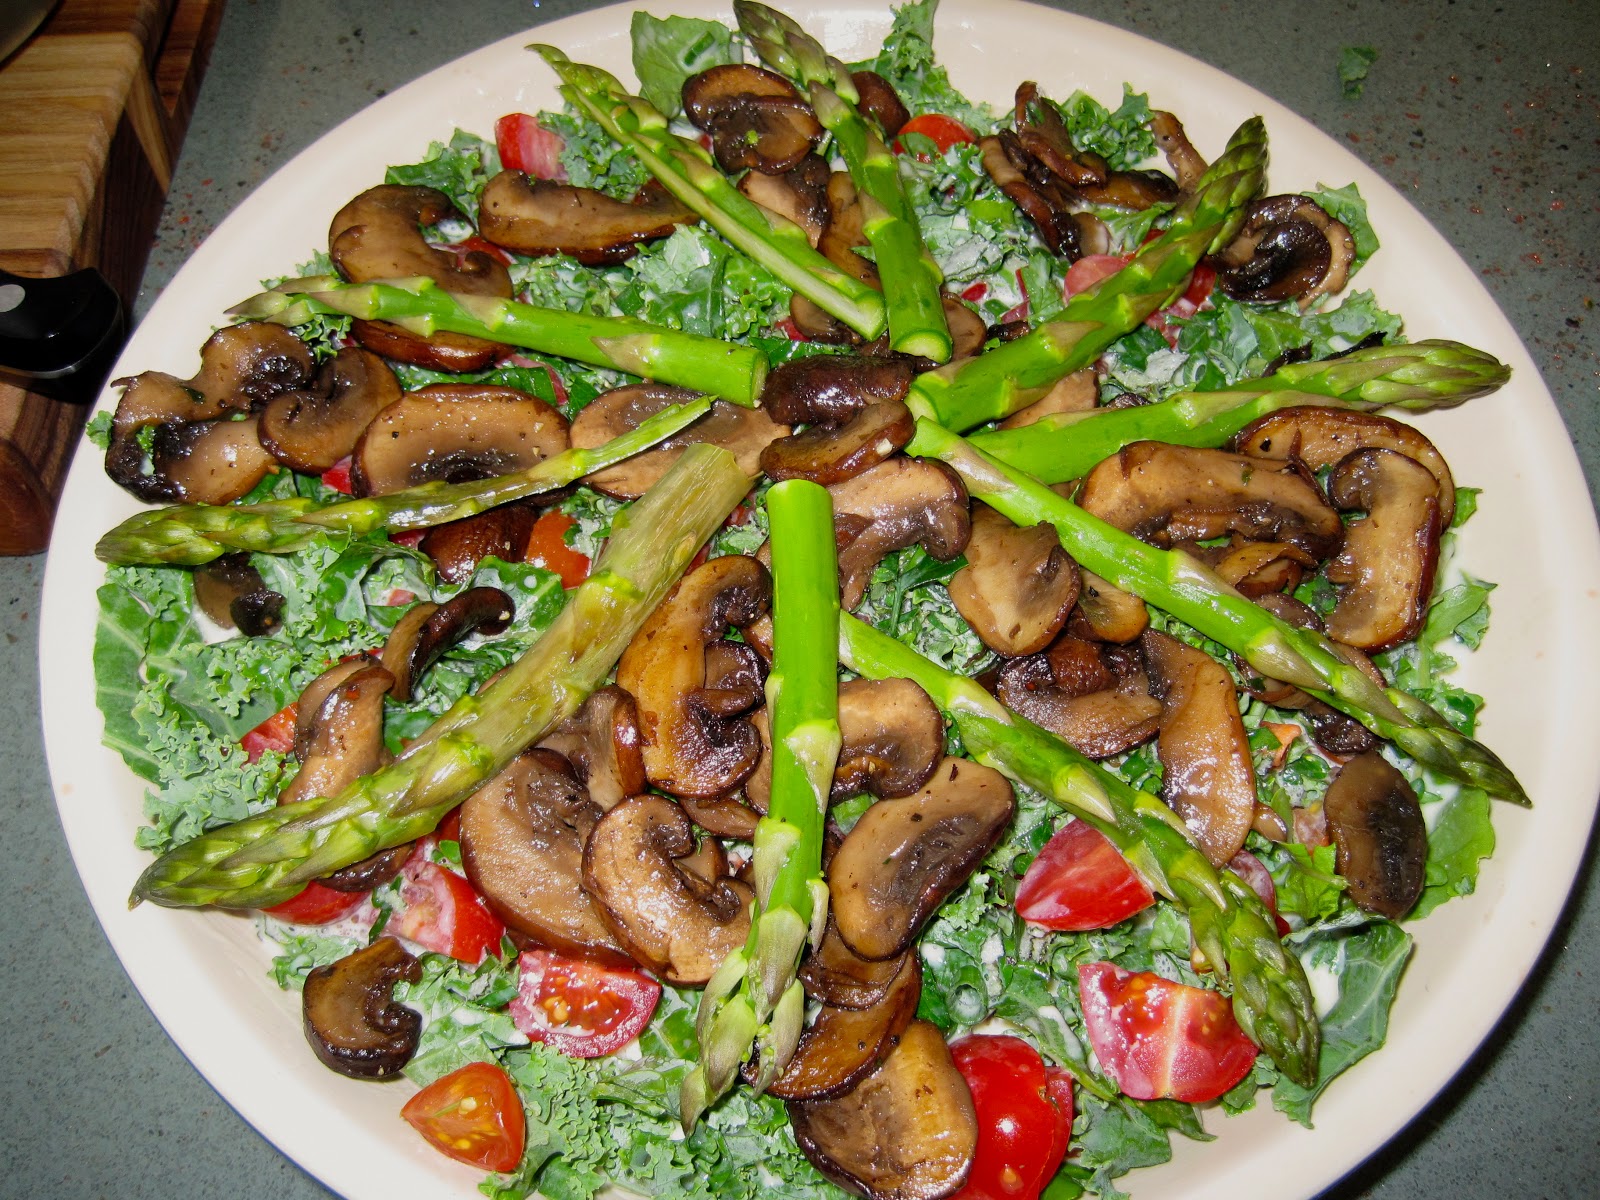
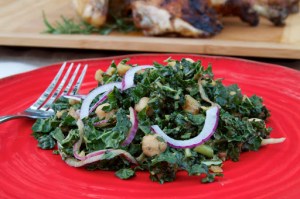
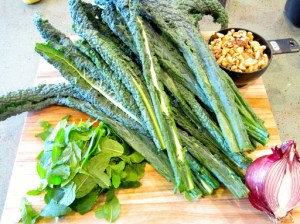
Many times I’ve had kale salads that just weren’t up to snuff.  They were very pretty, but the texture and flavor was somehow lacking, and eating it made me feel as if I were doing some sort of penance for a wrongdoing in a former life.  Don’t get me wrong, I love kale! I saute it; I put it in quiche; but sometimes a raw kale salad can be a little challenging–oh, the constant chewing!  Last week I received this recipe via email and had to try it that day! I was initially drawn to it because I already had almost all of the ingredients in the pantry, except for one: pomegranate molasses, and had to substitute regular molasses for it.  It wasn’t quite a substitution, because pomegranate molasses has a unique sour/sweet flavor that I really couldn’t replicate using ingredients I had on-hand.  That’s not to say it wasn’t delicious, because it was, but I was anxious to know what it would taste like with the original ingredient.  So, on a tip from a friend, I found a a Mediterranean market and purchased a bottle of pomegranate molasses.  Turns out it’s a very inexpensive ingredient (less than $3) and I can’t wait to find some more uses for it…I’m thinking some kind of sauce.  Anyway, I digress!  I made the recipe again this past weekend and it was amazing.  I made a few changes to the original recipe, mainly adding thinly sliced red onion and chickpeas to the salad, as well as chili sauce to the dressing.   I used regular curly leafed kale the first time that I made it, but the second time, I used lacinato, or dinosaur kale.  Both types of kale were equally delicious!
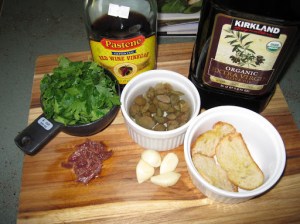
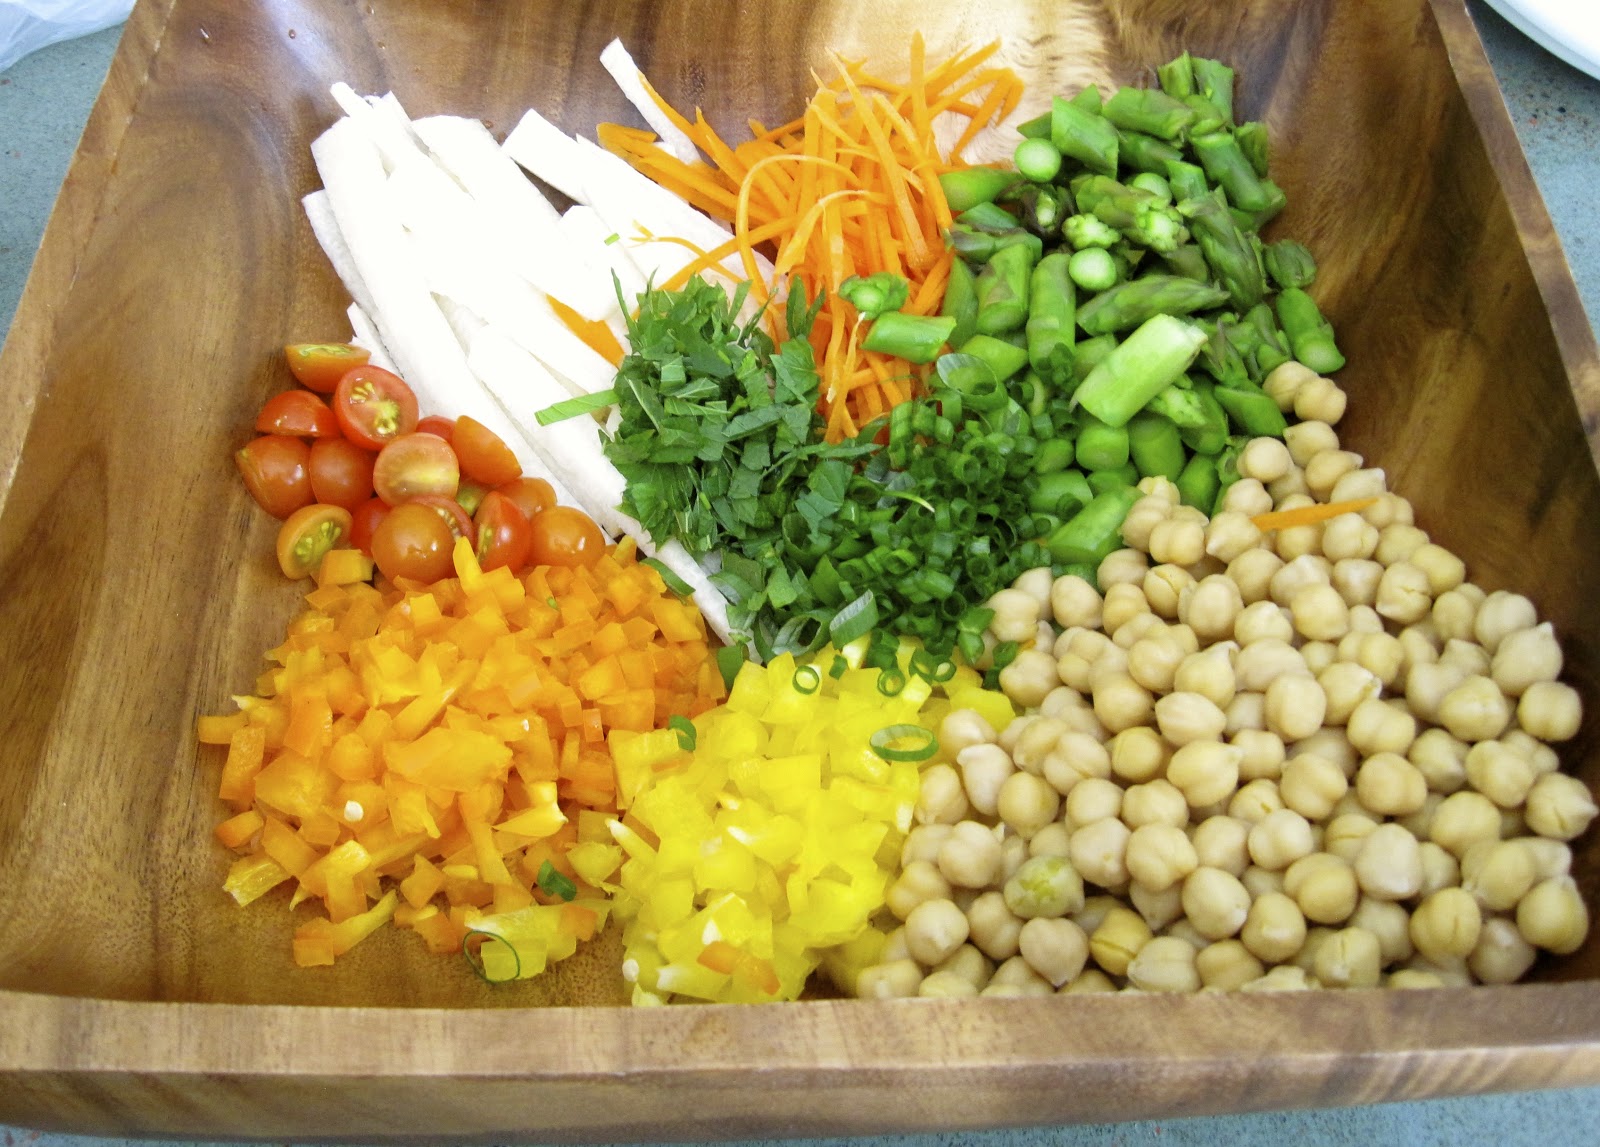
Salad Ingredients

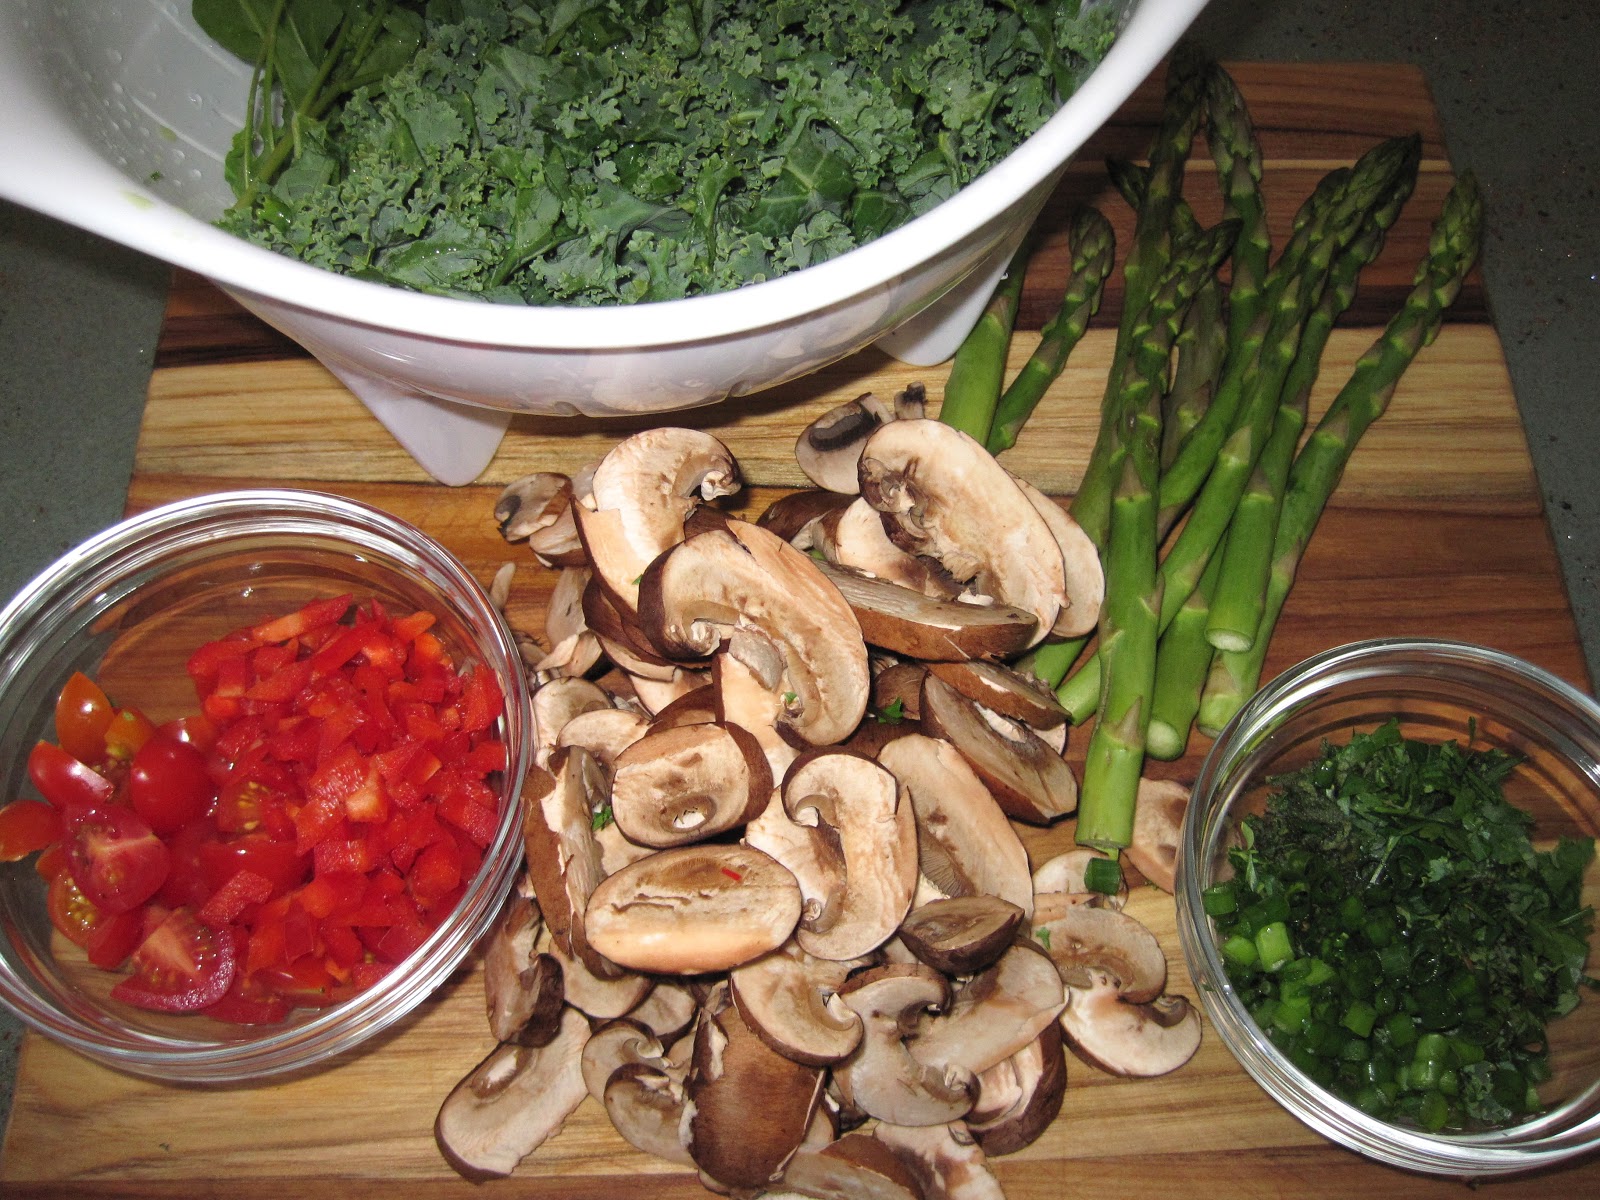
For the salad you’ll need:

1 bunch Lacinato or curly leafed kale, minced

1 cup chopped walnuts
1 cup fresh mint leaves, minced
1/2 small red onion, finely sliced
1/2 can chickpeas
Dressing:
3 tablespoons smooth peanut butter
3 tablespoons warm water
3 tablespoons rice vinegar
1 tablespoon pomegranate molasses
1 tablespoon soy sauce
1 teaspoons fresh garlic, minced (2 cloves)
1 tablespoon fresh ginger, minced
1 teaspoon sesame oil
1 teaspoon red chili flake
1 teaspoon chile sauce (if you like it a little spicier)

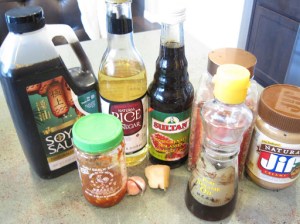
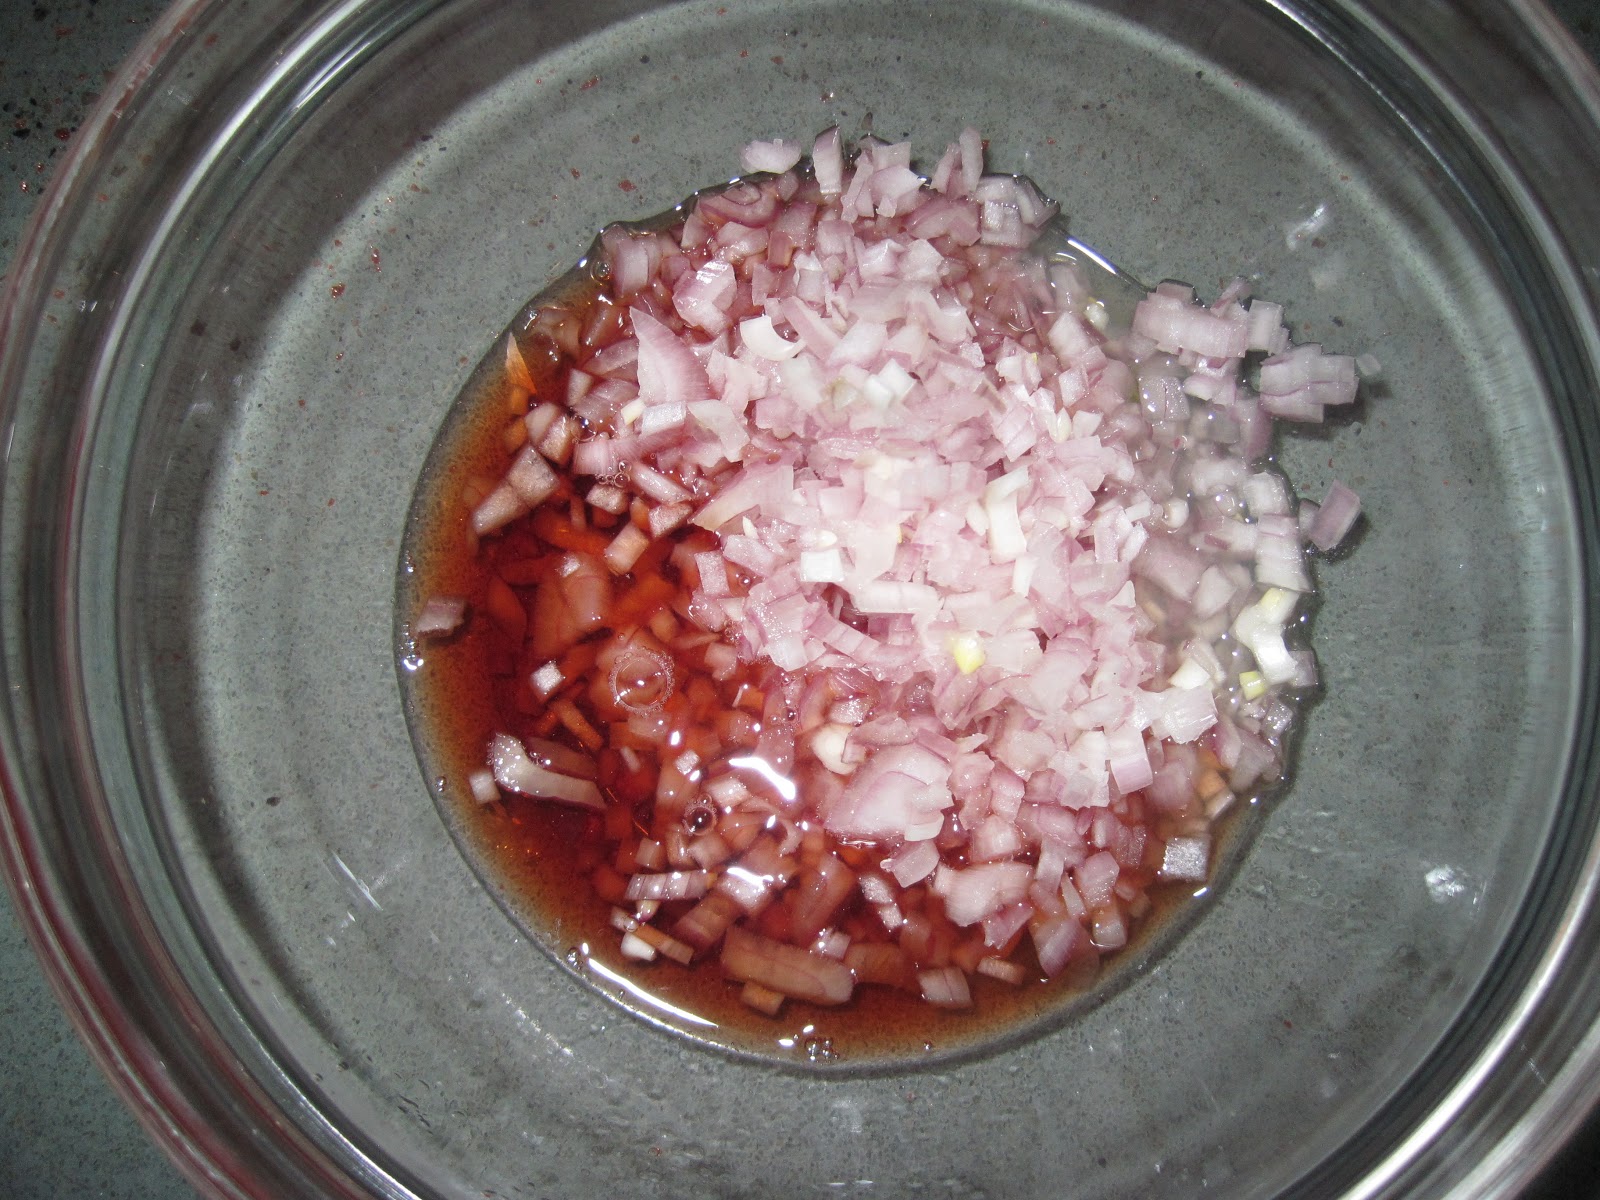
Dressing Ingredients

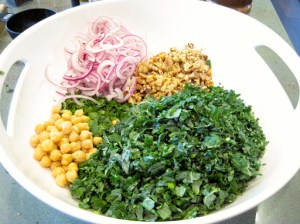
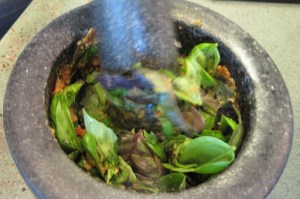
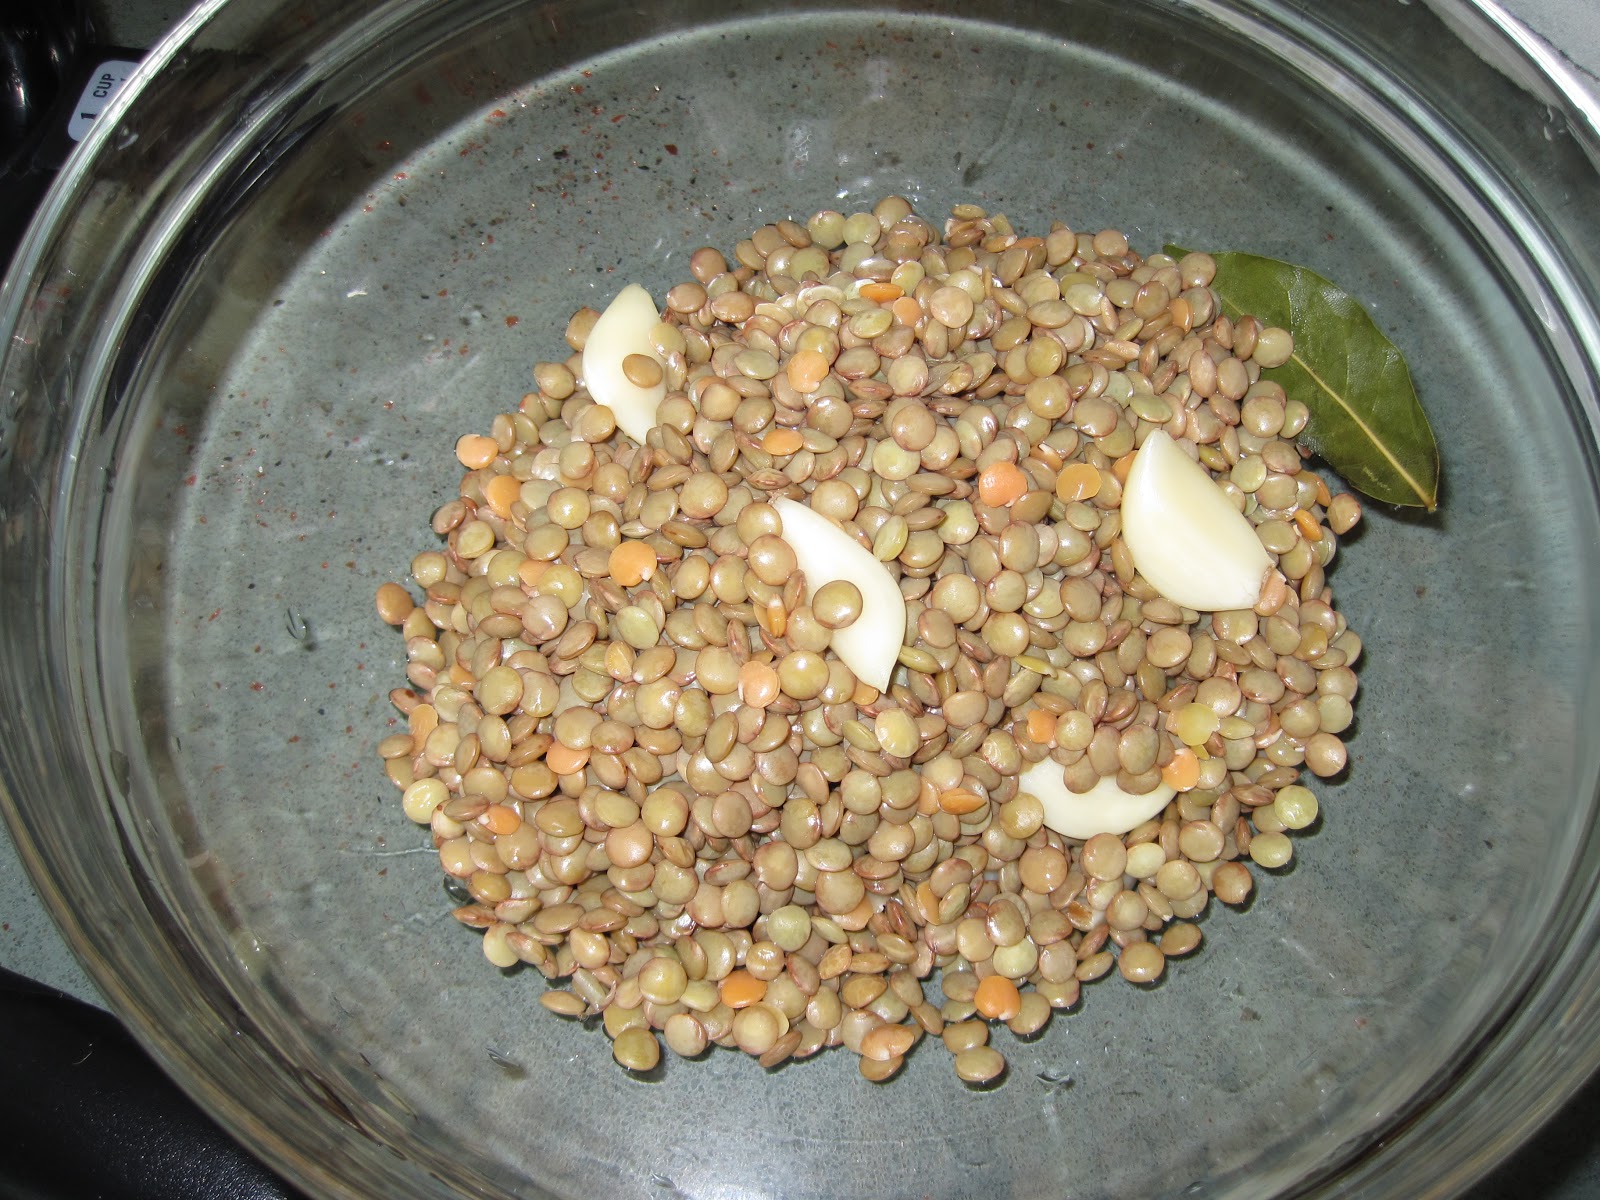
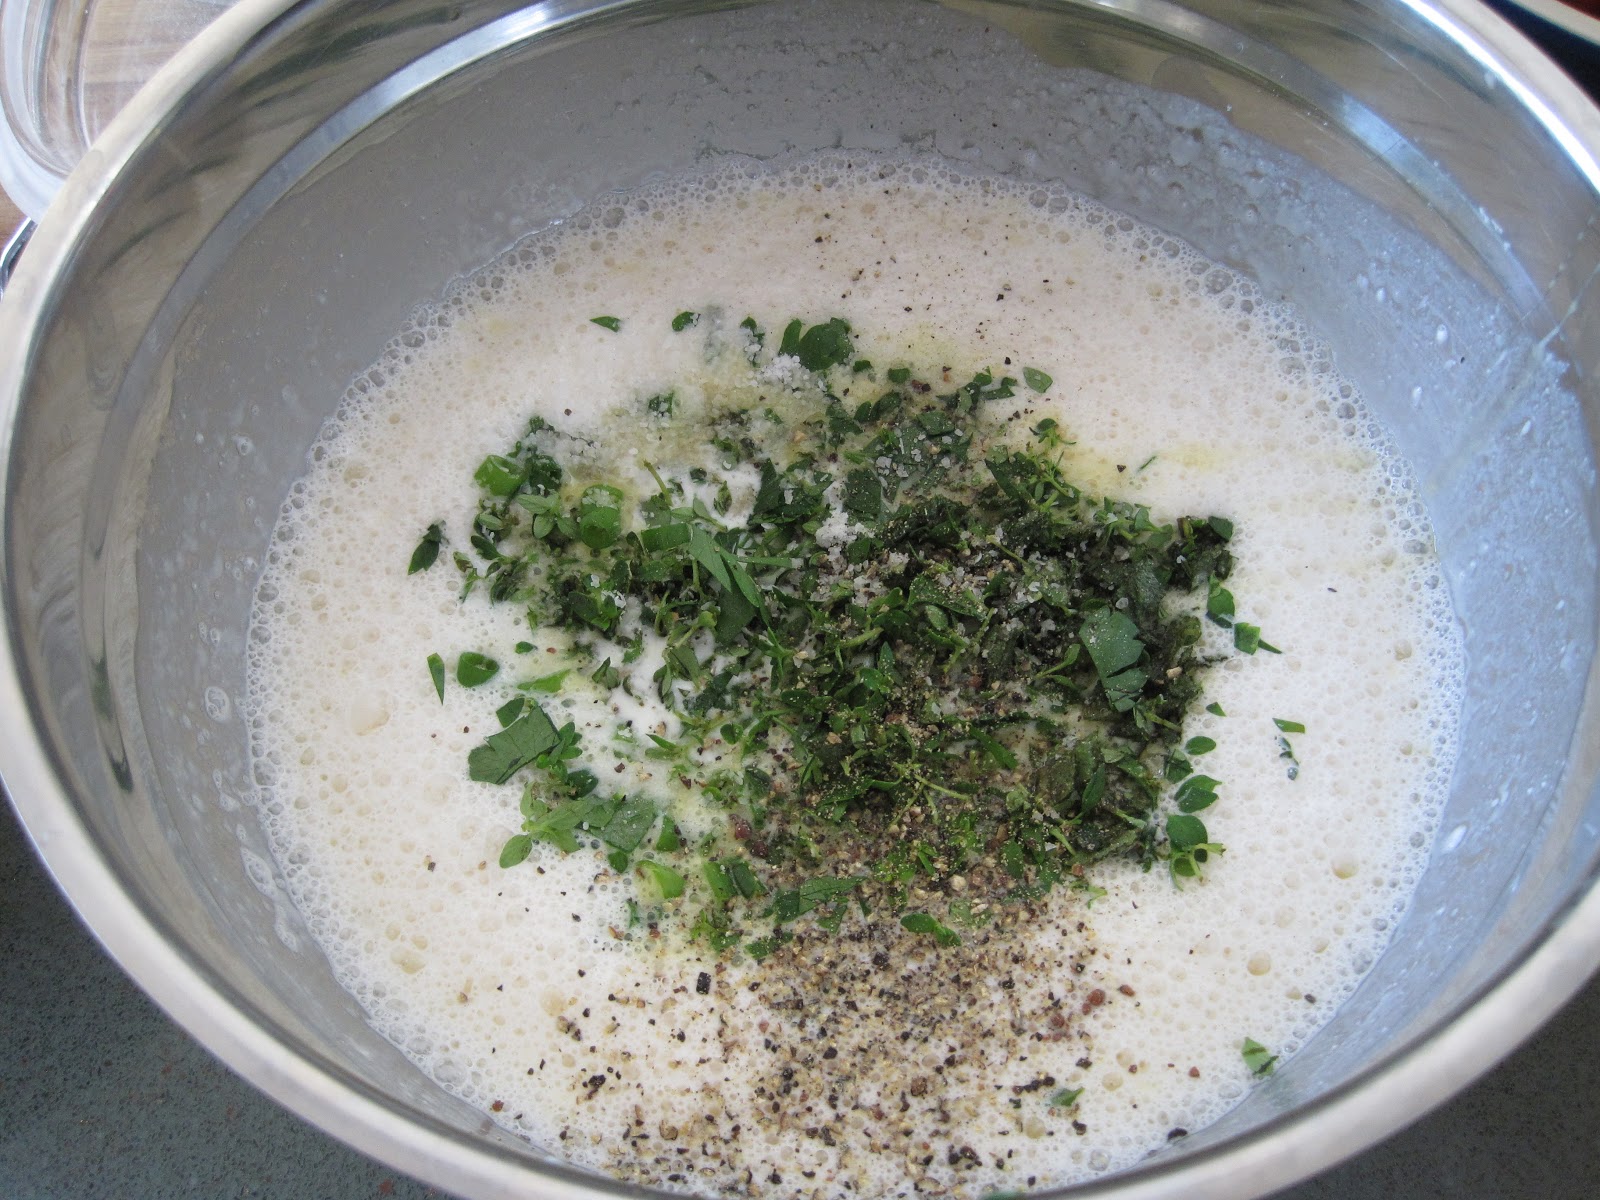
Finely chop the kale and the mint leaves and mix together in a bowl.  Drizzle with a little olive oil and a pinch of salt and massage it into the leaves.  Allow it to sit while you prepare the other ingredients and the dressing. This allows the kale to become a little more tender.

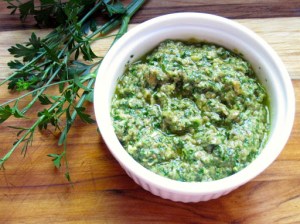
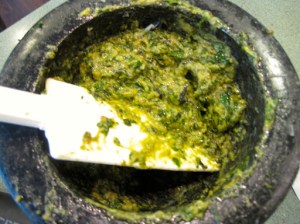
Place all the ingredients for the dressing in a blender or food processor and puree.  Drizzle the dressing over the kale and mix thoroughly.  The salad holds up very well with the dressing and is even great the next day as leftovers.

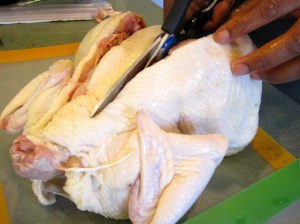
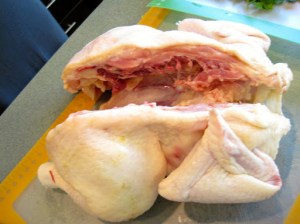
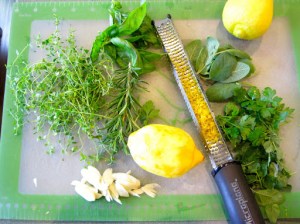
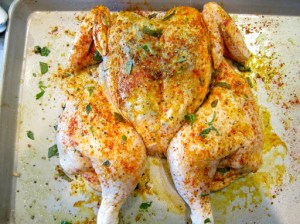
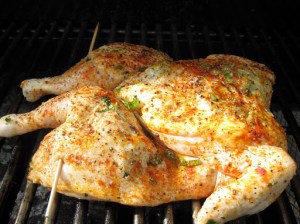
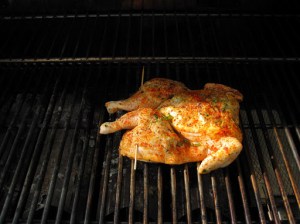
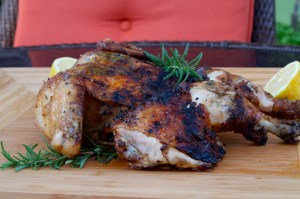
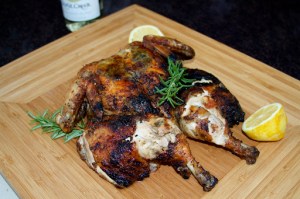
Meanwhile, I spatchcocked a chicken and cooked it on the grill.  This past weekend, we had record high temperatures:  112 degrees on Saturday! This means that it’s officially time to retire the use of the indoor oven and cook everything outside.  Eric’s favorite dish is roasted chicken.  I have cooked a whole chicken on the grill before, but found that it was a little difficult to cook the whole bird thoroughly without drying the breast.  This time I decided to spatchcock (or butterfly) the chicken so that it will lie completely flat on the grill and thus, cook more evenly.  I used the same herbs and seasonings that I use when I roast a whole chicken in the oven, but instead of stuffing the cavity with them, I slipped them underneath the skin.

The first thing you do is place the chicken breast side down on a cutting board.  Using kitchen shears, cut alongside the backbone and remove.  You can use the backbone for making chicken stock, so remember to save it!

Flip the bird over and lay it flat on your cutting board.  Next season it with herbs, garlic, lemon zest.  I used a combination of rosemary, sage, basil, parsley, thyme and thinly sliced garlic.  Take the herbs and garlic and slip them underneath the skin of the chicken, wherever you can find a little space–under the neck, in between the leg and thigh.  Season generously with coarse salt, freshly ground black pepper and smoked paprika.

Preheat your grill and set up for indirect grilling and oil the grates.  I demonstrated this technique in this post.  What I did was heated the three burners on left side of the grill and placed the chicken on the right side of the grill.  I used some applewood chips in the smoker box to give it a little smokey flavor as well.  Notice that I placed the legs facing the hotter side of the grill.  This is so that the legs and thighs, which cook more slowly than the breast, will have time to cook while the breast facing the cooler part of the grill doesn’t cook as quickly.

Allow the chicken to cook skin side up on the unheated part of the grill until the breast registers 145 to 150 degrees–about 50 minutes to one hour. After this temperature is reached, place the bird skin side down on the left side of the grill (over the hot grates) to crisp the skin.  When the breast reaches 162 degrees, remove the chicken from the grill, cover it with foil and allow it to rest for 15 minutes.  The internal temperature of the chicken will continue to rise as it rests. 

My bird’s knees got skinned due to crazy flare up! Still tasty!
The chicken was juicy and tender with nicely crisped skin (ok some areas were a little too crisp due to a sudden flare up).  We served it with a squeeze of fresh lemon and the kale salad.  

Grilled Scallops with Cannellini Beans and Salsa Verde

After many weeks fraught with anticipation and often disappointment, we were finally able to grow one full-sized zucchini!  Now, to those of you who are out there, baskets fully laden with summer squash, hauling all your abundance to the neighbors: don’t laugh at my one, single zucchini.  Well,  used to be one–we ate it with a quickness the other night alongside a salad of greens, cannellini beans and grilled scallops, and you know what? It was delicious; and we knew where it came from and it was free of pesticides.  There are a few more zucchinis forming on the vine now, so once again, I have high hopes that we’ll get some more soon!  Until then, I guess we’ll have to figure out something else to eat!

One large zucchini! Provenance known!
I’d like to share another amazing, intensely flavored sauce with you that is incredible alongside seafood, called “salsa verde”. Salsa Verde an Italian sauce made from a base of parsley, garlic, capers, anchovies, olive oil and bread.  The recipe is adapted from the same Williams-Sonoma Seafood cookbook that the Romesco sauce came from and it is very easy and comes together in minutes.
1 cup fresh flat-leaf (Italian) parsley 
4 oil packed anchovies
2 tablespoons capers
3 cloves garlic (I used 4, because I love garlic)
1 slice crusty bread soaked in water and squeezed dry
1/2 cup extra virgin olive oil
2 teaspoons red wine vinegar
Combine the bread, which was soaked in water and squeezed dry with the olive oil and form a paste.

Add the garlic to a food processor or blender and mince finely (this can also be done by hand).  Add the parsley, capers, anchovies to the bowl and pulse until combined.  Then add the bread and olive oil mixture and pulse until all the ingredients are blended together.  That’s it!

A word about capers.  You can use either the non-pareil capers in brine found at most grocery stores, or the salt packed type.  For the first time, I used salt-packed capers that we found at an Italian market.  They are larger than the non-pareil and require a little more preparation to remove the salt.  If you want to use salt-packed capers first rinse them very well in cool water.  Then allow the capers to soak for about 15 minutes and drain prior to using.

Delicious!

The rest of the meal was equally simple.  Pour a can of cannellini beans (or small white beans) in a saucepan and add a sprig of thyme (stems removed), one clove of minced garlic, a pinch of red pepper flake and a pinch of salt.  Heat gently over low heat for about 10 minutes to allow the flavors to combine.   Remove from the heat and drain the beans.

Whisk together 2 tablespoon of red wine vinegar with 4 tablespoons olive oil and season with salt and freshly ground black pepper.  Add half of the vinaigrette to the warm beans.

Soak wooden skewers in water for at least 30 minutes.  Thread scallops on the skewers and drizzle them with olive oil.  Season with salt, freshly ground black pepper and your favorite seasoning.  I sprinkled them with smoked paprika because I like the subtle smoky flavor.  Preheat your grill and oil the grates.  When it’s nice and hot, grill the scallops about 1 to 2 minutes on each side.  If scallops aren’t your thing, try it with shrimp, calamari or even chicken, if you prefer.

Dress your salad greens with half of the vinaigrette.  Spoon the beans over the greens and top with a skewer of scallops.  Spoon the salsa verde over the scallops!

Eating Together: Small Plate Supper, Romesco Sauce and Fresh Basil Pesto

Eric and I (yes, the Man of the House has a name) have been making small-plate suppers since we first met. Sometimes we would have a variety of cheeses, charcuterie, olives and bread; other times we’ll make a spread of other small dishes like the ones we had last night:  caprese salad made with burrata cheese and pesto, gigantic beans with rosemary and garlic, grilled Brussels sprouts, pan-fried sardines with romesco sauce and of course, a crusty baguette.  I love these types of meals because they force us to slow down and breathe; really enjoy the food and savor good conversation over a nice glass of wine.  I feel that in this day and age where everything happens so fast and there are so many distractions vying for our time, the time spent together sitting and enjoying a meal is so important.  It doesn’t need to be complicated or fancy, just prepared with love.

Pan-fried sardines with romesco sauce
I know a lot of you are probably looking at this and thinking “yuck”; but these pan-fried sardines were really tasty, not to mention inexpensive, sustainable and very healthy!  They are full of Omega-3 fatty acids!  I chose the type that are packed in olive oil and you’ll want the type with the skin on.  The skinless/boneless type are more expensive and they don’t hold together very well when frying.  They were only $1.50 a can!  I squeezed some lemon juice over them, dredged them in semolina and pan fried them in a little olive oil.  Simple and delicious!  The romesco sauce is a really great compliment to the fish.  We are in the process of trying to find fresh sardines, but haven’t had much luck.  If anyone knows of a source for them in Southern Nevada, please let me know!

I used semolina for these, but I’ve also dredged them in corn meal with very successful results.  

Romesco Sauce is a red pepper based sauce from Catalan, Spain.  It is very easy to make and took only a few minutes and it is delicious served with fish.  This recipe was found in Williams-Sonoma’s Seafood cookbook and it’s my go-to recipe.  It was also a great way to use a stale baguette.

Toast 1/2 cup of bread cubes and 1/2 cup of raw almonds in a saucepan with one tablespoon of olive oil.  

Roast a red bell pepper in the broiler or on a hot grill until evenly charred.  Place the pepper in a paper bag and allow it to cool.  After it cools, peel and seed the pepper and add to food processor or blender.  Add the toasted bread cubes and almonds to the food processor along with 2 cloves of garlic, 1/4 teaspoon cayenne pepper, 1 tablespoon of lemon juice, 3 tablespoons olive oil and salt to taste.  Puree until it becomes a grainy sauce.  I had jarred roasted red peppers on hand, so I used about 5 pieces for this sauce.  

Romesco Sauce
Grilled Brussels Sprouts

The simplest preparation.  The sprouts were sliced in half and drizzled with olive oil, salt and pepper and placed on a hot grill.  They took about 5 minutes.  After removing from the grill, I squeezed a little fresh lemon juice over them.  They got a little more charred than I’d planned, but that only increased the sweetness of the sprouts.

Gigantic Beans with rosemary and garlic

I saw these “Gigantic Beans” at Trader Joe’s and wanted to give them a try.  I just placed them in a pan with two sprigs of rosemary, minced garlic, olive oil, and a little salt and pepper.  The beans were packaged in a tomato sauce.

Last but not least, a lovely twist on a Caprese salad using slow roasted tomatoes, Burrata cheese and pesto made from basil we grew in the garden.  This salad is luscious.  Burrata cheese is made from the leftovers from making fresh mozzarella mixed with cream.  The outside has a very soft skin and the inside is soft and creamy.  I was able to find this burrata cheese at Trader Joe’s.  Eric makes pesto the traditional way, with a mortar and pestle.  Our basil was ready for a trim so I picked a good amount to make this salad.  Both purple basil and sweet basil were used in the pesto, which gave it its interesting color.  This recipe was inspired by Chef Nancy Silverton of Osteria Mozza in Los Angeles.

Burrata Caprese Salad


Roast roma or campari tomatoes (or other small to medium sized tomato) in a 300 degree oven for one and a half hours.
Toast 2 tablespoons of pine nuts in a dry frying pan until golden and put into a mortar.

Grate one clove of garlic on a microplane (or press or finely mince the garlic) and add to the pine nuts along with 1/2 teaspoon of sea salt.  Using your pestle, grind the pine nuts, garlic and salt to a paste.  

Roughly chop 2 cups of fresh basil leaves, with stems removed and add to the mortar and continue to grind. Slowly add 1/2 cup of olive oil, followed by the zest and juice from one lemon.
Add 1/4 cup of freshly grated parmesan cheese and stir to combine.  Spoon on top of burrata cheese or fresh buffalo mozzarella and serve with the roasted tomatoes.
Happy Eating!

Epic Lentil Salad

Memorial Day Weekend is over and we are back on the healthy eating train.  We kind of pigged out this weekend.  We ate red meat; deep-fried things; things made with boatloads of butter.  We ate All The Things.  So, I took an extra day off and with the goal of setting things to rights, I made this salad.  I was inspired by a photo I saw posted on the internet of someone’s lunch at Los Angeles restaurant.  I thought to myself: This salad is perfect.  This salad is epic.  It is so epic that it might just be The One Salad.  The salad that would undo the nutritional damage of a holiday weekend in one meal.  Ok, maybe it didn’t do all that, but it certainly made us feel way more virtuous than where we were late Monday night.  My salad contained lentils, chickpeas, asparagus, orange and yellow bell pepper, jicama, carrots and tomatoes, but the beauty of it is that you can use whatever vegetables you want!

A few months ago I happened to catch an old favorite cooking show on PBS called “America’s Test Kitchen”.  If you’ve never seen it and you’re interested in learning about the science of food and cooking, this is the show for you.  It’s been on for quite a few years and while I don’t often sit down to watch it, when I do, I always end up learning something new.  The episode I happened to watch demonstrated how to make perfectly cooked lentils–in other words, not soggy, mushy lentils.  The host, Christopher Kimball explained that brining the lentils with salt and warm water allows the skin of the lentil to become pliable, so that when the lentil cooks and swells, the skin can expand and yet stay intact and the lentils won’t become mushy.  Genius!  I love science! The lentils are cooked slowly in the oven so that the water doesn’t boil and further agitate the lentils.  It takes a little extra time and planning, but it does result in perfectly cooked lentils that keep their shape and work perfectly in a salad.  The lentils used in the episode were French green lentils, or Lentilles du Puy.  Apparently, the technique works for every kind of lentil except for red or yellow lentils.  The lentils from my grocery store are labeled simply: LENTILS.  No fancy designation or anything, so I believe they are simply called “brown lentils”. They are a brownish, khaki color.  

To make the lentils:

Rinse and pick through one cup of lentils, removing any rocks or debris (yes, I have found a pebble before).  Place in a bowl with 2 cups of warm water and 1 teaspoon of salt.  Let the lentils soak for one hour.  While the lentils were soaking, I chopped all the vegetables and set them aside:

8 asparagus spears, lightly steamed in the microwave and cut into one inch pieces
1 carrot, thinly sliced
1/2 orange bell pepper, diced
1/2 yellow bell pepper, diced
1/2 small jicama julienned
1 15 ounce can of chickpeas, drained and rinsed
1 stalk of green onion, thinly sliced
1 tablespoon minced fresh mint leaves
Salad greens – whatever you prefer, I used a pre-made “European” salad mix
1 lemon

Preheat the oven to 325 degrees.  After the lentils have soaked, drain and place them in an oven-proof saucepan along with:

5 cloves of garlic, peeled and lightly smashed,
1 bay leaf
1/2 teaspoon of salt
2 cups of chicken broth
2 cups of water

Cook for 40 to 60 minutes until the lentils are tender.  Drain and place into a mixing bowl.  Remove the garlic and bay leaf.

Cooked lentils

For the Vinaigrette:

2 tablespoons red wine vinegar
1 lemon, juiced
1 shallot, finely diced
2 teaspoons dijon mustard
1 teaspoon agave syrup or honey
5 tablespoons olive oil
salt and pepper

Combine the vinegar, lemon juice, shallot, dijon mustard and agave syrup or honey in a mixing bowl and whisk together well.  Add the olive oil and continue to whisk until completely mixed.  Season with salt and pepper then stir the dressing into the lentils while they are still warm so that the lentils soak up all that good flavor.

Now combine the lentils with the vegetables and mix well to incorporate the vinaigrette.  Season to taste with a little salt, pepper and a squeeze of lemon juice, if desired.  I always desire a squeeze of lemon juice!

Lightly dress your salad greens with olive oil first, then some freshly squeezed lemon and a sprinkling of salt.  I always dress my salad greens, because eating dry lettuce just makes me sad.  Top with a generous helping of the lentil/vegetable mixture and enjoy!  I garnished mine with some sliced avocado.

Feeling healthier already!

My New Favorite Way to Eat Eggs: Perfect, Creamy Scrambled Eggs

I never skip breakfast–it’s the most important meal of the day, right?  During the week, we eat a very consistent breakfast of either oatmeal with cinnamon, nutmeg, raisins, walnut and blueberries, or as it’s starting to get warmer, a cold cereal medley of grape nuts, whole oats, shredded wheat, blueberries and walnuts.  I don’t think we are deficient at all in whole grains and fiber! But, on the weekends, when I have more time, I like to have an egg breakfast.  It used to be that my favorite way to eat an egg was over medium or poached, but a few months ago the Man of the House learned a scrambled egg technique that elevated the lowly scrambled egg to the top of my list of favorites.  I’d been eating scrambled eggs the same way my entire life, but this technique resulted in an egg that is so creamy and decadent, I can’t go back to the way I used to make them.

The secret is cooking them gently over medium low heat while you constantly stir them, almost like making a risotto.  This video shows renowned chef, Gordon Ramsay demonstrating the exact technique that I used to make the eggs.  I like my eggs “dragged through the garden” so, like Chef Ramsay, I served them over a piece of toasted bread topped with arugula with broiled tomatoes, asparagus and mushrooms. Unlike, Chef Ramsay, I use a lot less butter and I skip the creme fraiche, because it really is creamy and wonderful without it (and a few less calories and fat).

For the eggs you’ll need:

4 large eggs
2 tablespoons olive oil
1/2 to 1 tablespoon of butter
Sliced green onions

For the broiled vegetables, I used:

4 campari tomatoes (or your favorite small-sized tomato)
4 mushrooms
6 asparagus spears
olive oil
salt pepper
Squeeze of lemon

First, place the vegetables in an oven-proof pan with a drizzle of olive oil, a sprinkling of salt and freshly ground pepper. Place under the broiler and broil until the tomatoes are wrinkled and soft, about 7 to 10 minutes.

Squeeze a little lemon juice over the cooked veggies–it makes their flavor pop!

Slice your bread and place in the toaster.  Sometimes I will toast the bread under the broiler, but this usually results in me burning the bread (those who know me well, know that this is my claim to fame).  Now add olive oil and butter to a saucepan and turn the stove to medium low.

Add the eggs to the saucepan and begin stirring constantly, removing the pan from the heat intermittently to allow the eggs to cool. The eggs will continue to cook with the heat that is retained in the pan.  After the eggs have started to set, season with a pinch of salt.

Eggs are removed from the heat while constantly stirring

Stir in sliced green onions.

I’m so thrilled that I still have some arugula growing in pots in the garden.  For our climate, it’s the end of their season, and they are just starting to bolt, but until they get bitter, I’ll be using them as much as possible.  I lightly dressed the arugula with a little olive oil, a pinch of salt and a squeeze of lemon juice.  Honestly, I think most things can be seasoned with those three ingredients–it’s perfect!

Place the toast on a plate and top with the dressed arugula.  Spoon the eggs over the arugula and serve with the broiled vegetables.

Tiny sweet tomatoes from the garden!

I had this breakfast twice this weekend, it is so good!  See that loaf of bread in the background?  I made that!

Blueberry Mojito

I’m kind of a chronic over-purchaser of certain items, and the item varies from week to week.  This week, I overbought limes.  Every time I went to the grocery store (which is often) I bought 8 to 12 more limes.  I guess in my mind, a home without limes is just not the place to be!  So, in an effort to utilize all these limes, I decided to make mojitos!  Earlier this week, I had some friends over and made a pitcher of traditional mojitos.  They were good, but they just weren’t minty enough in my opinion.  So, I changed it up a bit and made this one with mint-infused simple syrup, and that seemed to correct that missing element.  I also added some frozen blueberries, because I had them on hand and it’s always great to be able to make a cocktail with ingredients at your fingertips!  Plus, it keeps me out of the grocery store, where I might buy more limes.  As an added bonus, the frozen blueberries help keep the drink cold!

Blueberry Mojito

  • Servings: 1
  • Difficulty: easy
  • Print

To make mint infused simple syrup, combine one cup of sugar with one cup of water in a small saucepan.  Heat until the sugar completely dissolves and the mixture becomes clear.  Remove from the heat, add a few sprigs of fresh mint and cover the saucepan.  After it completely cools, remove the mint leaves and pour into a storage container and refrigerate.

  • 1/2 ounce to 1 ounce mint simple syrup (depending on your preference)
  • Freshly squeezed juice from one lime
  • 2 ounces light rum
  • 10-12 fresh mint leaves
  • sparkling water or soda water
  • Blueberries (frozen or fresh if you have them)
  1. Muddle the mint leaves, simple syrup and half of the blueberries (about 6 blueberries) in the bottom of a cocktail glass.
  2. Add light rum, the remainder of the blueberries and fill the glass 3/4 with ice.
  3. Stir, then add sparkling water to fill the glass.  Enjoy!  Depending on your preference, you may want to add more simple syrup.  For mine, I added about 3/4 ounce of the simple syrup.

The Evolution of a Quiche: Crustless Quiche with Greens

This morning, I decided to make a quiche for breakfast.  I love quiche. In fact, I love all kinds of egg custard type dishes, but quiche is near and dear to my heart and has been a favorite of mine since I was fairly young.  I was first introduced to the wonders of this eggy concoction when I was in middle school.  There was a product in the…ahem…1980’s that was called “pour-a-quiche” and my mother used to buy it.  Now, this product came in a milk carton and it was just as the name said, you simply poured the pre-made quiche mix into a ready-made pie crust and popped it into the oven!  Hey, we liked instant stuff back then!  Later on, when I went to college, one of favorite professors, who was also a  fabulous gourmet cook, made me one of her quiches.  It was the most amazing, decadent, wonderful dishes I had ever had.  It was lovingly baked in a homemade, buttery pie crust and filled with spinach, bacon, ham and cheeses. It was divine. It was rich. It was completely calorie-laden, but that didn’t matter because I had the metabolism of a 20 year old!  She gave me the recipe, which took about two days to make.  Now, when you’re in college, you simply cannot fathom anything taking two full days to get onto the table (hello, Top Ramen) and sadly I never made that recipe.  Now fast forward to today, and though I still love quiche, I make it a lot less decadently, because my 40-something metabolism just isn’t what it used to be.  You’ll notice that the quiche is missing a crust and it’s also missing something else: cheese.  But it’s loaded with a lot of great vegetables and leafy greens and it still tastes a little bit decadent!

I adapted this recipe from Alexandra’s Kitchen, one of my favorite blogs.  The original recipe calls for creme fraiche, which I love, but it contains quite a bit of fat and calories.  I have found that substituting 0% fat Greek Yogurt for creme fraiche is a great way to shave a few calories, fat and cholesterol in the dish without sacrificing the flavor.

5 eggs
3 tablespoons all-purpose flour
1 cup whole milk
1 cup 0% Greek Yogurt
1 teaspoon kosher salt
1/2 teaspoon freshly ground black pepper
1 tablespoon fresh thyme (or other assorted herbs), finely chopped
1 to 3 cups coarsely chopped uncooked kale or your favorite greens
Additional vegetables if desired

Since I’m always looking for opportunities to add more vegetables to a dish, I also added quartered grape tomatoes along with some tomatoes from the garden, two tablespoons of chopped red bell pepper, fresh arugula and sautéed mushrooms.  You can also use whatever combination of herbs that you enjoy.  I used a tablespoon of thyme, along with some minced parsley and sage and green onion that I had in the garden.

Preheat the oven to 375 degrees fahrenheit.  Place one egg and 3 tablespoons flour into a bowl and whisk until smooth.  Whisk in the remaining 4 eggs until blended.

In another bowl, whisk the milk and the yogurt until smooth.  Pour the egg mixture through a mesh sieve held over the milk and yogurt mixture.  This will remove any lumps of flour.   Whisk in the salt, pepper and herbs.

Pile your greens into a buttered or oiled pie dish along with any other vegetables you are using.  I like to sauté the mushrooms first in a little olive oil and butter so that they release their moisture before before they are added to the quiche.

Pour the egg mixture over the greens.  Don’t panic if it seems like there isn’t enough liquid in the pan.  Gently press down on the greens and vegetables to submerge them as well as you can, but don’t feel the need to add additional liquid! As it cooks, the greens will shrink and the custard will rise.

Place in the 375 degree oven and bake for ten minutes, then lower the temperature to 325 degrees and bake for approximately 30 additional minutes.  The center of the quiche should feel slightly firm when touched.  Allow the quiche to rest for 20 minutes before slicing.  Now, today, it was completely squirelly for me.  I have always had to increase the baking time on this quiche and today was no exception.  I baked it for 35 minutes and took it out and allowed it to rest while I took some photos.  After it had rested, I cut into it only to find that it wasn’t fully set in the middle.  I had to put it back into the oven for a little while longer.  I probably should have baked it for a total of 55 minutes. Well, we had tickets to see an early matinee of “Star Trek: Into Darkness” in 3D and due to the extra baking time there was no wiggle room for 20 additional minutes of resting time.  The first pictures I took were a mess, because the quiche just spread out on the plate like a blob!  I had to take the finished shots after we came home this afternoon with a piece that had had time to cool!