Latest Posts

Pork Shoulder Two Ways: Carnitas Tacos

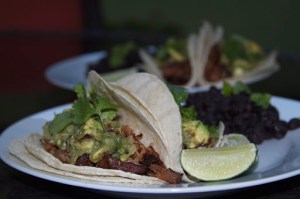
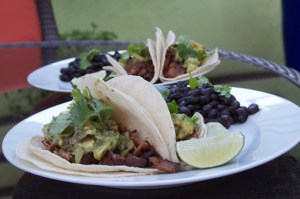
Yesterday, in honor of Administrative Professional’s Day, my office threw a party for the administrative staff and hosted a chili cook-off.  I originally wanted to enter a white turkey chili that I’ve made many times, but was unable to do so since two white chicken chilies had already been entered. So, back to the drawing board I went and developed a chili based on a pork carnitas recipe that was already a favorite of ours.  Since I was using a very large pork shoulder roast and the chili would take a longer time to cook, I decided to make carnitas tacos for our dinner Thursday evening.

Carnitas tacos are my favorite type of taco!  These are the sort of tacos that you get from a little taco stand in Mexico, topped with cilantro, onions and a wedge of lime and they just make me feel like Summertime. “Carnitas” means “little meats” and it is traditionally made by frying pork in lard and then braising it.  The method I use is probably a little healthier, as I don’t fry the pork in lard at all.  I braise the meat and then broil it to crisp it before adding it to the taco.  This recipe takes a little bit of time to make and you’ll want to marinate the meat overnight in order to get the best flavor.  The pork also takes about 3 hours to braise, but once that is done, the rest goes quickly (and so do the tacos)!

Carnitas Tacos

  • Servings: 6
  • Difficulty: medium
  • Print
You will need:
  • 3 to 4 pound pork shoulder roast
  • 3/4 cup orange juice
  • chicken broth
  • 1 tablespoon kosher or sea salt
  • 1 teaspoon ground cumin
  • 1/2 teaspoon dried oregano
  • 1 teaspoon garlic powder
  • 1/2 teaspoon ground coriander
  • 1 teaspoon chili powder
  • 1 teaspoon ancho chili powder
  1. First, cut the pork shoulder into approximately 3 to 4 inch chunks.  It doesn’t matter if you buy a boneless pork shoulder roast or if the bone is left in, just remove the bone when you prepare it.  There is a thick band of fat on one side of the roast that you will want to remove as well as any other thick bits of fat.
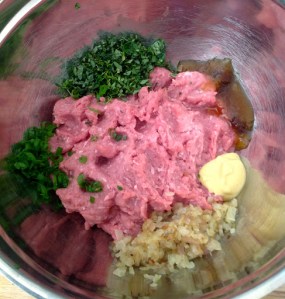
  2. In a small bowl, combine the salt, cumin, oregano, garlic powder coriander and chili powders  to form a dry rub. Evenly distribute the spice rub onto the meat, them place the seasoned meat in a sealed container and refrigerate overnight.
  3. Heat a large braiser or dutch oven on medium high heat with enough vegetable oil to cover the bottom of the pan.  Brown the marinated chunks of meat in batches and set the cooked chunks aside.  It is important when you are searing meat that you do not crowd the pan.  Crowding the pan will cause the meat to steam and it won’t brown.
  4. After all of the meat has been seared, add 3/4 cup of orange juice to the pan to deglaze it, scraping up all the little brown bits.
  5. After deglazing the pan with the juice, add the chunks of meat back to the pan.  Add enough chicken broth to almost cover the meat and bring to a simmer.
  6. After it comes to a simmer, cover the dutch oven and place into a 300 degree oven for three hours, stirring at the top of each hour.
  7. At the end of three hours, you’ll notice that the meat is tender and falling apart.  Now if you’ve ever made pulled pork, this next part of the process will be very familiar.  Remove the meat from the pan and transfer it to a platter or large flat baking pan so that it will cool enough that you can work with it.  Do not discard the braising liquid.  While the meat is cooling, reduce the braising liquid on medium high heat until it’s about half the amount.
  8. Using food preparation gloves to protect your hands, carefully remove the bits of fat from the meat and discard.  The meat will be fall apart tender and you can “pull” it into shreds or chop it into chunks. Toss the bits of shredded or chopped meat in the braising liquid and place the meats back on the large baking pan.  Place the meat under the broiler for about five minutes on each side.
The next part is easy–make tacos!  I prefer white corn tortillas purchased from the Mexican market.  Most Mexican markets make their own tortillas onsite and they are always great and very inexpensive.  I think I bought three dozen for about $1.39!  I served these tacos with an avocado and tomatillo salsa.
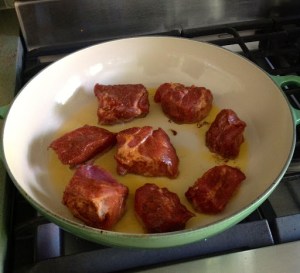
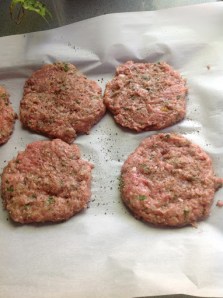
Brown the meat in batches
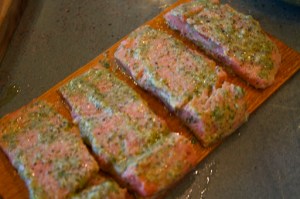
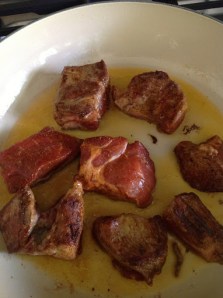
Note the color on the seared meat

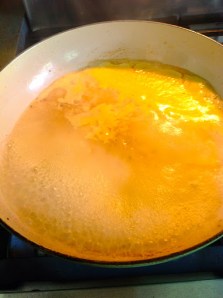
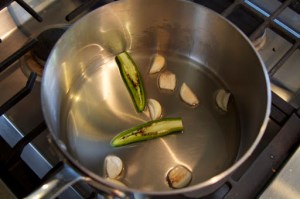
Deglaze the pan with the orange juice

You’ll notice that I changed pans in this photo.  This was unintentional.  I used a six pound roast, two pounds heavier than what I normally use.  I normally like making this in my 5 quart cast iron braiser, but after I added all the meat back into it, it was just too full, so I switched to a 6.75 quart oval dutch oven.  This recipe is for a three to four pound roast, so, if using a larger roast, you’ll want to increase the amounts on the spice rub as well as the braising liquid.
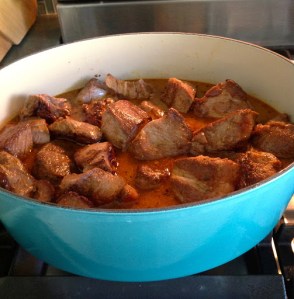
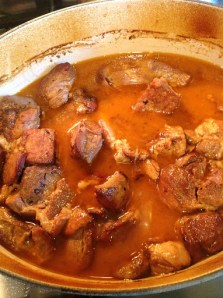
The pork after braising for three hours

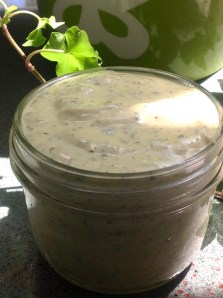
A few weeks ago, I posted a recipe for guacamole, which is the basis for the avocado tomatillo salsa.  It’s almost exactly the same recipe, only I used 1/4 cup of oil to fry the garlic and serrano pepper and I added two roasted tomatillos to the food processor with the cilantro, serrano chili, lime juice and garlic.  You can buy canned tomatillos, but since I was fire roasting fresh tomatillos for the Pork Chili Verde, I used those.  The fire roasting gave it a nice smoky flavor.  Delicious!

A Healthy Burger and Tarragon-Caper Mayonnaise

So, today, I was really craving a hamburger.  A big, juicy, drippy hamburger filled with all things naughty.  The only thing, was that the Man of the House had asked me to make something light and healthy for dinner.  It was a fair request, since he’d been on a business trip all week, which usually means lots of restaurant dining (poor guy, right?).

So, a good compromise was a turkey burger.  I know what you’re thinking: turkey burgers have the reputation of being rather dry, boring and short on flavor. With that in mind, I set out to create a burger that was juicy and flavorful and would fulfill that naughty burger craving.

I also made a jar of homemade mayonnaise.  Mayonnaise is one of those magical foods that always makes me think: “wow, that was easy! why don’t I make this all the time??”  Also in the “magical foods” category is cheese and bread.   Now, I have recently come across a recipe for making my own hamburger buns, and one day soon, I’m going to make them…but this was not that day.  You can be sure that when I do, I will definitely tell you all about it!  So, store-bought whole wheat hamburger buns were the order of the day.

As I said before, mayonnaise is extremely easy to make and once the base is made, you can add whatever flavorings you prefer.  A food processor makes it even easier.  It’s also good to make the mayonnaise prior to starting on the burgers so that the flavors have a chance to develop.

1 large egg
2 teaspoons dijon mustard
1 tablespoon white wine vinegar
1 cup olive oil
2 teaspoons capers, chopped
1 clove garlic, minced
1 tablespoon tarragon, minced
salt and pepper to taste

Put the egg, dijon mustard and white wine vinegar into the food processor or blender and puree.

Slowly add the oil while the machine is running.  If you are using a food processor, the small clear tube  at the top of the machine is made for this.  You pour the oil into the tube and there’s a little hole in the bottom that allows the oil to drain into the bowl at a slow speed.  Genius, right?  It took me a little while to realize that’s what it’s for.  After the mixture has emulsified, add the capers, garlic, tarragon, salt and pepper and pulse until well mixed.

Scoop the mayonnaise into a resealable jar and store in the refrigerator.

Now for those burgers!  This recipe makes about 5 good sized patties.

1 pound ground turkey
2 sprigs each of fresh thyme, oregano and sage chopped finely, a little more than a tablespoon
2 shallots, minced
1 green onion finely sliced
2 teaspoons dijon mustard
1 tablespoon Major Grey’s Chutney (completely optional, but adds a nice flavor–this is easily found in a regular grocery store)
drizzle of olive oil
salt and pepper

First, cook the shallots in a little olive oil until they begin to soften.  This prevents that raw onion taste in the burgers.  Add the shallots, mustard, chutney, herbs and green onion to the ground turkey and mix with your hands.  Then add a drizzle of olive oil and mix that in as well.  This, along with the other wet ingredients really helps the meat to stay juicy.

Shape into patties and place onto a pan lined with wax paper or parchment paper.  The burgers will be very wet and sticky, so after you are done, place the patties into the refrigerator for about 30 minutes to “set” them.  They will be much easier to work with after they have chilled.

Preheat your grill and oil the grates with vegetable oil to prevent sticking.  You may have noticed that I didn’t add salt or pepper to the meat mixture, but have no fear;  after the burgers have chilled, generously season the outside of the patty with salt and pepper.  Lay the patties seasoned-side down on the hot grill and season the other side of the patty with salt and pepper.  Allow the patties to cook about 6 minutes on one side and about 4-5 minutes on the second side.  Resist the urge to press on them or tinker with them while they’re grilling.  I know it’s hard not to, but that squeezes all the juices out and you don’t want a dry burger! When they are done, remove from the grill and allow them to rest for about 2-3 minutes.

I dressed these burgers with the tarragon-caper mayonnaise, sliced avocados, tomato, sliced red onion and a little arugula.  Tasty goodness!

"Not Broken, Just Bent": Garden Update

This has been such a difficult week, with so many emotions to process.  There was great sorrow mixed with gratitude for the life we have.  There was even more sadness after learning of the devastation in West, Texas; then there was relief today and the ability to finally tear myself away from constant news coverage.  I don’t have many wise words to share about the events this week, but what has helped me get through the week is spending time outside, watching things grow; seeing life springing up.  There is something deeply meditative about spending time in the garden.

The past two weeks have actually been pretty hard on the garden.  Twice we’ve had strong windstorms coupled with a drop in temperature.  The wind really did a number on the plants in the aquaponic bed–I’m not sure why, but it might have to do with it being elevated to waist height.  The morning following the storm, I went out to check on everything and found the tomato plants were really bruised and battered, the peppers had withered and the squash leaves were torn and bruised.  I pruned most of the damaged vines and leaves but it was sad because they were really growing and flowering well and some vines that were full of flowers had to be removed.  This week, there was another windstorm but not nearly as damaging as the prior one.  It was a little bit of a setback, but the plants are beginning to bounce back.  
Mint and Thyme growing like crazy

Even the fish seem to be growing!
The tomatoes in the traditional soil bed are doing really well.  All of the plants except one variety, the “Early Girl” are in bloom and have set fruit.  The “Early Girl” tomato in the aquaponic garden hasn’t bloomed either, so I’m not going to worry about them yet.  
“Sweet 100” tomato in traditional soil garden
“Sweet 100” tomato in aquaponic garden
The elusive “San Marzano” tomato
This past week, I noticed that the beautiful petunias were getting ravaged by caterpillars.  I started pulling them off by hand, but quickly realized that this was a losing, uphill battle and instead bought some organic pest control for the ornamental flowers.  Since it seems that the dinner bell has rung for the pests, I decided to pretty up the vegetable garden with some marigolds.  I have always heard that marigolds repel certain insects that prey on vegetables and keeping last year’s pest problem in mind, I decided to plant the marigolds in the empty spaces in the cinderblocks as a kind of force field.  I’ll let you know if it’s successful, but in the meantime, it is really pretty!  I think I’ll pick up a bunch more this weekend to fill the rest of the holes.
May the Force repel caterpillars!
I’m really excited about the little cucumber plants.  I have totally outed myself as a City Mouse.  Every day, I’ve been looking at the cucumbers, wondering if they will ever fruit.  I kept seeing flowers, but no cucumbers, or so I thought.  Then one day this week, I was looking really closely and finally saw them and squealed “pickles!!”  Apparently, I’ve never seen cucumbers growing on the vine before and didn’t know what I was looking at and yes, I do know it’s not called a pickle plant!  
Can you see the “pickle”?
The zucchini and yellow crookneck squash has been blooming as well, and like the cucumbers, I just noticed the baby squash growing behind the blossom!  Very exciting!   
Zucchini Squash blossom in traditional soil garden
Zucchini Squash in aquaponic garden

Farro Tabbouleh Salad with a side of Margarita!

Parsley and mint are growing exceptionally well in the garden right now and the parsley was starting to get overgrown; so, I wanted to make a dish that allowed me to use it before it flowered.  I find that once it gets to that stage, the flavor is very pungent and I like it a little on the milder side.  Tabbouleh is a classic Middle Eastern salad that is traditionally made with bulgur wheat, chopped parsley and mint, but I wanted to try it using farro, which I have dubbed my Favorite Whole Grain of 2013. The cooked texture of farro reminds me of barley–it’s a little chewy and nutty, and it’s great in salads or cooked into soups.  I’ve even seen it made into a risotto, or, “farrotto”, more accurately.  I usually cook it in chicken or vegetable stock, which gives it even more flavor.  This was a very simple, healthy salad and can be made vegan by simply using vegetable stock or water to cook the grains in.  Let me just say that I’m looking forward to the day (hopefully soon) that I can make this salad entirely from the tomatoes, cucumbers and herbs in my garden (I’d add lemon to that list, but let’s be realistic about that baby tree).

I buy farro from the bulk section in Whole Foods Market.  Make sure that you get “pearled” farro, as that drastically shortens the cooking and prep time.  Non-pearled farro requires overnight soaking.  For the tomatoes, I mixed one half pint of grape tomatoes and one half pint of round yellow “sunburst” tomatoes.  My favorite, however, is a mixture of mini-heirloom tomatoes that I’ve found at Trader Joe’s.  The colors are so beautiful.  I chose Persian cucumbers because of the small seeds and the fact that the skins aren’t bitter and don’t need to be peeled.

For this you’ll need:
1 cup pearled farro
2 cups chicken or vegetable stock
1 package of your favorite small-sized tomatoes.  
2 Persian cucumbers
1 bunch chopped fresh Italian parsley (approximately one cup)
1/2 cup chopped fresh mint leaves
2 lemons, juiced
1/4 to 1/2 cup good olive oil
2 cloves garlic, pressed or minced finely
1 stalk green onion, tops and bottoms sliced thinly
salt and pepper
Combine the farro with the stock and a pinch of salt in a saucepan and bring to a boil.  After it comes to a boil, turn the heat down to low and cover.  Simmer covered for 30 minutes.  Remove from heat and allow it to rest with the lid on for 10 minutes.  
Next, make the dressing for the salad.  Juice the two lemons into a small bowl.  Add the garlic, 1/2 teaspoon of salt and pepper and whisk together.  Then add the olive oil and continue whisking.  Add more salt and pepper if it needs it.  Now, pour half of this dressing into the cooked farro while it’s still a little warm.  The farro will soak up the dressing and the seasoning very nicely while it’s warm.  Place the farro into the refrigerator to allow it to cool.
Chop the mint, the parsley and the green onion and put into a salad bowl.  Also halve the tomatoes (or quarter them if they are a little bit large) and cut the cucumbers into small pieces and place them in the bowl with the parsley and mint.  
After the farro has had a chance to cool, add it to the vegetables and mix thoroughly.  Then add the remainder of the dressing.  
Extreme Closeup: note the size of the chopped vegetables
The Man of the House prepared a classic (and quite stiff) Margarita to go with it!
Recipe from:  Speakeasy Cocktails app for iPad 
2 oz Tequila
3/4 oz Cointreau
3/4 oz fresh lime juice
1/4 oz agave nectar (made by reducing agave syrup and water)
kosher salt
Rim a rocks or Margarita glass with kosher salt.  In order to do this, “paint” the outside of the glass with a lime wedge, then apply the salt to the outside edge of the glass.  Put the glass into the freezer to chill for a few minutes.  Combine Tequila, Cointreau, lime juice and agave nectar in a cocktail shaker filled with ice.  Shake and then strain into the chilled glass.  Enjoy!

Framboise 75

This was a rough week for the garden, as we had a huge windstorm on Sunday that left almost everything bruised and battered.  This is one more challenge that we tend to have in Southern Nevada that I may have failed to tell you about.  The wind whipped through on Sunday night with gusts up to 50 mph that lasted through Monday.  By Tuesday, just about everything was bruised, bent or battered. I  sadly had to prune some tomato stalks that were full of flowers, but I’m trying not to let it get me down.  I think everything will recover nicely; it just looks a little sad right now.  So, with that, it’s finally Friday and time for a drink! This drink was inspired by a traditional French 75, which is a cocktail I fell in love with last summer; but I wanted to add a summery, flowery twist to the traditional drink.  This week, I discovered St. Germain liqueur, which is a liqueur made with handpicked Elderflower blossoms.   The flavor is sweet and floral and for lack of a better description, it just tastes…pretty!  Now, this may look like a very girly drink, but it packs a wallop!  In fact I’m drinking it right now, and I can’t promise that this post will pass the coherency (is that even a word?) test!

So before I completely fall out of my chair, I shall go ahead and tell you how it’s done!

Framboise 75

  • Servings: 1
  • Difficulty: easy
  • Print

5 fresh raspberries
5 fresh mint leaves
1.5 ounces St. Germain Liqueur
1.5 ounces Hendrick’s Gin (or whatever you prefer; Hendrick’s is my personal favorite)
.5 ounce freshly squeezed lemon juice
.5 ounce simple syrup
Chilled Champagne

Fill the metal portion of a cocktail shaker with ice cubes.  Using either a glass or the glass end of a cocktail shaker, muddle the mint leaves and the simple syrup.  Add the raspberries to the mix and continue muddling.  Then add the St. Germain, gin and the lemon juice and stir with a spoon.  Pour this mixture over the ice cubes and stir.  Strain the mixture into a champagne flute and top with a float of champagne.  Garnish with mint and raspberries and have a great weekend!

Salmon and Guacamole Sandwiches

So, yesterday morning, I was flipping through the television channels and landed on Barefoot Contessa on the Food Network.  Now, it’s no secret to anyone who knows me that I want to be Ina Garten when I grow up.  I think she is amazing and I love not only her recipes but also her entertaining style.  I have it Liz Lemon-bad for Ina Garten.  Yesterday on her show, she featured some lovely salmon sandwiches with guacamole and I was inspired to make them for dinner yesterday afternoon. Here is Ina’s Recipe.  Now, because I can never follow a recipe exactly,  I decided to add a little more Mexican flair to the dish.  I also omitted the bacon and for the life of me, I can’t think of why!  Probably because I’m out of the habit of buying bacon!  Believe me, bacon would have been a fabulous addition to this sandwich.  What was I thinking??  I had to substitute mâche for the arugula, but use your favorite salad greens.  That primal scream you heard yesterday was me realizing that we’re coming to the end of arugula season.  This was a sad, sad realization.

The guacamole we made is different from Ina’s version and I also cooked the salmon on the grill using a cedar plank, because I really like the smokiness that the cedar plank gives the salmon.  Again, I used wild-caught Coho salmon.  I wasn’t able to find ciabatta rolls when I went to Whole Foods Market, but that led me to discover some fabulous panini bread from locally owned and operated Granello Bakery (sold at Whole Foods).

Now, the guacamole recipe was one we fell in love with that was created by Rick Bayless.  The sauce for the guacamole was also used to marinate the fish and to dress the salad greens.

Here’s how you make it:

2 ripe avocados
1/2 cup vegetable oil
4 cloves garlic, peeled and cut in half
1 Serrano chili, stem removed and cut into quarters (you can use 2, but Serranos are quite hot)
1/2 cup freshly squeezed lime juice
3/4 cup cilantro, roughly chopped
one large onion, cut into thick slices
salt and pepper

Heat the oil in a skillet or sauce pan–a sauce pan helps to keep the oil from splashing so much.  Add the garlic and chilis and cook for 2 to 3 minutes until the garlic softens and browns.

In a blender or food processor, purée the lime juice, cilantro, one teaspoon of salt and 1/2 teaspoon black pepper.  Add the garlic, chilis and the oil from the pan into the mixture.  Pour about 1/3 of this mixture over the fish and allow it to marinate for about 15 minutes.

Next, oil the slices of onion with a basting brush and place them on a preheated grill.  If you have a grill pan that is used on the stovetop, that’s also a great way to cook them.  Grill the onion slices until they become tender and have a little char on them.  Then chop the onion into small pieces.

Chop the grilled onion into small pieces

Pit and halve the avocados and scoop the flesh into a mixing bowl along with the chopped onion.  Add another 1/3 of the dressing mixture to the avocado and mash with a fork, potato masher or spoon.

Guacamole
Now, grill or pan fry your salmon, leaving the skin on.  If you want to grill on a cedar plank, see my earlier post Cedar Plank Salmon.  I made four small portions of salmon, about 1 1 /2″ wide.  Pour a little olive oil over the top and bottom of the fish and sprinkle with salt and black pepper.  Cook on a preheated grill for about 6-8 minutes.  After the salmon is done cooking, cover with foil and allow it to rest for about 5 minutes.  Resting any meat is very important as it allows the juices to return to the meat after cooking.  If you are pan frying, cook each side of the salmon in a frying pan on med-high heat for about 2 minutes on each side, then allow it to rest.  After the salmon has rested, peel the skin off.  You don’t want the skin on your lovely sandwiches.
Marinated salmon on cedar plank ready for grilling
Slice the rolls crosswise and drizzle them with a little olive oil.  Toast them under the broiler for about 2 minutes.  Seriously, keep an eye on those rolls–I am famous for burning bread in the broiler, so now I set the timer for exactly two minutes to prevent that from happening.
After the bread is nicely toasted, spread the bottom and top of the bun with the guacamole.   Place the cooked fish on the bottom half of the bun, topped with the salad greens that you’ve lightly dressed with the remaining lime/cilantro dressing.    

We ate these outside on the patio with a glass of chilled white wine.  Life is good!

Happy Friday: Ginger Rogers

I love ginger in major way. It’s funny but I have an actual memory of the first time I tasted it.  My family and I were on vacation and spent a day at Epcot Center in Disney World and we had lunch in Japan Land (this was 1983, by the way). The entree we ordered came with a little dish of almost fuschia-colored pickled ginger.  I can’t remember the entree we had, but I remember the ginger and ever since then, I’ve been known to eat all of the pickled ginger condiment that you get at the sushi bar.  So, that being said, this drink is right up my alley.  This is another gin based drink, similar to the Welcome Back, Cocktail that I posted last week. I think that gin drinks can be so fresh and summery.  The herbal notes in the gin really compliment fresh herbs like basil, thyme and mint.

This is a perfect cocktail to celebrate the beginning of the weekend!

Ginger Rogers

  • Servings: 1
  • Difficulty: easy
  • Print

1 1/2 oz Gin (Hendrick’s is my personal favorite)
1/2 oz  fresh lime juice
1/2 oz ginger syrup*
Ginger ale
8 mint leaves

Pour the 1/2 oz ginger syrup into a glass with the mint leaves.  Muddle the mint leaves in the ginger syrup until the mint leaves release their flavor.  Pour ice into the glass, then the gin and the lime juice (I find that one half of a lime is almost exactly 1/2 oz).  Top the drink with the ginger ale.  Now, I like a more intense ginger flavor than regular ginger ale, so I like to use “Reed’s Extra Ginger Brew”.  It really has a nice, strong ginger bite!  Stir with a spoon from the bottom up and enjoy!  Now, how easy was that? Happy Friday, everyone!

*Ginger simple is very easy to make.  Heat 1 1/2 cups of water in a saucepan.  Cut a 2 inch piece of fresh ginger into thin slices and add it to the water along with about 12 black peppercorns. Dissolve one cup of white sugar into the water and simmer gently for about 30 minutes.  Strain the syrup with a mesh strainer into a glass jar.  You can store this in the refrigerator for about two weeks.